44292401TH Rev.1
86 /
Oki Data CONFIDENTIAL
MAINTENANCE
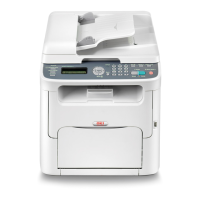
6. Remove the connector (PJ24) [1]
from the printer control board and
remove its harness from the harness
guide.
7. Remove the screw [1], and remove
the harness band [2].
8. Remove the screws [1], and remove
the earth cable [2].
9. Remove the E-ring [3] from the right
of the main body and remove the
arm [4].
10. Remove the spring [5] from the notch
on the plate.
NOTE
• When removing the spring [5], the
IR unit moves down, posing a dan-
ger of your hands getting caught
under the IR unit. Be sure to
securely hold the IR unit and pre-
vent it from moving down.
11. Remove the screw [6], and remove
A034F2C092DA
[1]
A034F2C093DA
[1]
[2]
A034F2C094DA
[1][2]
[3] [4] [5] [6] [7]
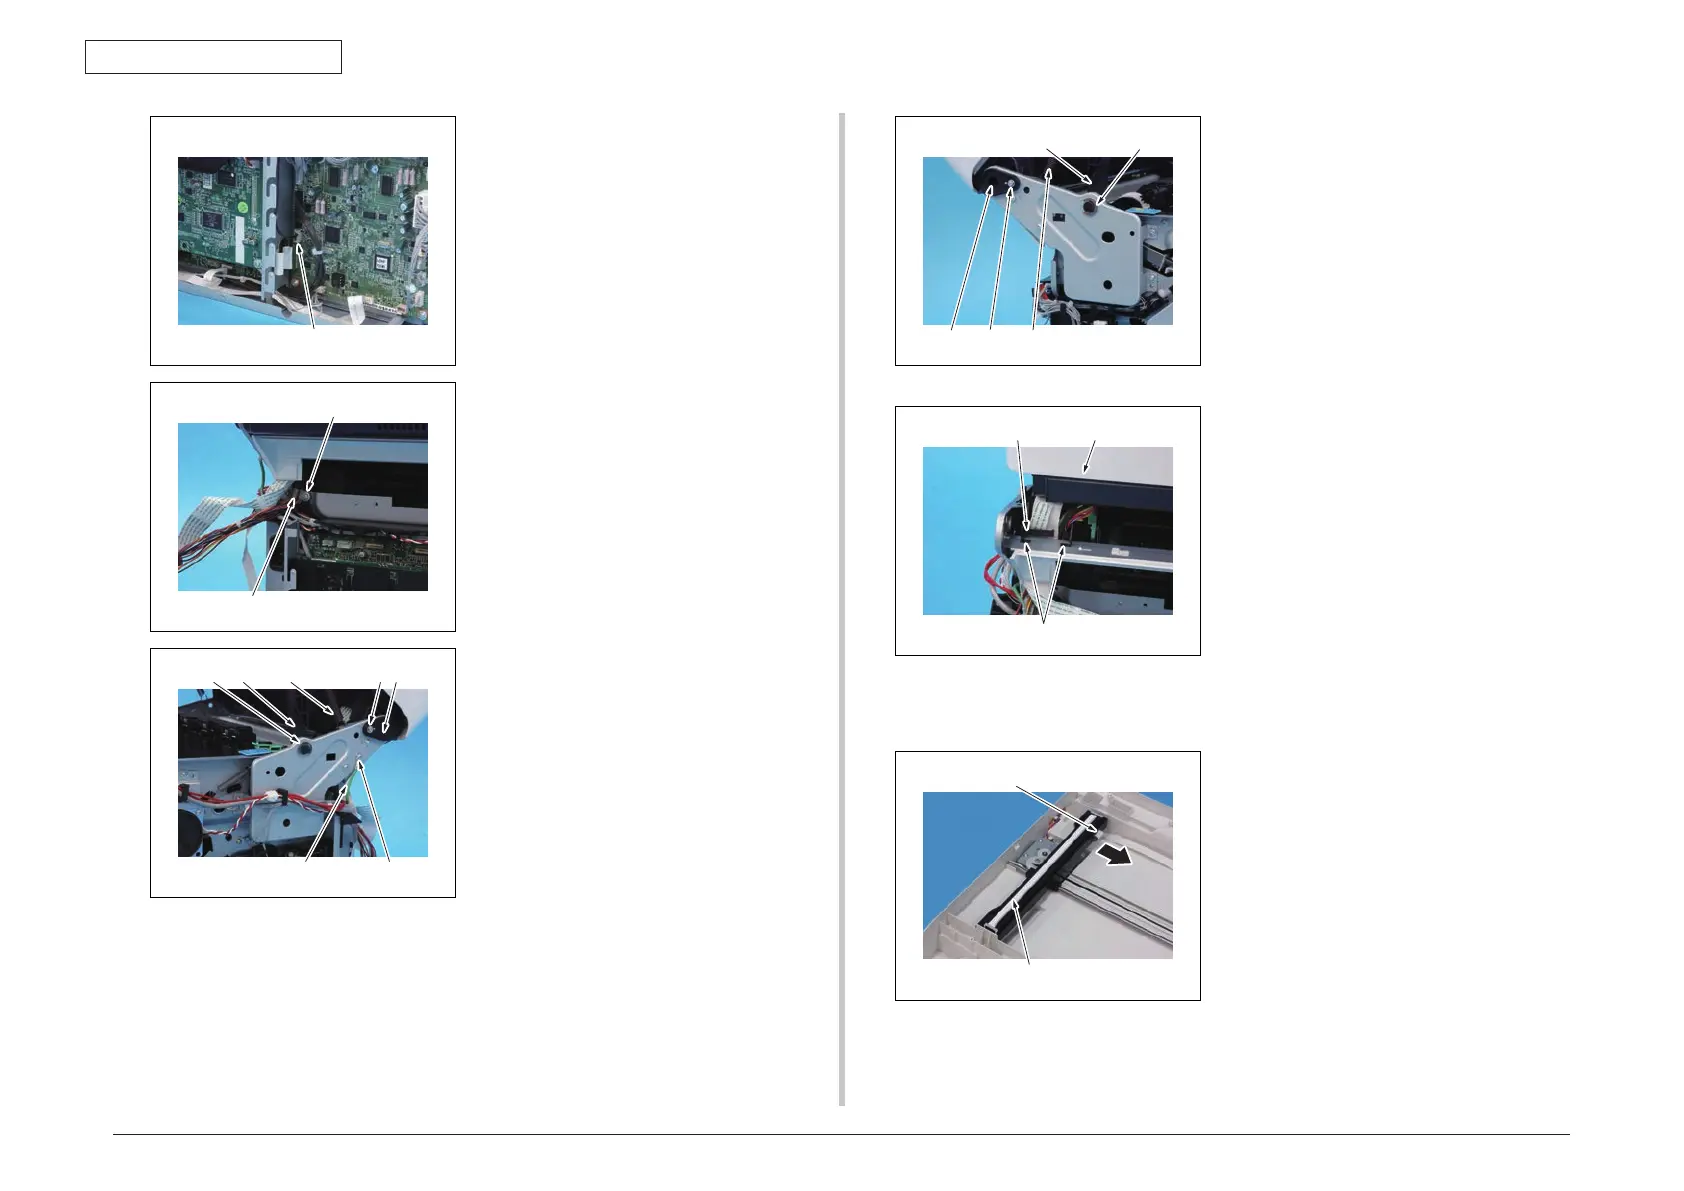
12. Remove the E-ring [1] from the left of
the main body and remove the arm
[2].
13. Remove the spring [3] from the notch
on the plate.
NOTE
• When removing the spring [3], the
IR unit moves down, posing a dan-
ger of your hands getting caught
under the IR unit. Be sure to
securely hold the IR unit to prevent
it from moving down.
14. Remove the screw [4], and remove
the left stopper [5].
15. Raise the IR unit [1] a little.
16. Unhook the tab [2], and remove the
harness guide [3].
17. Pull out all harnesses and flat cables
and remove the IR unit [1].
7.3.18 Scanner unit
1. Remove the original glass.
See P.77
2. Disconnect the flat cable [1], and
remove the scanner unit [2].
A034F2C095DA
[1][2]
[3][4][5]
A034F2C096DA
[1]
[2]
[3]
A034F2C097DA
[1]
[2]
6.3.18 Scanner unit
 Loading...