44292401TH Rev.1
89 /
Oki Data CONFIDENTIAL
MAINTENANCE
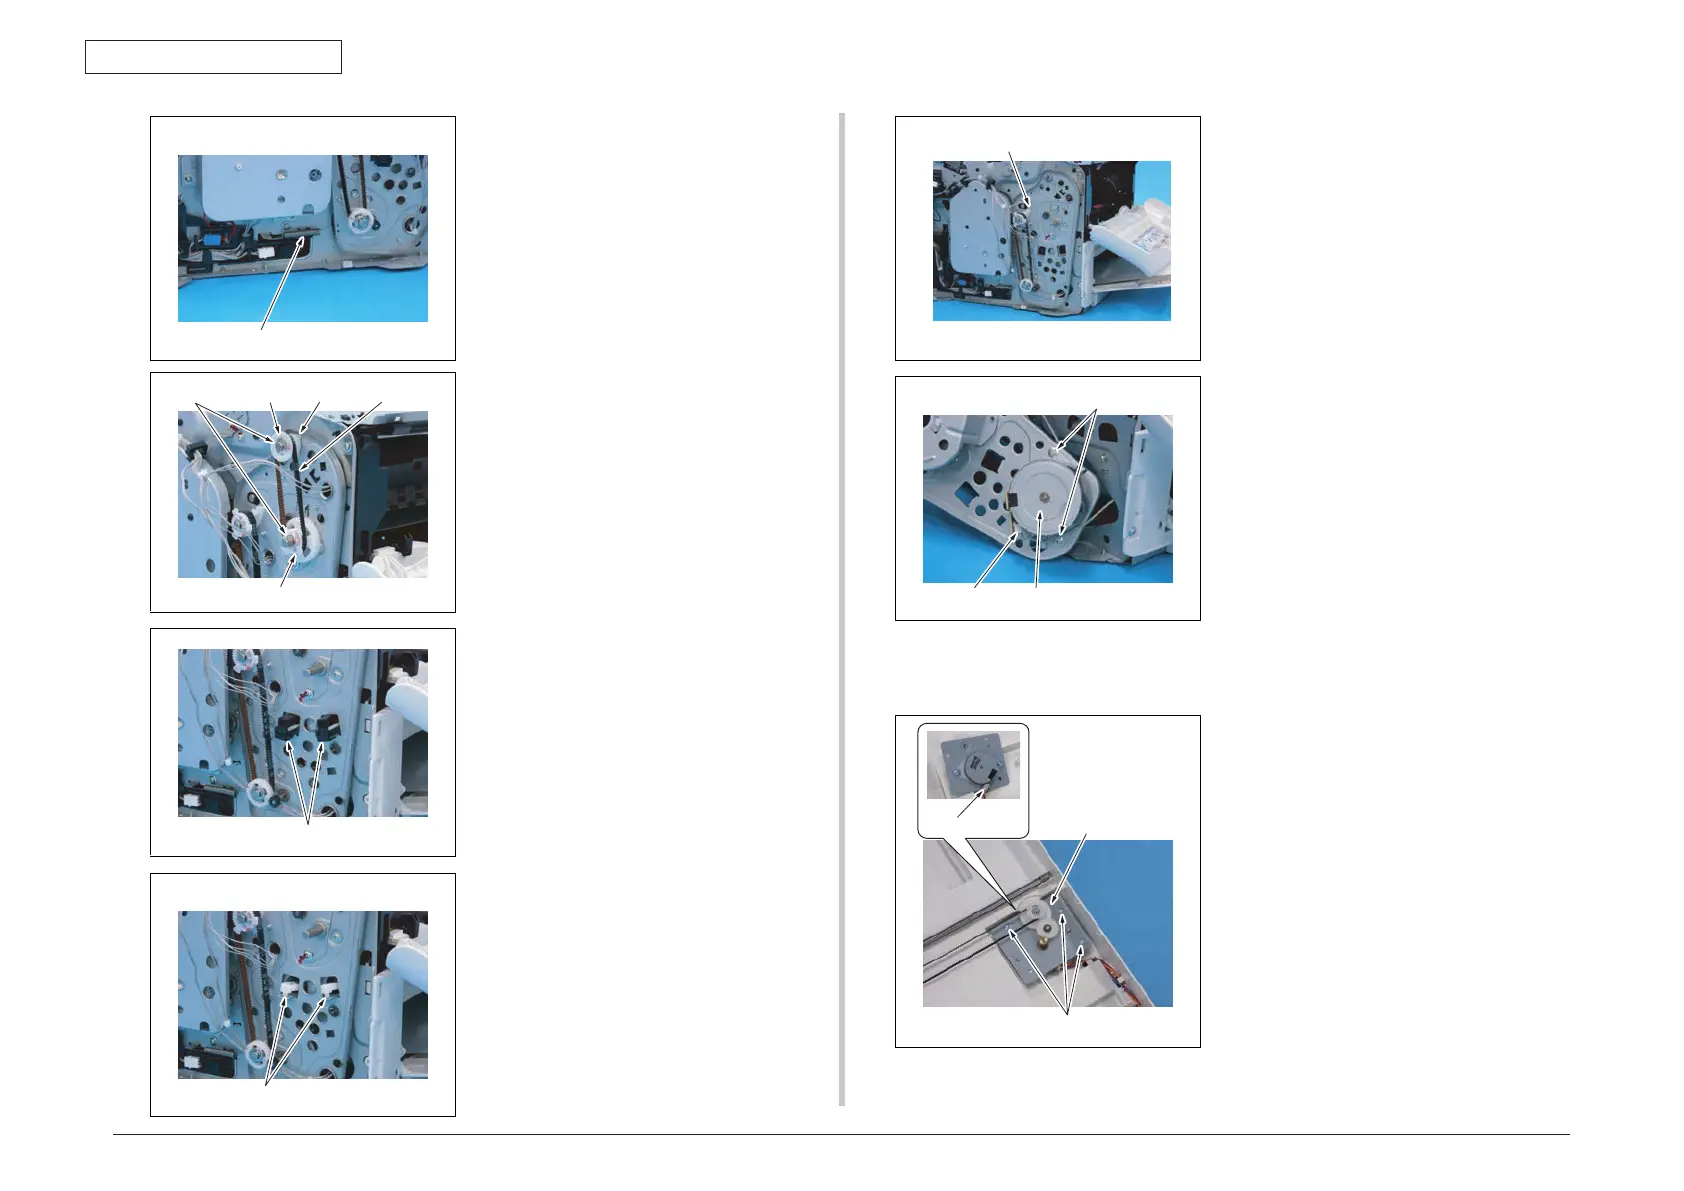
3. Remove the spring [1].
4. Remove two E-rings [1], belt [2], two
gears [3] and bearing [4].
NOTE
• Make sure to pull out the belt [2]
and gears [3] forward parallel
together.
• Use care not to lose the shaft.
5. Remove two covers [1] by taking out
the hooks at both sides.
6. Remove two levers [1].
A034F2C047DA
[1]
A034F2C048DA
[1] [2][3]
[3]
[4]
A034F2C049DA
[1]
A034F2C050DA
[1]
3. Remove the spring [1].
4. Remove two E-rings [1], belt [2], two
gears [3] and bearing [4].
NOTE
• Make sure to pull out the belt [2]
and gears [3] forward parallel
together.
• Use care not to lose the shaft.
5. Remove two covers [1] by taking out
the hooks at both sides.
6. Remove two levers [1].
A034F2C047DA
[1]
A034F2C048DA
[1] [2][3]
[3]
[4]
A034F2C049DA
[1]
A034F2C050DA
[1]
7. Slide out the motor assy [1].
8. Remove two screws [1] and discon-
nect the connector [2], and remove
the developing motor [3].
7.3.22 Scanner motor assy
1. Remove the original glass assy.
See P.77
2. Remove three screws [1] and dis-
connect the connector [2], and
remove the scanner motor assy [3].
[1]
A034F2C523DA
A034F2C053DA
[1]
[2] [3]
A034F2C103DA
[1]
[3][2]
6.3.22 Scanner motor assy
 Loading...