A1
Gable End Base Rail
H7/H9
H8/H1
PF3
H8/H1
PF3
X12
PF1/PF12
B8/B1
B7/B9
B8/B1
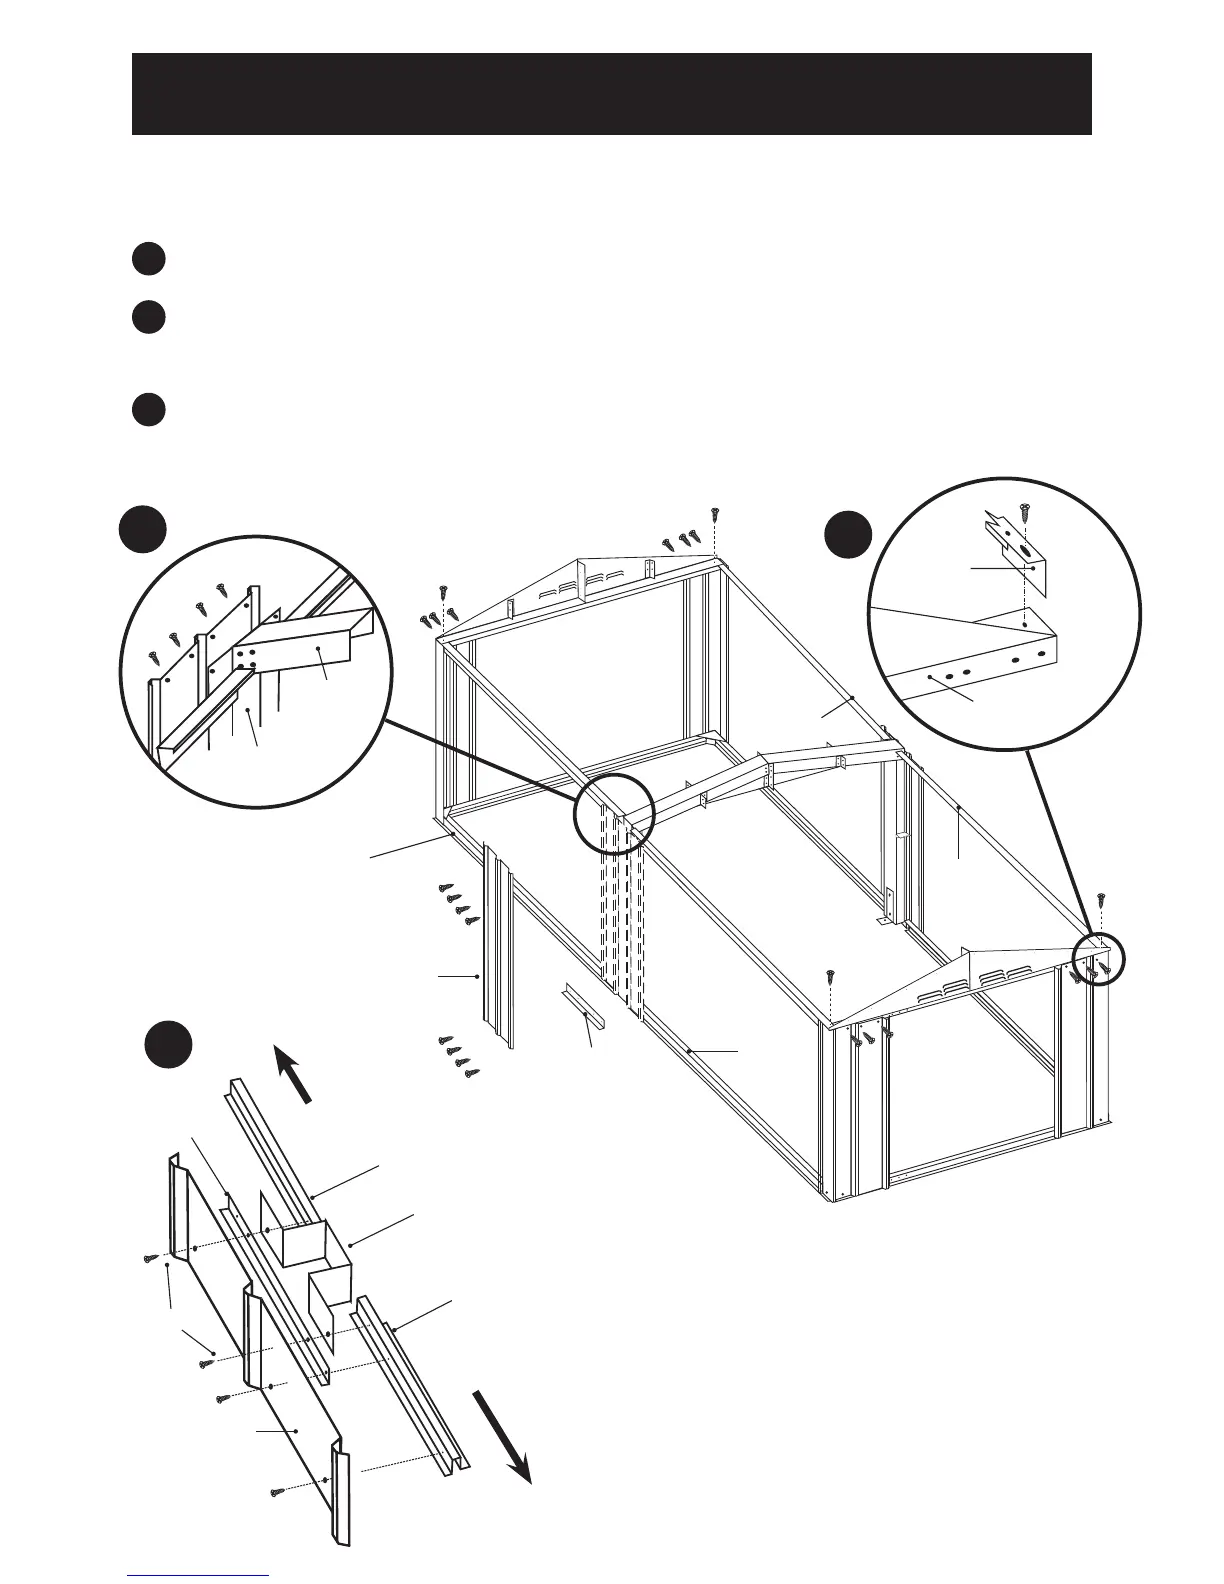
STEP 8 - Wall Panels and Gables
I1
1
PF2
PF1/PF12
2
3
Note: The wall panel overlaps the PF1/PF12 towards the long side by half a panel as shown in
diagram 1. Please study the screw fixing procedure in step one closely. You may need to squeeze
the bottom of the PF1/PF12 to line it up with the holes in the PF3 correctly.
Fix screws through bottom of the wall panel-'K/K2', 'PF3', (PF1/PF12) and into the Base
Rails -(B7 and B8) or (B9 and B1)
Fix screws through
top of the wall panel - 'K/K2, 'PF1, (PF1/PF12) and into the Top Rail -
(H7 and H8) or (H9 and H1)
Repeat 1 and 2 on both sides
Fix pre-assembled Gables to front and back of shed.
1
2
3
Long Side Base Rail
B7/B9
K/K2
K/K2
16
Short Side Base Rail