28
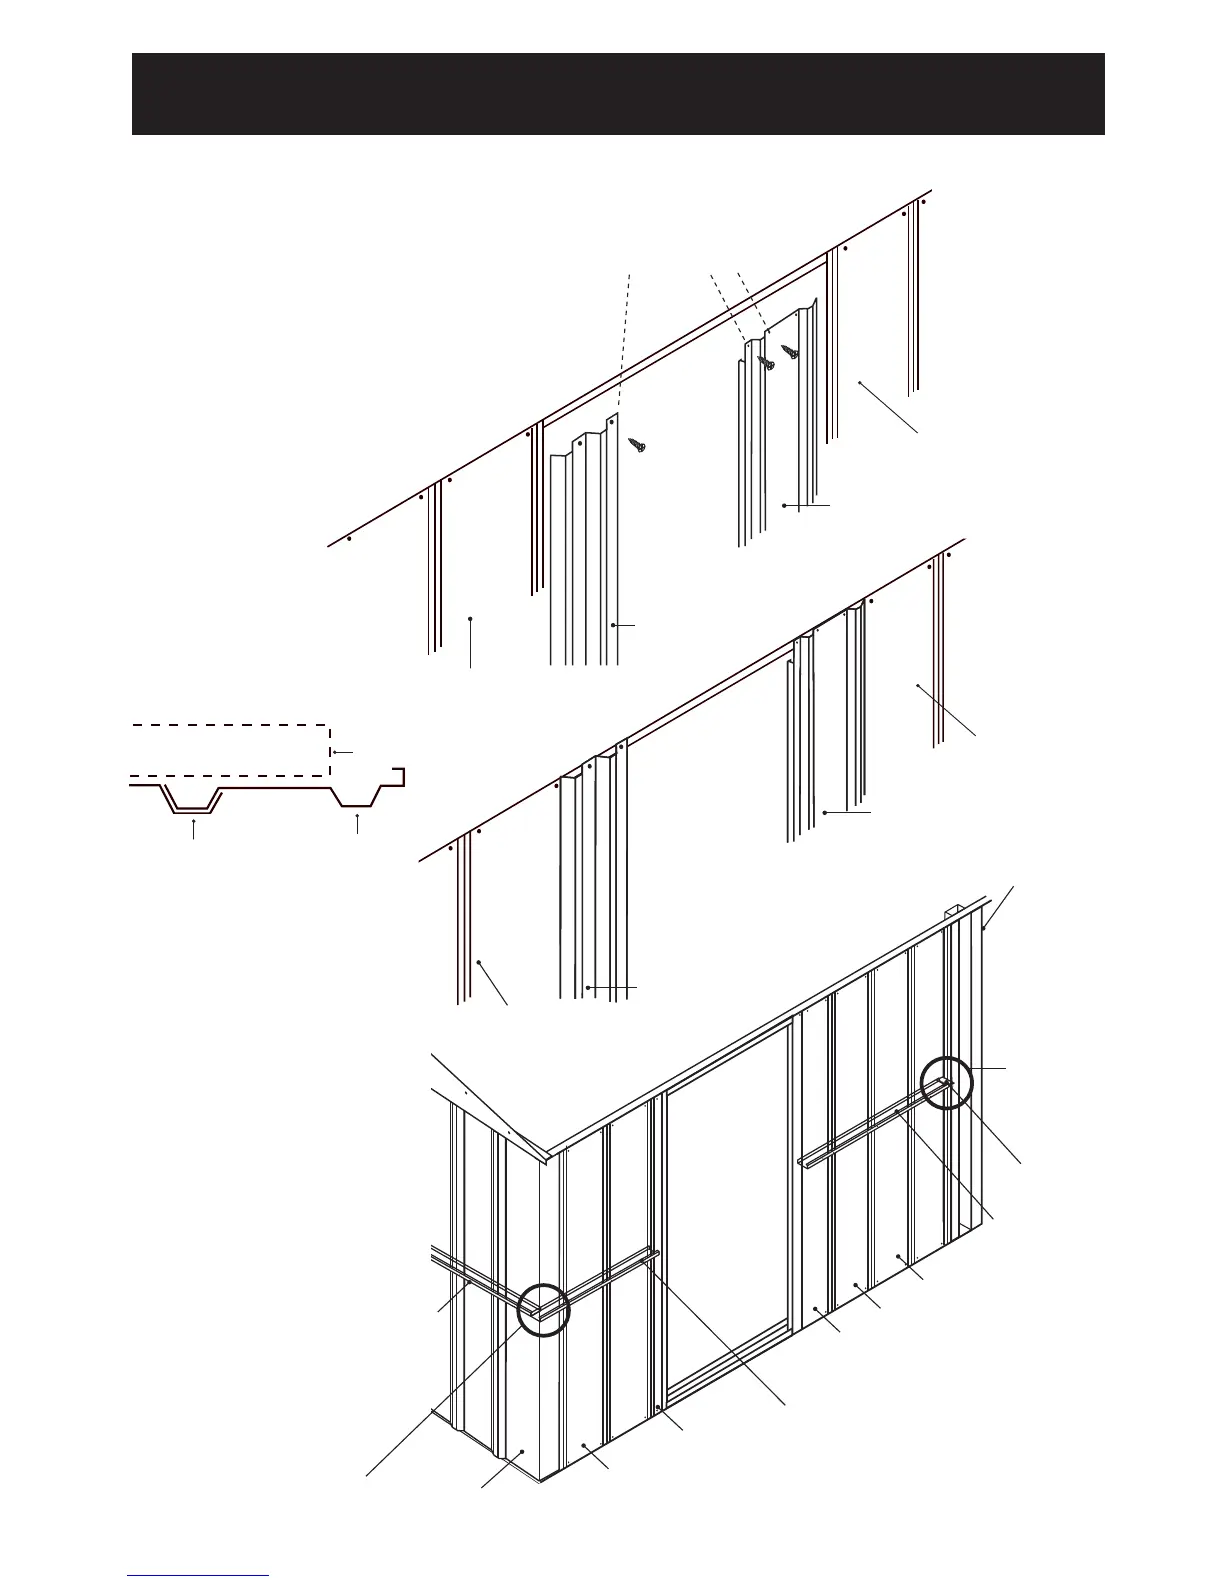
STEP 10a - Door Jamb construction for Optional Hinged Door
L8/L82
L1/L12
DRILL 2.8mm HOLES
AND FIX WITH SELF
TAPPING SCREWS 'X12'
K/K2 Wall Panel
K4/K42
1/4 Wall Panel
K4/K42
1/4 Wall Panel
K/K2 Wall Panel
Door jambs
L8/L82
L1/L12
MIDWALL
CUT AS IN
DIAGRAM
ABOVE
MIDWALL
K/K2
L8/L82
L1/L12
K4/K42
K/K2
TOP VIEW
Place rib of door jamb
'L' under rib of wall
panel 'K/K2' screw to
Top Rail 'H' and Base
Rail 'B'.
Attach cut midwalls SM
to either side of the door
opening with screws 'X12'
through the wall sheet
then attach each end into
either the RM1 or the PB2
with nuts and bolts. Only
connect the two cut SM
pieces. As this will not
restrict movement in the
shed when fixing the roof
sheets. Do not connect
any other SM's to RM1's
or PB2's until Step 14.
RM1
'PF1/PF12'
Shown with
no wall panel
'K/K2' for
viewing
purposes
only.
F/F2
Connect the cut 'SM' with
the 'RM1' with nuts & bolts
Connect the
cut 'SM' with
the 'PB2' with
nuts & bolts
PB2
L8/L82
K/K2
Cut Midwall
Door Jambs
can be fixed
either side
The door can be placed on any
side of the shed, by leaving out
Two Wall Sheets when sheeting
up the shed. The ¼ Wall Panel
and the two Door Jambs are
to be fixed to the shed while
sheeting up the shed. This will
give structual strength to the
shed to counter the weight of
the roof. Construct and hang
the door after STEP 16.
Place pre-assembled
Midwall into position and
mark where to cut using
the diagram above. Cut
with Hacksaw or Tin snips