40
9.19 Condenser slinger assembly removal
Remove the body (Cf. 9.2 Body removal, on p. 32).
Remove the grille (Cf. 9.5 Grille removal, on p. 33).
Remove the front panel (Cf. 9.3 Front grille removal, on p. 32).
Remove the electronic assembly housing (Cf. 9.11 Electronic assembly
housing removal, on p. 36).
Remove the upper tank (Cf. 9.8 Upper tank removal, on p. 35).
Remove the internal fan (Cf. 9.9 Internal fan removal, on p. 36).
Remove the intermediate tank assembly (Cf. 9.18 Intermediate tank
assembly removal, on p. 39).
NOTE: Before moving every individual assembly-component, ensure that
the electrical wiring and any condensate drain tubes are disconnected.
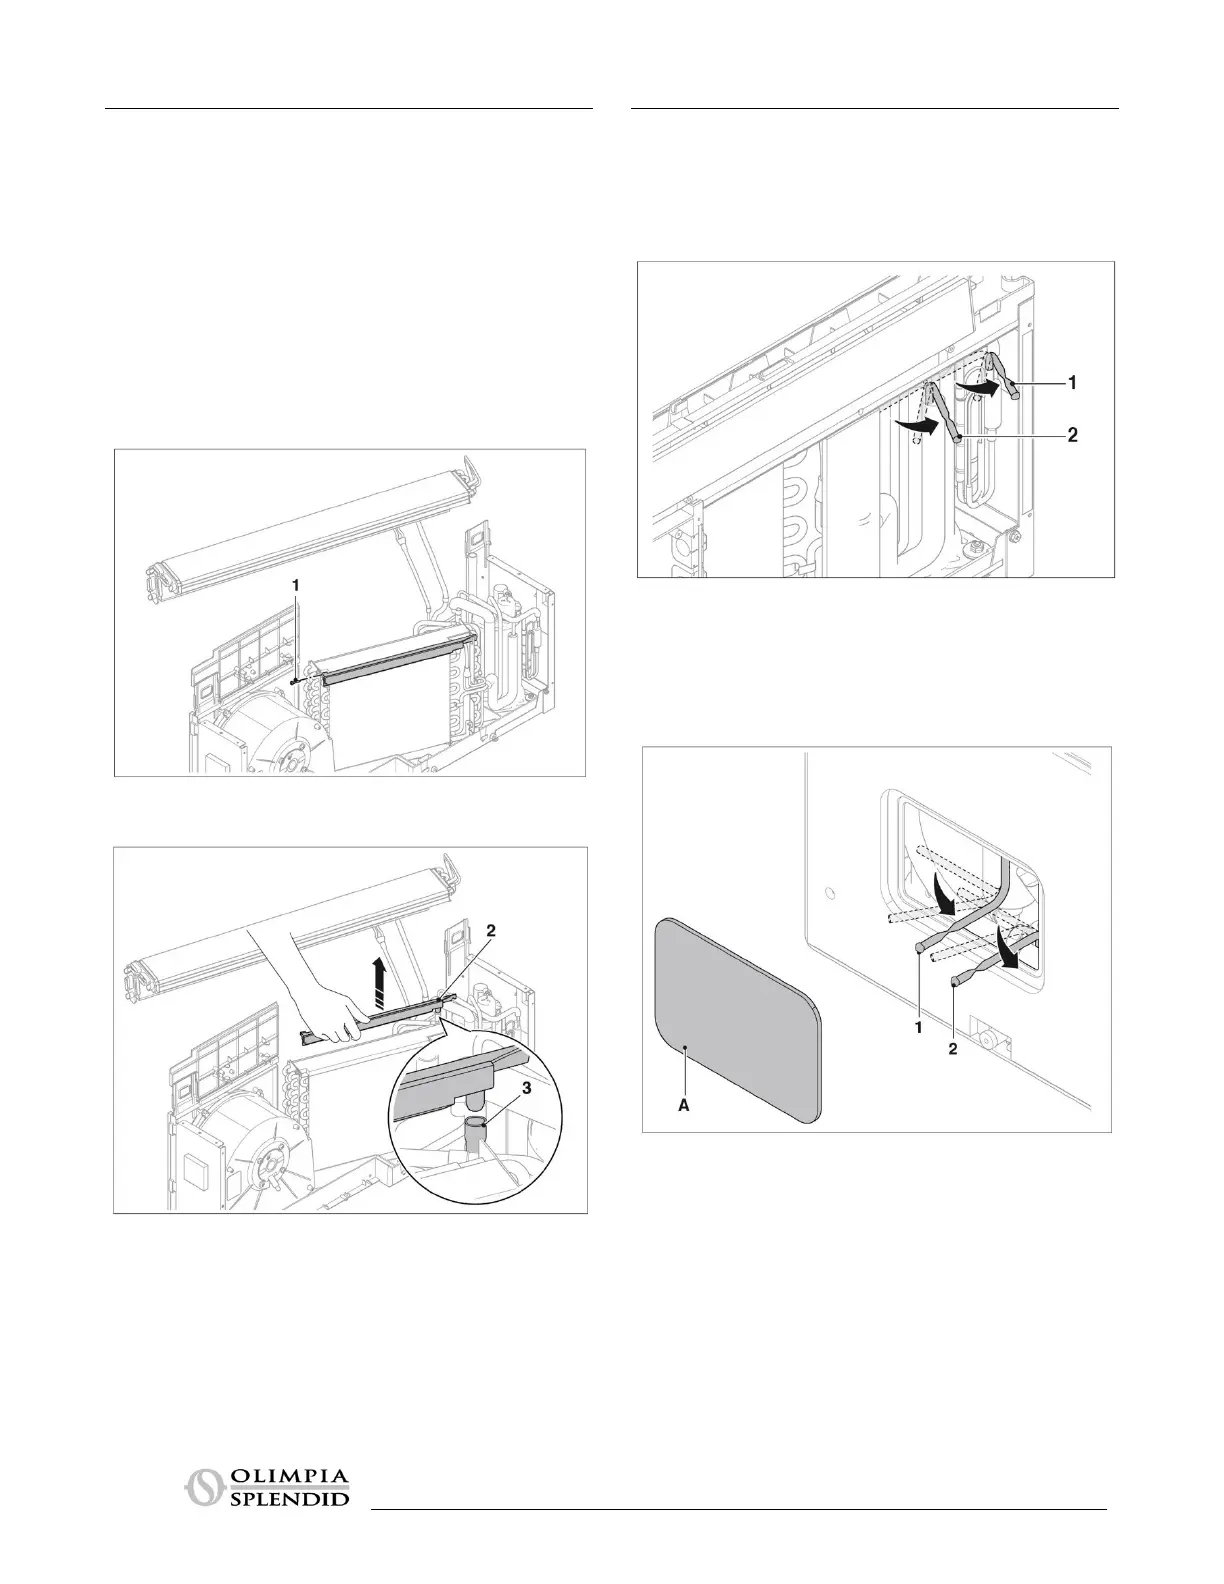
Remove the screw (1).
Carefully remove the condensate slinger assembly (2) and disconnect
the condensate drain tube (3).
NOTE: To clean the condenser
slinger
assembly, it is recommended to
fill it with water, agitate it and empty it. Repeat this several times so as to
eliminate as much dirt from the inside as possible, that could block the
condensate drain holes.
9.20 Refrigerant charging/discharging
9.20.1 Unit with front charging
Remove the body (Cf. 9.2 Body removal, on p. 32).
Remove the front panel (Cf. 9.3 Front grille removal, on p. 32).
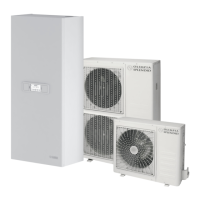
Carefully rotate the refrigerant charge/discharge tube forward (1)(2).
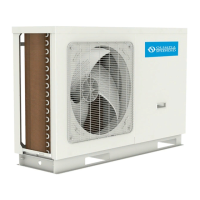
9.20.2 Device with rear charging
The unit with rear charging has an access panel for the refrigerant
charging tubes.
Remove the cover (A).
Carefully rotate the refrigerant charge/discharge tubes (1)(2) forward.