89
EN
Playback functions
6
x
Notes
• Red-eye correction may not work depending on the image. Red-eye correction may affect
other parts of the image, as well as the eyes.
• Editing of a JPEG image is not possible in the following cases:
When an image is recorded in RAW, when an image is processed on a PC, when there is not
enough space in the card memory, when an image is recorded on another camera.
• When resizing ([Q]) an image, you cannot select a larger number of pixels than was
originally recorded.
• [P] and [ASPECT] can only be used to edit images with an aspect ratio of 4:3 (standard).
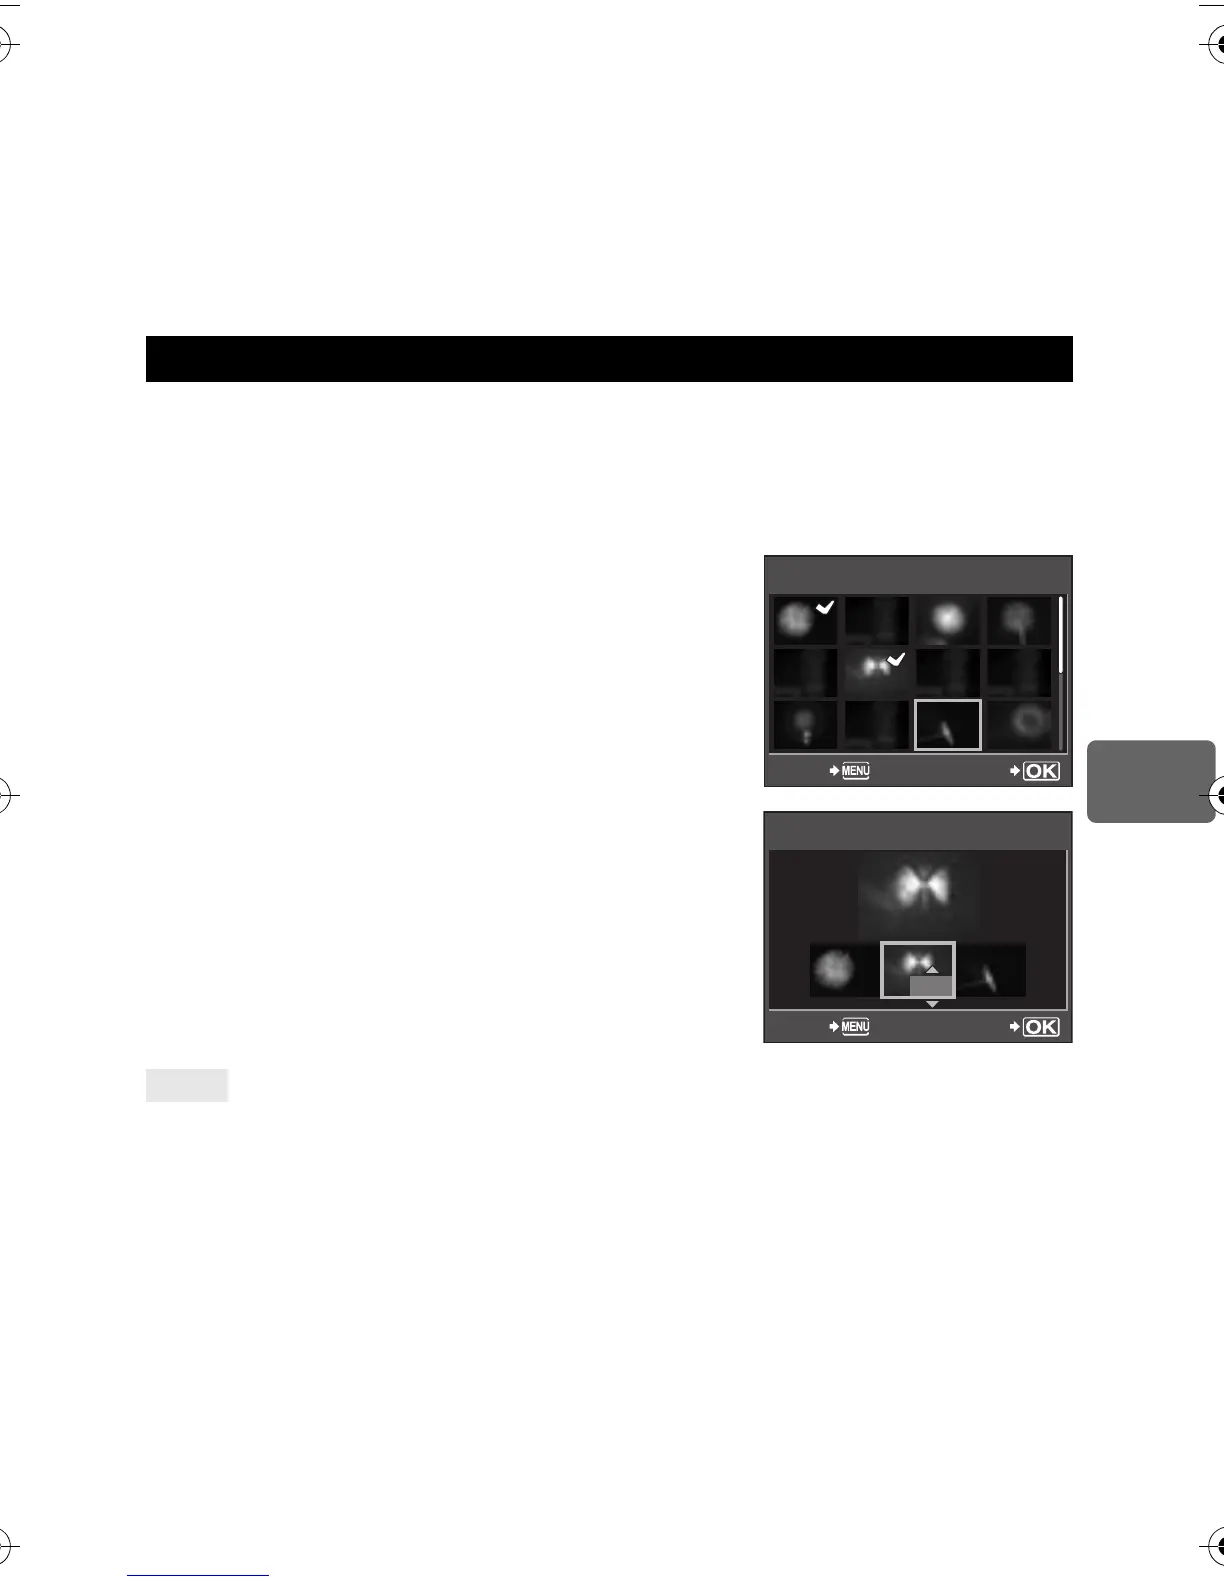
Up to 3 frames of RAW images taken with the camera can be overlaid and saved as a
separate image. The image is saved with the record mode set at the time the image is saved.
1
MENU
[
q
]
[EDIT]
[IMAGE OVERLAY]
2
Select the number of frames to overlay and press the
i
button.
3
Use
p
to select a frame and press the
i
button.
•
Repeatedly select images only for the number of frames
selected in Step 2.
•
To cancel your selection, press the
i
button again.
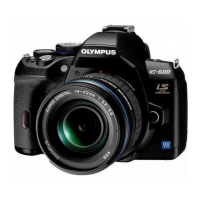
4
Use
hi
to select an image, then use
fg
to
select the gain for each image. Press the
i
button.
•
Select from 0.1 to 2.0.
•
The displayed image changes as the gain is adjusted.
5
Use
fg
to select [YES], then press the
i
button.
To overlay 4 or more frames:
j
To overlay 4 or more frames, save the overlay image as a RAW file and use
[IMAGE OVERLAY]
repeatedly.
x
Notes
• When the record mode is set to [RAW], the overlay image is saved as [YN+RAW].
• When selecting a frame to overlay, the JPEG images for images recorded in JPEG+RAW are
displayed.
Image overlay
TIPS
IMAGE OVERLAY
RAW
RAW
RAW
RAW
RAW
RAW
RAW
BACK SET
x
0.3
x
0.3
x
0.1
x
0.1
x
0.3
x
0.3
IMAGE OVERLAY
BACK SET
E-620_MASTER.fm Seite 89 Dienstag, 17. Februar 2009 11:04 11