4-3 Turning ON the light
1
Checking the lighting of the illumination at the distal end of
the insertion tube
The light intensity is adjusted depending on the brightness of the inspection object.
TIP
●
Always follow the steps (Menu → SYSTEM SETUP → LIGHT → OFF) to turn OFF the light
when the instrument is not in use, such as when replacing the optical adapter.
●
When using a UV or IR LED unit which does not illuminate visible light, refer to “Observation
of special light” (page 88).
■ Turning ON/OFF the light manually
From Menu → SYSTEM SETUP → LIGHT, the light can be toggled between the “ON”, “ECO” and
“OFF” modes.
The status is shown by the LED icon.
TIP
Selecting “ECO” turns down the brightness and reduces battery consumption.
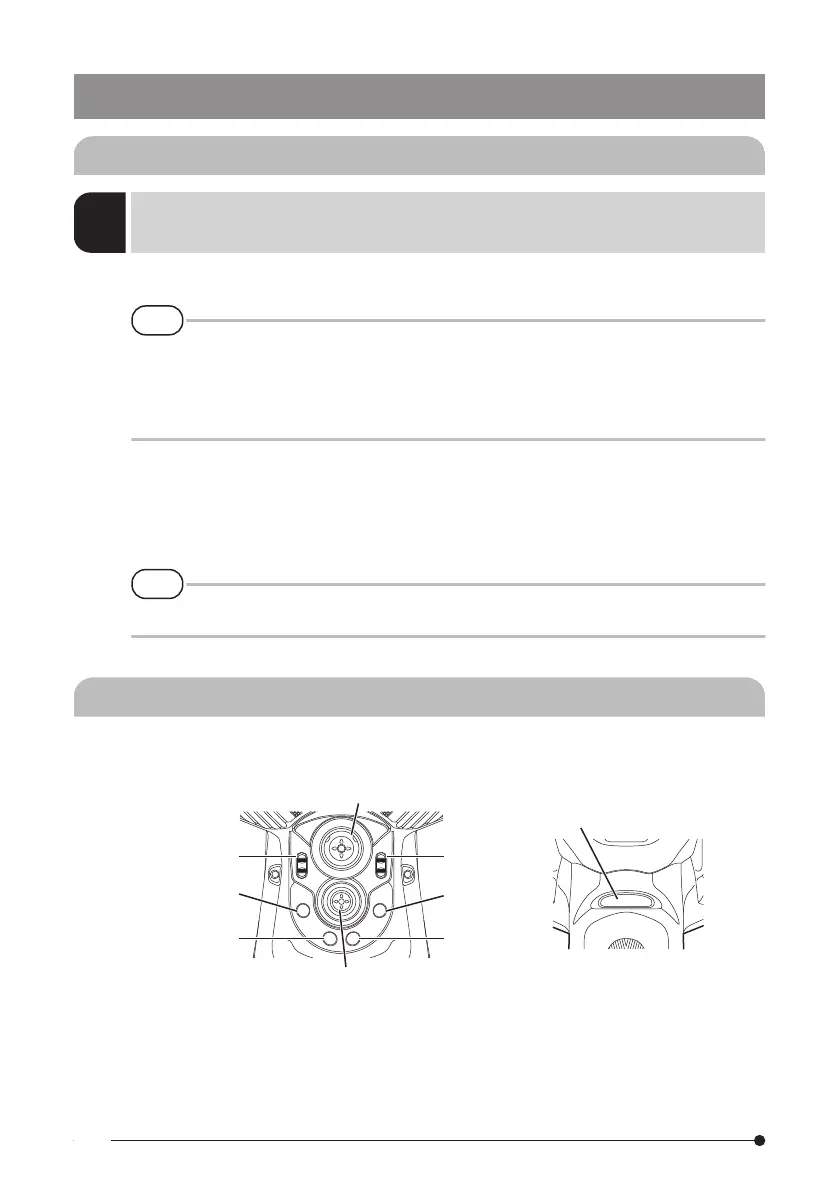
4-4 Operating the instrument
This unit can be operated using the buttons, levers and joysticks on the main unit as well as the
touch panel on the LCD monitor.
FRZ/REC button
ZOOM
lever
LIVE
button
CENT
button
MEAS/OK joystick
VIEW
button
MENU
button
BRT
lever
ANGLE/LOCK joystick
*For more information on the position of the buttons, levers and joysticks, please refer to
“Nomenclature” (page 13).
34