Inspection Before Use
3
3.1 Setup of Connected Equipment
33
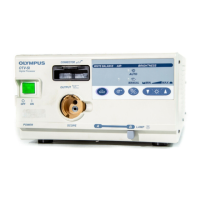
OTV-S7Pro “9.2 System setup”
“Printer”
“Type” “OEP4” Select the printer type. Be sure to set “Type”
to “OEP4” when using this instrument.
“Qty. “N”” “4” – “ 9” Select the print quantity when the “Print
quantity indicator” on the keyboard is set to
“N.” Select any setting, as required.
“Caption” Max. 32 characters. Input the characters to be printed in the margin
of print sheet.
“Release Time” “0.5sec” “1sec”
“1.5sec” “2sec”
Before the images are read by the printer, set
the time while still images from the endoscope
are captured.
“OEP4 mode” “Mode1” “Mode2” Select the output signal format for the
endoscope image. Select “Mode1” when
HDTV signals are input.
“9.3 User preset”
“Scope switch and Foot
switch”
“Scope switch”
“Switch1”
“Switch2”
“Switch3”
“Switch4”
“Foot switch”
“Switch1”
“Switch2”
“Release1”
“Release2”
Select the function to be controlled from the
scope switch and foot switch on the camera
head. Select any setting, as required.
“9.3 User preset”
“Release function”
“Release”
“Release1”
“Release2”
“CVP” Select the instrument to be controlled from
“Release1” and “Release2” that are assigned
to the scope switch and foot switch on the
camera head. Be sure to set this item to “CVP”
when using this instrument. The RELEASE
key of the keyboard performs the same
function as “Release1.”
OTV-S7V “5.12 Remote control
switches”
Remote control
switch on the
videoscope or
camera head
“REL.+DIG. CAP.”
“RELEASE”
Select the function to be controlled from the
remote control switch on the videoscope or
camera head. Select any setting, as required.
“5.13 Setting a function to
the keyboard”
“F4” key “REL.+DIG. CAP.”
“RELEASE”
Select the function to be activated with the
“F4” key on the keyboard. Select any setting.
Input them, as required.
OTV-SI “5.9 Remote control
switches”
Remote control
switch on the
videoscope or
camera head
“RELES” Select the function to be controlled from the
remote control switch on the videoscope or
camera head.
Select any setting, as required.
EU-ME1 “9.2 System setup”
“Scope switches”
“U1 (F) Switch”
“U2 (R) Switch”
“U3 (S) Switch”
“Release” Select the function to be controlled from the
scope switch of the ultrasound endoscope.
Select any setting, as required.
EU-M30S No setup required.
EU-M60 “6.3. Setup”:
“System setup – Scope
switch”
Scope switches
“U1(F) switch”
“U2(R) switch“
“U3(S) switch“
“Release”
“Save & release”
Select the functions to be controlled from the
scope switches on the ultrasound endoscope.
Select any setting, as required.
“6.3. Setup”:
“System setup – Remote
control”
“REMOTE PRN2” “Color video
printer”
Select the type of the storage device to be
remote controlled.
Be sure to set this item to “Color video
printer” when using this instrument.
EU-C60 “6.3. Setup”:
“Setting up a video printer”
“printer” “on” Select whether or not the video printer is used.
Be sure to set this item to “on” when using this
instrument.
Ta bl e 3. 1
Connected
equipment
Instruction Manual
references
Setup Item Setup Note