37
STM7
3
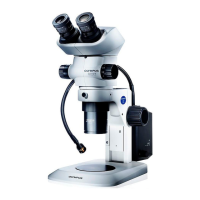
Adjusting the parallelism of specimen
2
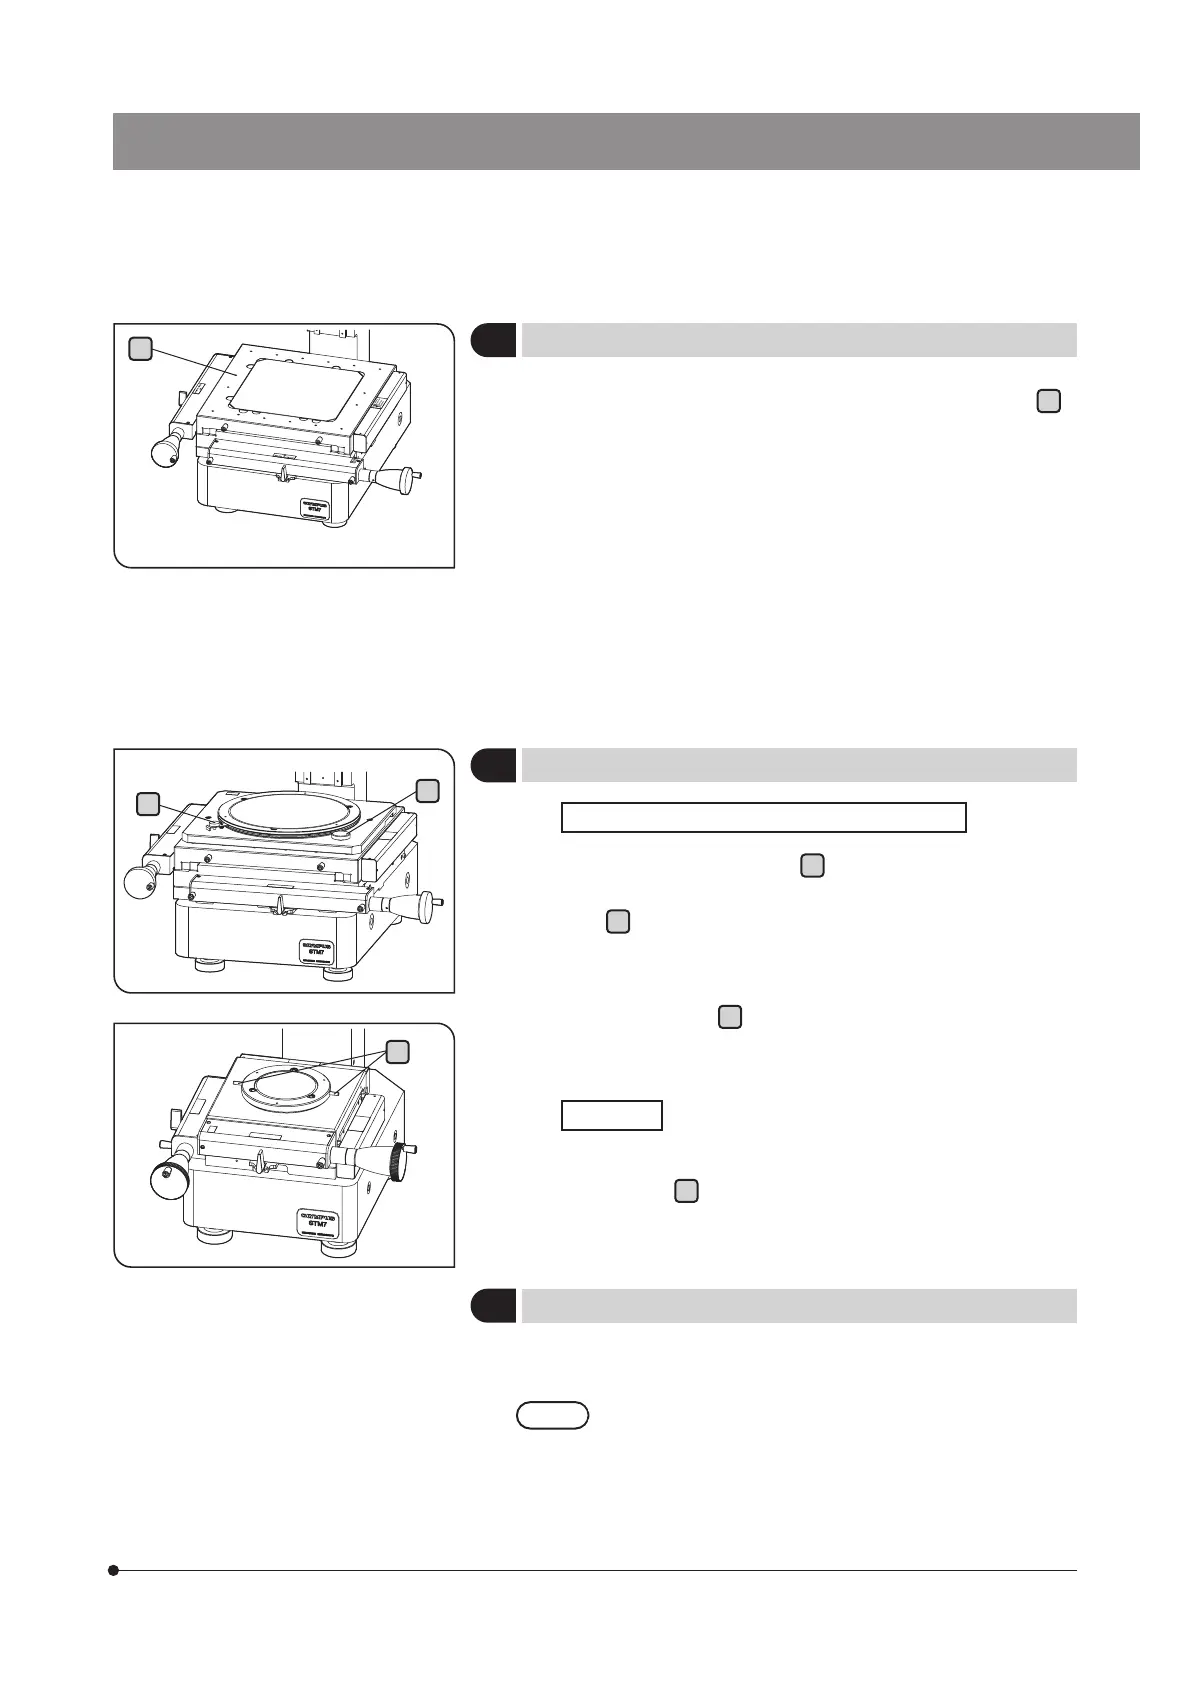
Clamping the option and jig tool
4
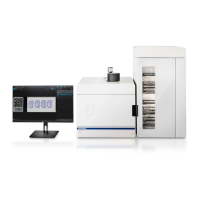
Replacing the stage glass
STM7-CS50/STM7-RS100/STM7-RS200/STM7-RS300
Rotate the rotation clamp knob
b
in the counterclockwise direction
to cancel the fixing of the rotatable stage. Then, rotate the fine focusing
knob
c
with fingers to adjust the parallelism of the measurement
object.
When the parallelism of measurement objects is adjusted, rotate the
rotation clamp knob
b
in the clockwise direction to fix the rotatable
stage.
STM7-CS50
Adjust the parallelism of the measurement objects by holding the fine
focusing knob
d
.
The rotatable stage and jig tool can be attached using the tap
a
.
(M4 threading, depth max. 7 mm)
} Flatness of the mounting surface of the jig attached to the stage
should be 40 μm or less.
If the flatness of the mounting surface of the jig is bad, the stage
may be damaged.
} Be sure to prevent the jig from touching the glass surface.
The glass surface is protruded from the stage surface. If the jig is
attached to the stage while touching the glass surface, the glass
may be broken or the stage may be distorted and damaged.
a
When the stage glass is dimmed, scratched or cracked after long
hours of use, the stage glass should be replaced.
· Ask Olympus to replace the stage glass.
· The stage glass has been adjusted to ensure flatness.
Therefore, height adjustment is required after replacement
of the stage glass.
c
b
d