CRANKSHAFT
To remove the crankshaft, loosen the rear bearing
plate screws and remove the bearing plate, gasket,
thrust washer, and shims. Turn the crankshaft
so
the
crankthrow is aligned with the notch in the rear open-
ing of the crankcase. Carefully slide the crankshaft
out of the crankcase.
Inspection
Inspect the rod and main bearing journals. If they are
worn or scored and cannot be smoothed out by pol-
ishing, either the journals should be reground to use
one of the standard undersize bearings or the crank-
shaft should be replaced. Remove only as much
metal as is required to restore the journal surface
while maintaining the recommended bearing clear-
ance.
Whenever making major repairs on the engine,
always inspect the drilled passages of the crankshaft.
Clean them
to
remove any foreign material and to
assure proper lubrication
of
the connecting rods.
Installation
Lubricate the front and rear main bearings with
engine oil. Use oil or gear lubricant to hold the front
thrust washer in place against the engine block. The
flat side of the thrust washer goes against the block.
Position the crankshaft
so
the crank throw is aligned
with the notch at the rear of the crankcase and install
the crankshaft. Make sure the front thrust washer did
not slip out
of
place during installation.
Place the oil seal loader
on
the oil seal guide and
driver and insert into the rear bearing plate. Remove
the seal guide and driver leaving the loader
in
the
bearing plate. The loader prevents the seal from
being cut on the crankshaft keyway during installa-
tion of the rear bearing plate.
Use oil or gear lubricant to hold the shim(s) and rear
thrust washer in position on the rear bearing plate
(see Figure
9-32).
The shim goes against the bearing
plate and the flat surface of the thrust washer goes
against the shim.
Place the bearing plate gasket
in
position on the
block, making sure the oil hole on the back of the
block is exposed. Install the rear bearing plate and
fasten with two nuts (or capscrews) tightened to the
specified torque. Make sure the rear thrust washer
and shim(s) did not slip out of place during installa-
tion. The crankshaft should turn freely by hand.
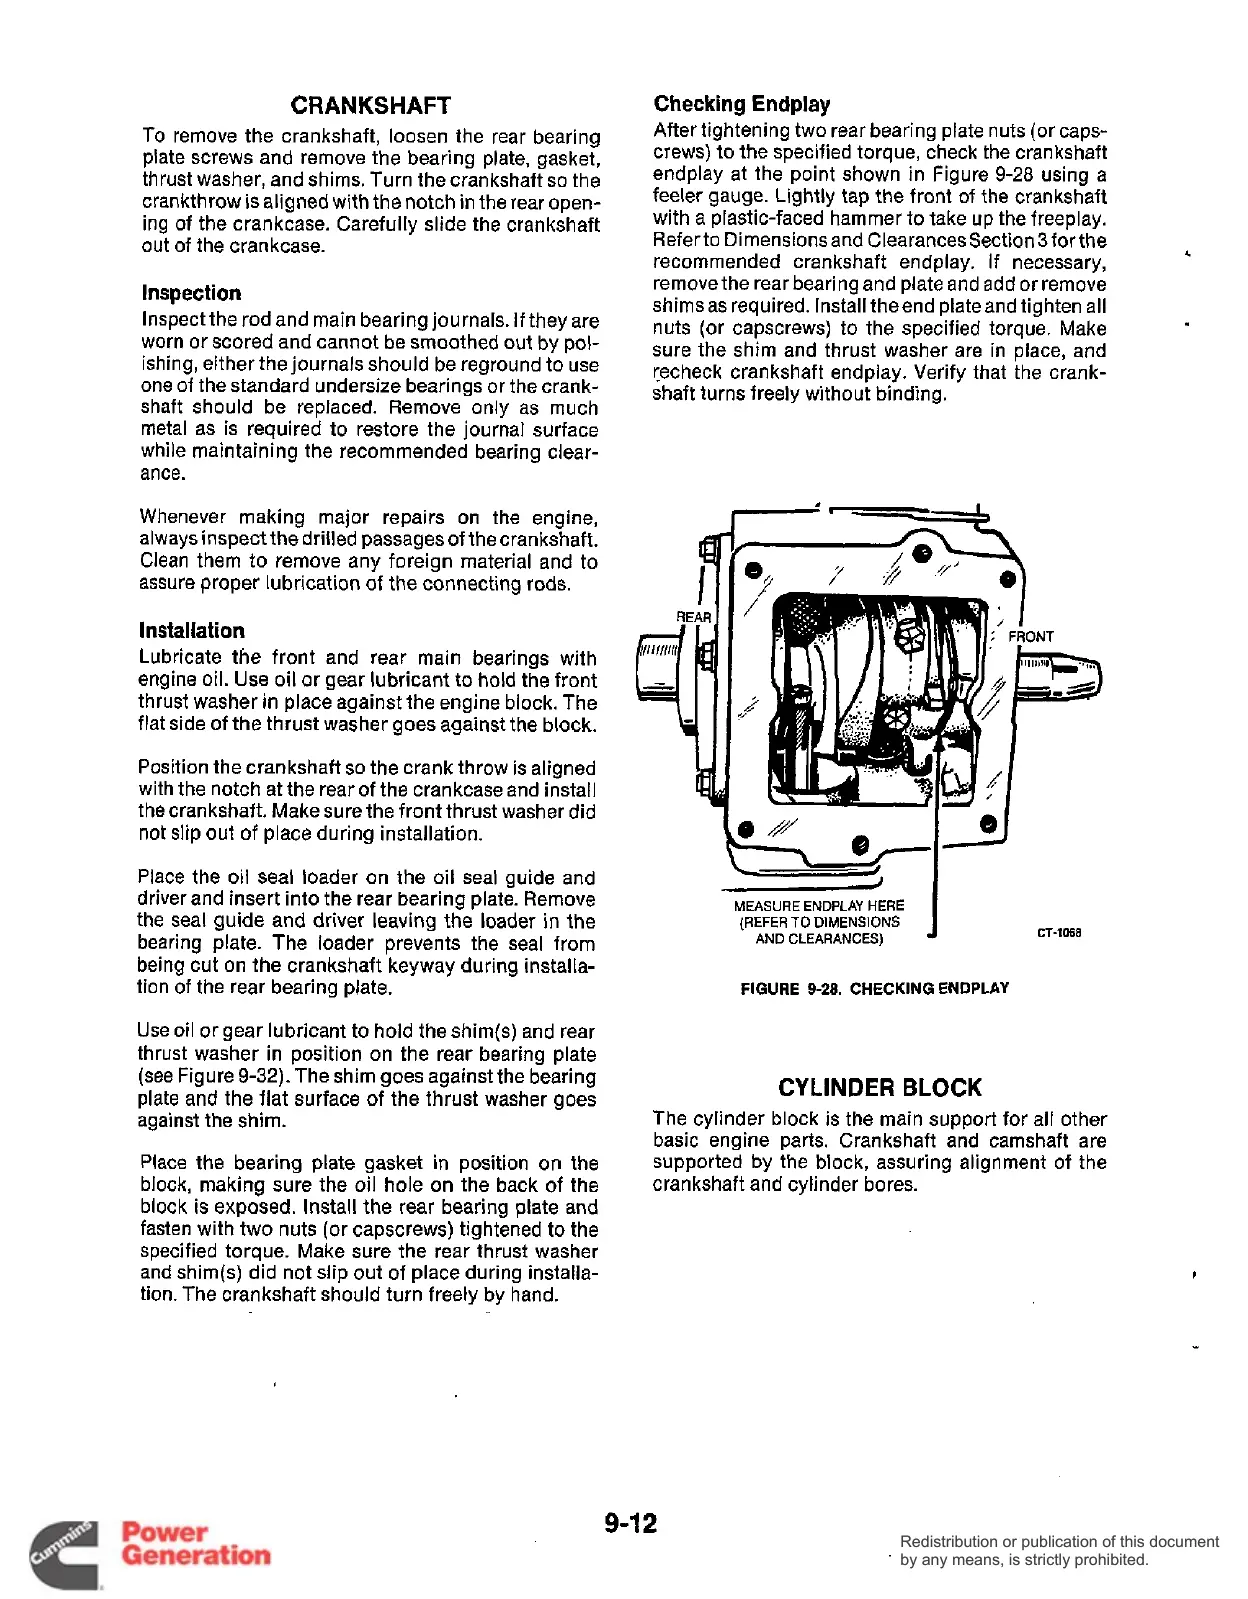
Checking
Endplay
After tightening two rear bearing plate nuts (or caps-
crews) to the specified torque, check the crankshaft
endplay at the point shown in Figure
9-28
using a
feeler gauge. Lightly tap the front of the crankshaft
with a plastic-faced hammer to take up the freeplay.
Refer to Dimensions and Clearances Section 3for the
recommended crankshaft endplay. If necessary,
remove the rear bearing and plate and add or remove
shimsas required. Install theend plateand tighten all
nuts (or capscrews) to the specified torque. Make
sure the shim and thrust washer are in place, and
recheck crankshaft endplay. Verify that the crank-
shaft turns freely without binding.
CT-1068
MEASURE
ENDPLAY
HERE
(REFER
TO
DIMENSIONS
AND
CLEARANCES)
FIGURE
9-28.
CHECKING
ENDPLAY
CYLINDER
BLOCK
The cylinder block is the main support for all other
basic engine parts. Crankshaft and camshaft are
supported
by
the block, assuring alignment of the
crankshaft and cylinder bores.
9-1
2
Redistribution or publication of this document
by any means, is strictly prohibited.
Redistribution or publication of this document
by any means, is strictly prohibited.