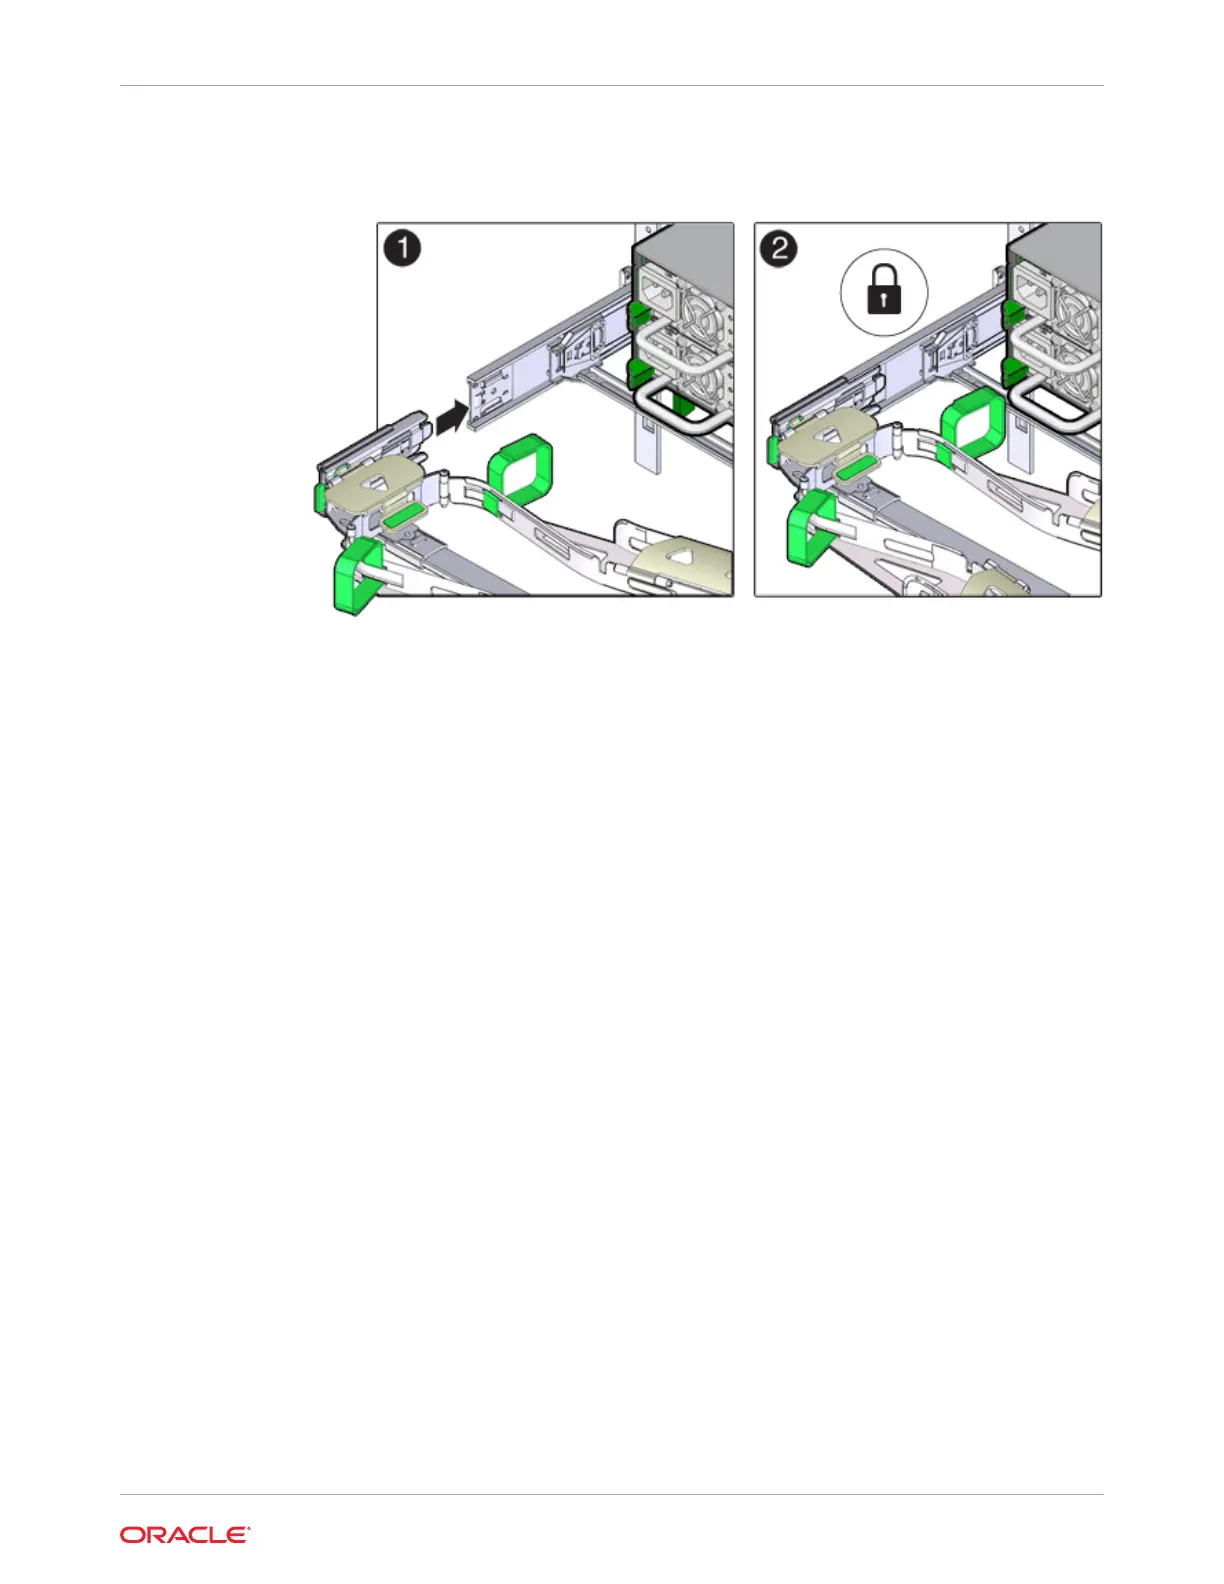
When inserting connector D into the slide-rail, the preferred and easier method is to
install connector D and the latching bracket as one assembly into the slide-rail.
12. Gently tug on the left side of the CMA's rear slide bar to verify that connector D is
properly seated.
13. Gently tug on the four CMA connection points to ensure that the CMA connectors are
fully seated before you allow the CMA to hang by its own weight.
14. Verify that the slide-rails and the CMA are operating properly before routing cables
through the CMA:
a. Ensure all rack anti-tilt devices are extended to prevent the rack from tipping.
b. Extend the controller from the front of the rack until the CMA is fully extended.
c. The center arm end latch should stay engaged with the rail as it moves out. If it does
not stay engaged with rail, remove the latch from the rail and bend it or yield outward
so that it fully engages.
Chapter 7
Installing an Oracle ZFS Storage ZS5-2 Cable Management Arm
7-9
 Loading...