SECTION 3 - HANDLING, STORAGE, AND INSTALLATIONPACE │ Installation & Assembly Manual
Issue Date: 07/03/2018
50
Form PA102.20-N1
Table 5 - AAF Pre-Filter/Final Filter Application
PERFECTPLEAT,
PREMIUM OR HM
AND VARICEL SH OR
DRIPAK 2000
PERFECTPLEAT,
PREMIUM OR HM
AND VARICEL DH
4 IN AMAIR 300X
AND VARICEL SH OR
DRIPAK 2000
4 IN AMAIR 300X
AND VARICEL DH
FILTER FRAME
12X24 - 16 G
GALVANIZED
P/N 026-35778-007
and 026-35778-000
X
P/N 026-35778-006
and 026-36339-001
X
P/N 026-35778-007,
026-35778-008 and
026-35778-000
X
P/N 026-35778-006
and 026-36339-000
X
FILTER FRAME
24X24 - 16 G
GALVANIZED
P/N 026-35778-007
and 026-35778-000
X
P/N 026-35778-006
and 026-36339-001
X
P/N 026-35778-007,
026-35778-008 and
026-35778-000
X
P/N 026-35778-006
and 026-36339-000
X
Note: When lters are supplied by other companies, the lter clips are supplied as well.
Filter Installation
Installing a 2 in. Pleated Filter
Use the following instructions to install a 2 in. Multi-
Pleat Elite filter into a 16 g galvanized holding frame
with four latches (P/N 026-35788-702), as shown in
Figure 72 on page 48.
1. Install one latch at each corner (4 corners) of the
frame. The latch ts into two rows of three knock-
outs. Use the row of knockouts closest to the gas-
ket for nominal 1 in. lters or lters with a 13/16 in.
single header. Use the second set of knockouts
for nominal 2 in. lters.
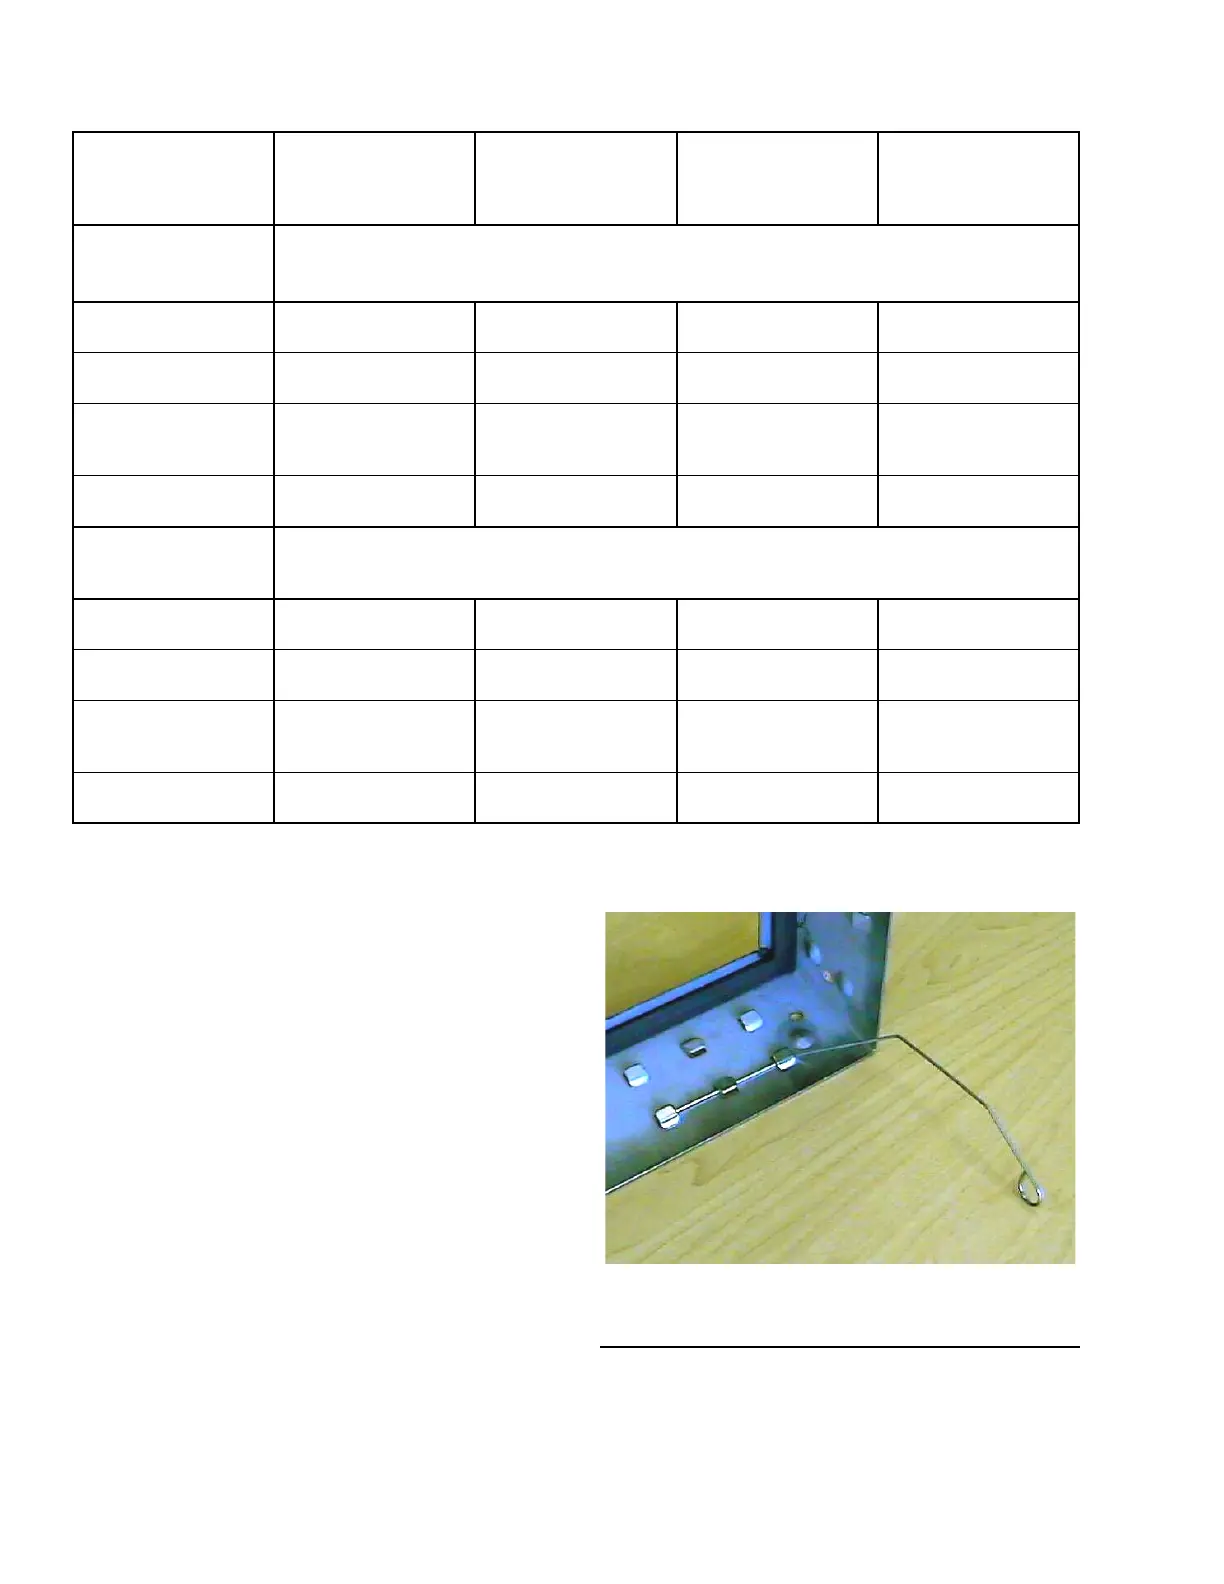
2. Insert the straight end of the latch between the
two knockouts furthest from the corner.
3. Using a moderate amount of pressure, force the
latch over the third knockout. The latch should
now be trapped within the three knockouts, but
should be able to freely rotate as shown in Figure
73 on page 50.
4. The latch installation should be complete.
LD10171
Figure 73 - Correctly Installed Latch Pin (P/N 026-
35788-702)
5. Install the other three latches into the corners.
6. Rotate all of the latches outward, and insert the
lter into the frame.