If the baking is still insufficient, baking time can be added by repeating
above steps3&4,after Start/Stop has been pressed.
The additional baking time may be set as long as the accumulated
time does not exceed 90 minutes.
Prepare cake in a separate mixing bowl. Follow the instructions for each
recipe carefully.
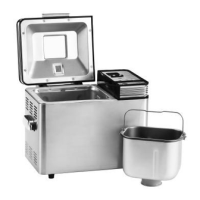
Place the mixture carefully into the lined
bread pan.
(The kneading blade must be removed.)
Place the bread pan inside the bread maker.
Press to choose bake only.
Press to set the required time.
(Between 30 to 90 minutes.)
The Timer cannot be used to delay
the start of baking.
Ensure that the bread pan is lined
with baking parchment so the
cake mixture does not touch the
sides.
See "select" section on page 7.
Time indication starts from 30
minutes and moves up to
1 hour 30 minutes in 1 minute
increments.
When ''TEMP'' blinks, see page 45.
Press .
Using the "bake only" program
Measure ingredients carefully according to each recipe on pages 41 to 42.
Make sure that the raisin nut dispenser is in
position and the lid and dispenser lid are
closed.
The red light comes on, the program is set
and the pad is inoperable
Baking begins.
Steps Notes
1
2
3
4
When baking is completed, remove the
bread pan using oven gloves.
Unplug after use.
Be sure to grip plug when removing it
from the socket.
Never pull on the cord.
5
When checking with a skewer,
take utmost care not to burn
yourself as the oven cavity will
be extremely hot.
The time will change rapidly
if constant pressure is applied to
the pad.
Note:
Upon completion of baking, you may check the consistency of the
baked product by piercing the centre with a skewer.
Each time select is pressed, the arrow on the
right of the display will move down to the next
choice.
14