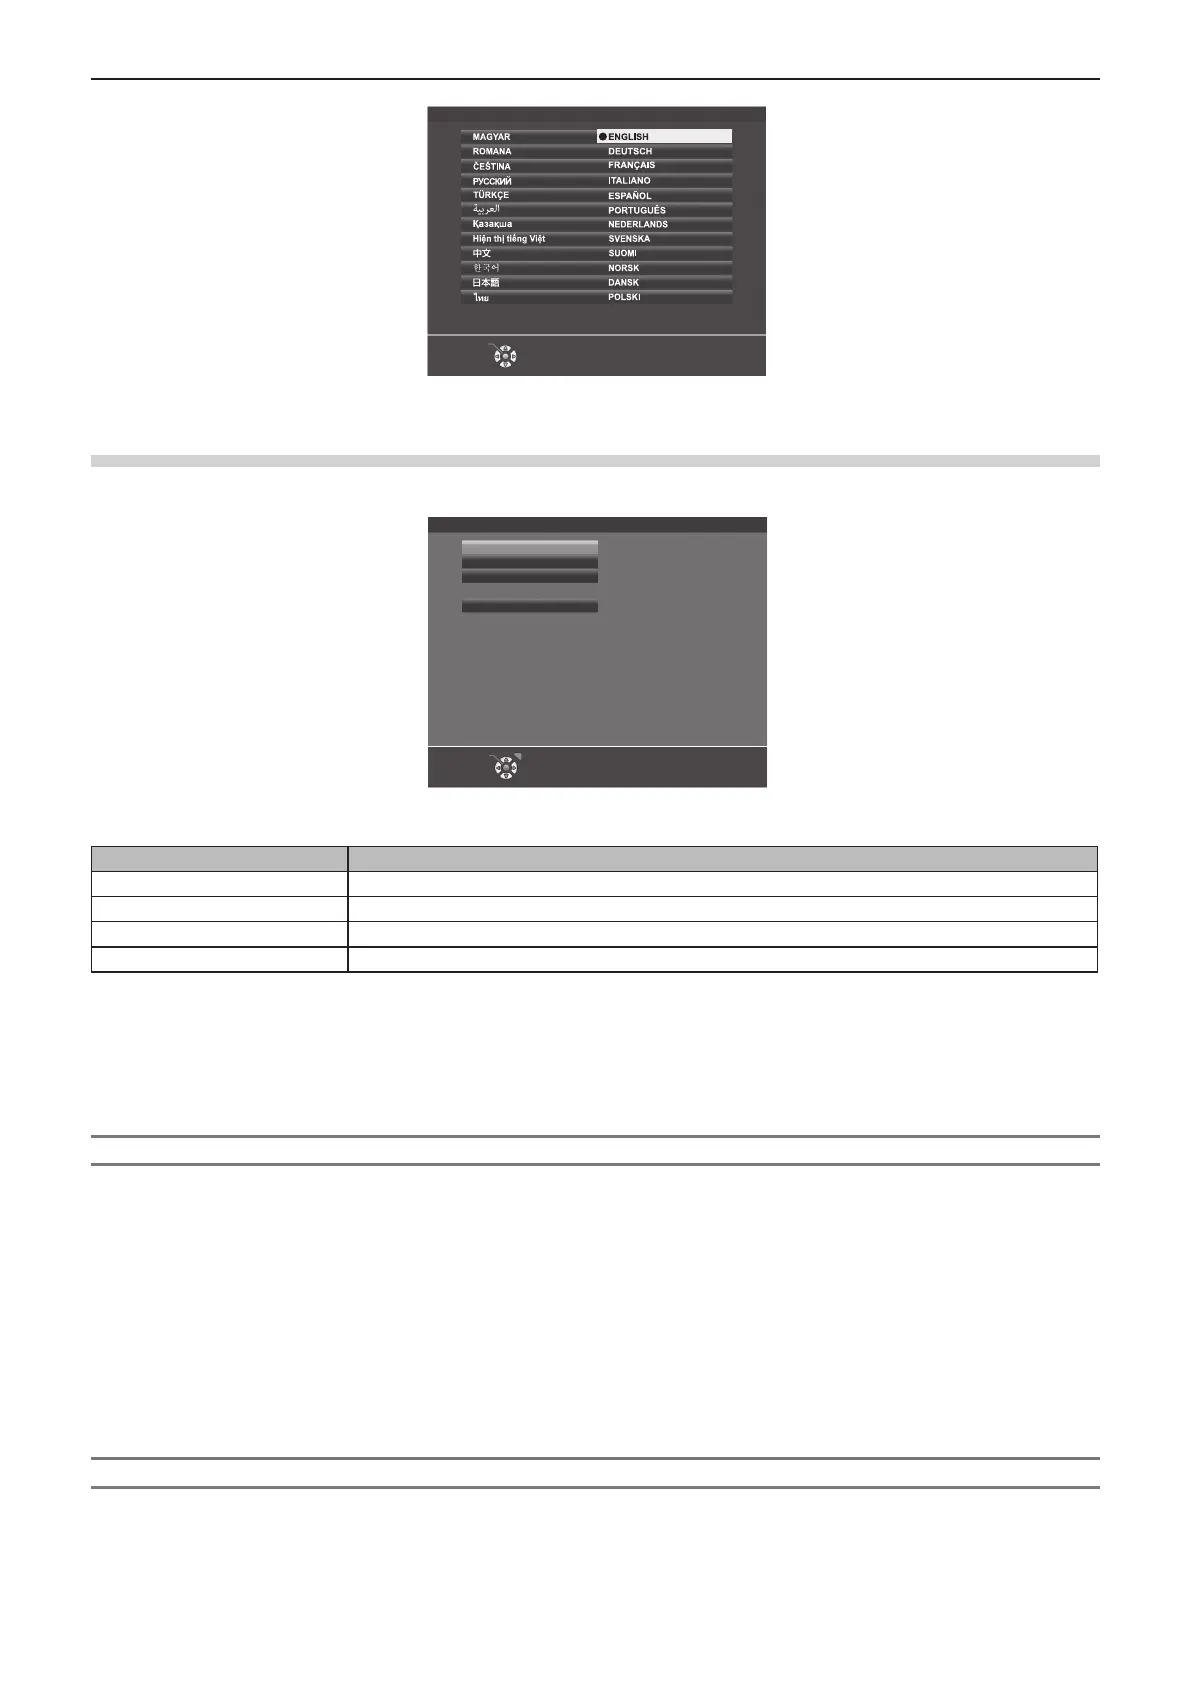
ENTER
PLEASE SELECT LANGUAGE.
INITIAL SETTING
2) Press the <ENTER> button to proceed to the following initial setting.
Initial setting (projector setup)
If necessary, change the setting of each item.
INITIAL SETTING
PROJECTION METHOD AUTO
16:10
NORMAL
If STANDBY MODE is set to ECO,
you cannot use network functions
when the projector is standing by.
Also, you cannot use some RS-232C
protocol commands.
SCREEN FORMAT
SCREEN POSITION
STANDBY MODE
ENTER RETURN
1) Press as to select an item.
Item Description
[PROJECTION METHOD]
Set [PROJECTION METHOD] depending on the installation mode.
[SCREEN FORMAT]
Set the aspect ratio of the screen.
[SCREEN POSITION]
Set the display position of the screen.
[STANDBY MODE]
Set the operation mode during standby.
2) Press qw to switch the setting.
f When all settings are completed, proceed to Step 3).
3) Press the <ENTER> button.
f Conrm the setting value and complete the initial setting.
Setting [PROJECTION METHOD]
If the screen display is upside down or is reversed, please change the settings, refer to “Installation mode”
(x page 32). After initialization, you can change the settings from the [PROJECTOR SETUP] menu →
[PROJECTION METHOD].
1) Press as to select the [PROJECTION METHOD].
2) Press qw to switch the settings.
f When set to [AUTO], the built-in angle sensor detects the orientation of the projector and automatically
switches to [FRONT/DESK] or [FRONT/CEILING]. Normally, set to [AUTO].
f To project from the rear of the screen, select [REAR/DESK] or [REAR/CEILING] (using a translucent
screen).
Setting [SCREEN FORMAT] and [SCREEN POSITION]
Set the screen aspect ratio and display position according to the screen being used. When the initial setting is
complete, you can change the setting from the [DISPLAY OPTION] menu → [SCREEN SETTING] → [SCREEN
FORMAT]/[SCREEN POSITION].
ENGLISH - 45
Chapter 3 Basic Operations - Switching on/off the projector

 Loading...