EasyManua.ls Logo

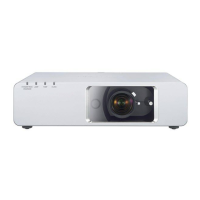
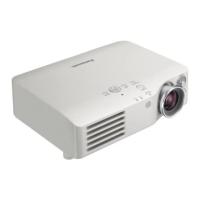
Panasonic SOLID SHINE PT-VMZ51

Panasonic SOLID SHINE PT-VMZ51
170 pages
To Next Page IconTo Next Page
Loading...
Operating Instructions
Functional Manual
LCD Projector
Commercial Use
Thank you for purchasing this Panasonic product.
This manual is common to all the models regardless of sufxes of the Model No.
z
for India
D: White model
z
for Taiwan
T: White model
z
for other countries or regions
With B: Black model (PT-VMZ71B and PT-VMZ61B only) Without B: White model
Before operating this product, please read the instructions carefully, and save this manual for
future use.
Before using your projector, be sure to read “Read this rst!” (
Æ
pages 4 to 15).
Model No.
PT-VMZ71 PT-VMZ61
PT-VMZ51 PT-VMZ51S
PT-VMZ41 PT-VMW61
PT-VMW51
ENGLISH
DPQP1388ZB/X1
The remote control differs depending on
projector models.
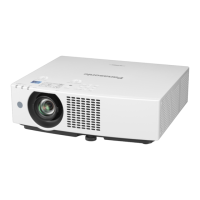
Table of Contents

Questions and Answers:

Panasonic SOLID SHINE PT-VMZ51 Specifications

General IconGeneral
ResolutionWUXGA (1920 x 1200)
Light SourceLaser
Contrast Ratio3, 000, 000:1
Display TypeLCD
Throw Ratio1.09-1.77:1
Zoom Ratio1.6x
Speakers10W mono
InputsHDMI, VGA, USB
Lamp Life20, 000 hours
Dimensions399 x 115 x 348 mm
Keystone CorrectionHorizontal ±30°
Video Modes480i, 480p, 576i, 576p, 720p, 1080i, 1080p
InterfacesRS-232C, LAN, USB
Brightness5200 lumens

Summary

Model Information and Initial Safety Advice

Model Numbers and Suffixes

Lists projector model numbers and their associated suffixes for different regions.

Initial Safety Reading Recommendation

Advises users to read the manual carefully and save it for future use.

Essential Safety Precautions

Electrical Safety and Grounding Requirements

Details earthing requirements and safety features of the power plug.

Environmental Hazards and Operational Warnings

Warns against exposure to rain, moisture, and electrical shock hazards.

Laser Safety and Lens Handling

Class 1 Laser Product Classification

Information on the projector being a Class 1 laser product and associated warnings.

Precautions for Viewing the Projection Beam

Advises against looking into the lens and placing objects in front of it.

Electrical Safety and Compliance Notices

Three-Pin Grounding Plug Safety

Explains the safety feature of the three-pin grounding-type power plug.

FCC and Canadian Compliance Statements

Provides regulatory compliance information for USA and Canada.

Molded Plug and Fuse Replacement Procedures

Molded Plug Safety Features and Fuse Rating

Details the safety features of the molded plug and fuse replacement.

Fuse Replacement and Wiring Color Codes

Explains how to replace the fuse and identifies wire colors.

Laser Hazard Distance and Risk Group Classification

Understanding Laser Hazard Distance Zones

Defines hazard distance (HD) and hazard zone (HZ) for laser safety.

Projector Risk Group Classification Details

Explains the projector's classification as risk group 2.

Operational Safety and Installation Guidelines

Power Connection and Cable Handling Precautions

Covers safe handling of power cords, plugs, and outlets.

Installation Environment and Placement Restrictions

Advises on suitable installation locations, avoiding heat, dust, and vent blockage.

Product Safety and Accessory Handling

Laser Beam Safety and Product Integrity

Warns against laser exposure, disassembly, and foreign objects.

Battery Safety and Handling Precautions

Provides guidelines for safe handling and disposal of batteries.

Operational Cautions and Maintenance Guidelines

Power Disconnection and Cable Handling Safety

Emphasizes disconnecting power and cables before maintenance.

Projector Placement and Basic Maintenance

Discusses placement in hot locations and air filter maintenance.

Battery Disposal and Removal Procedures

Used Battery Disposal Guidelines for Brazil

Specific instructions for returning used batteries in Brazil.

Remote Control Battery Removal Instructions

Steps for safely removing batteries from the remote control.

Projector Features and Initial Setup

Key Projector Features Overview

Highlights features like compact design, reliability, and flexible setup.

Quick Steps for Initial Projector Setup

Outlines the seven essential steps for starting the projector.

Chapter 1: Preparation Overview

Introduction to Preparation Tasks

Introduces the chapter covering pre-use checks and setup.

Precautions for Use and Handling

Intended Use and Transportation Safety

Defines the product's intended use and provides transportation cautions.

Installation Environment and Placement Cautions

Advises on avoiding specific environmental conditions during installation.

Projector Installation and Placement Guidelines

Installation Environment Limitations

Details altitude, temperature limits, and prohibited installation locations.

Projector Mounting and Ventilation Requirements

Covers 360° installation, mounting methods, and vent clearance.

Security Measures and Wireless LAN Safety

General Security Best Practices

Recommends password security, periodic changes, and network firewalls.

Wireless LAN Security Risks and Mitigation

Highlights risks like data interception and unauthorized access.

Wireless LAN and DIGITAL LINK Considerations

Wireless LAN Usage Notes and Interference

Discusses potential interference and communication limitations.

DIGITAL LINK Technology and Standards

Explains DIGITAL LINK technology based on HDBaseT.

Software, Usage Cautions, and Handling

Supported Application Software List

Lists software for projector control, monitoring, and image transfer.

Picture Quality and Projection Lens Care

Provides guidance on achieving good picture quality and lens maintenance.

Component Precautions and Connection Guidelines

Optical Parts and Light Source Precautions

Discusses care for optical parts and the light source.

External Device Connection Best Practices

Refers to using correct power cords and shielded cables.

Included Projector Accessories

Accessory Identification and Quantity

Lists all included accessories with part numbers and quantities.

Accessory Handling and Important Notes

Provides attention points for unpacking and using accessories.

Optional Accessories and Compatibility Information

List of Optional Accessories

Details optional items such as ceiling mount brackets and wireless modules.

Optional Accessory Notes and Updates

Mentions model number changes and website for latest information.

Remote Control Overview

Remote Control Layout and Button Functions

Identifies all buttons on the remote control and their primary functions.

Projector Body and Remote Control Details

Remote Control Usage and Handling Cautions

Provides attention points for remote control and battery usage.

Projector Body Component Identification

Shows diagrams of the projector's front, side, and rear views.

Projector and Remote Control Interfaces

Remote Control Button Descriptions

Details the functions of various buttons on the remote control.

Projector Body Terminals and Controls

Identifies projector body components like terminals and the control panel.

Projector Components and Control Panel

Projector Indicators, Vents, and Terminals

Describes power indicators, lens, vents, and connecting terminals.

Projector Control Panel Button Functions

Explains the functions of buttons located on the projector's control panel.

Connecting Terminals and Network Interfaces

Terminal Descriptions and Connection Types

Details USB, Audio, Computer, HDMI, LAN, and DIGITAL LINK terminals.

Terminal Usage Attention Points

Provides important notes on terminal usage, power supply, and network.

Remote Control Preparation and Multi-Projector Use

Remote Control Battery Installation and Removal

Instructions for inserting and removing batteries from the remote control.

Setting Up for Multi-Projector Control

Explains setting ID numbers for controlling multiple projectors simultaneously.

Attaching the Lens Cap

Lens Cap Attachment Procedure

Step-by-step guide to attach the lens cap using its string.

Chapter 2: Getting Started Overview

Introduction to Setup and Connection Tasks

Introduces the chapter covering initial setup and connections.

Projector Setup and Installation Modes

Setting the Installation Mode

Describes four projection methods and how to configure them.

Understanding the Built-in Angle Sensor

Explains the angle sensor's role in detecting projector orientation.

Ceiling Mount and Projection Setup Details

Optional Ceiling Mount Bracket Information

Details required optional brackets and installation precautions.

Projected Image Size and Throw Distance Charts

Explains how to use charts for projected image size and distance.

Screen Adjustment and Distortion Correction

Projection Range and Correction Angle Data

Shows projection range and correction angles for keystone and curved correction.

Available Screen Adjustment Features

Lists available screen adjustment functions like keystone and corner correction.

Projection Distance Calculations

Projection Distance for 16:10 Aspect Ratio

Provides tables for projection distance based on throw ratio and zoom.

Projection Distance for 16:9 Aspect Ratio

Offers tables for projection distance based on throw ratio and zoom for 16:9.

Projection Distance and Calculation Formulas

Projection Distance for 4:3 Aspect Ratio

Provides tables for projection distance based on throw ratio and zoom for 4:3.

Calculating Projection Distance for Custom Sizes

Explains how to use formulas for calculating projection distance for custom sizes.

Connecting External Devices

Pre-Connection Checks and Guidelines

Advises reading external device instructions and handling static electricity.

Connecting AV Equipment Example Diagram

Illustrates connections for DVD players, Blu-ray players, and audio equipment.

Connecting Computers for Projection

Computer Connectivity Diagram

Shows how to connect computers via USB, LAN, and HDMI terminals.

Connecting via DIGITAL LINK

DIGITAL LINK Connection Example Diagram

Illustrates connections using twisted-pair cables and HDBaseT technology.

DIGITAL LINK Connection Cautions and Notes

Provides important notes on cable types, VCR, and network configuration.

DIGITAL LINK and Network Configuration

DIGITAL LINK Signal Quality Check Procedure

Explains how to check signal quality and transmission distances.

Setting Up Wired LAN Connections

Covers network settings for DIGITAL LINK and LAN terminals.

Chapter 3: Basic Operations Overview

Introduction to Basic Operations

Introduces the chapter covering fundamental projector operations.

Powering the Projector On and Off

Connecting the Power Cord

Step-by-step guide for attaching and removing the power cord.

Understanding the Power Indicator Lights

Explains the status and meaning of the power indicator lights.

Projector Indicator Status and Meanings

Power Indicator Status Interpretation

Details projector status based on power indicator color and blinking patterns.

Initial Projector Setup and Operation

Procedure for Switching On the Projector

Outlines steps to power on the projector and remove the lens cap.

Initial Setting Screen and Language Selection

Describes navigating the initial setting screen and selecting the display language.

Initial Projector Configuration Settings

Setting Display Language and Screen Format

Covers language selection and screen format settings.

Configuring Projection Method and Standby Mode

Details settings for projection method and standby mode.

Configuring Display and Network Settings

Setting Screen Position and Standby Mode

Explains screen position adjustments and standby mode options.

Administrator Account Setup Introduction

Introduces the administrator account setup for network functions.

Setting Up Administrator Account Credentials

Administrator Account Creation Process

Step-by-step guide to set up the administrator username and password.

Making Image Adjustments and Selections

Adjusting Focus, Input, and Installation Mode

Covers initial focus, input selection, and installation method.

Fine-tuning Image Position, Size, and Setup

Explains using adjustable feet, lens shift, zoom, and auto setup.

Procedure for Switching Off the Projector

Steps to Power Down the Projector

Details the process of powering off the projector and disconnecting power.

Projecting Images: Input Selection

Switching Between Image Input Sources

Explains how to select inputs using the remote control or control panel.

Input Selection via Control Panel

Using the Input Select Button and Guides

Describes using the control panel's input select button and guides.

Adjusting Image Focus, Size, and Position

Focus, Zoom, and Lens Shift Adjustments

Explains how to use the focus lever, zoom lever, and lens shift dials.

Adjusting Projector Feet for Leveling

Details how to use adjustable feet to level the projector.

Lens Shift Adjustment Range Details

Understanding Lens Shift Capabilities

Illustrates the horizontal and vertical lens shift ranges available.

Remote Control Operations: Shutter, Mute, and Volume

Using the Shutter Function

Explains how to temporarily turn off image and audio output.

Muting Audio and Adjusting Volume

Covers muting audio output and controlling speaker volume.

Remote Control Operations: Freeze, OSD, and Auto Setup

Using Freeze and On-Screen Display Functions

Explains how to pause images and toggle the on-screen display.

Automatic Image Setup Functionality

Describes the auto setup for analog RGB signals.

Remote Control Operations: Screen Adjustment and Zoom

Screen Adjustment for Distortion Correction

Details functions like keystone, corner, and curved correction.

Digital Zoom Functionality for Image Enlargement

Explains how to enlarge images using the digital zoom feature.

Digital Zoom and Aspect Ratio Control

Adjusting Digital Zoom Image Position

Describes how to move the enlarged image using the remote control.

Switching Image Aspect Ratio

Explains how to change the image aspect ratio using the ASPECT button.

Remote Control Operations: Timer and Function Button

Presentation Timer Functionality

Details how to start, stop, and use the presentation timer.

Assigning Functions to the FUNCTION Button

Explains how to set custom shortcuts using the FUNCTION button.

Remote Control Operations: Test Patterns, Status, ECO, HDMI-CEC

Displaying Internal Test Patterns

How to display built-in test patterns for diagnosis.

Using Status, ECO Management, and HDMI-CEC

Covers checking projector status, ECO settings, and HDMI-CEC functions.

Remote Control ID Number Setting

Configuring Remote Control ID for Multi-Projector Use

Explains setting ID numbers for controlling multiple projectors.

Chapter 4: Settings Overview

Introduction to Settings and Adjustments

Introduces the chapter on on-screen menu settings and adjustments.

On-Screen Menu Navigation

Accessing and Navigating the Menu System

Describes how to use the MENU button and navigate menus.

Resetting Settings and Main Menu Structure

Resetting Menu Items to Factory Defaults

Explains how to use the DEFAULT button and INITIALIZE ALL.

Overview of Main Menu Item Categories

Lists the main menu categories: PICTURE, POSITION, etc.

Sub-Menu Item Configuration

Picture and Position Settings Sub-Menus

Details items within PICTURE and POSITION sub-menus.

Display, Setup, Security, and Network Sub-Menus

Lists items in DISPLAY OPTION, PROJECTOR SETUP, SECURITY, NETWORK sub-menus.

Detailed Settings Configuration Options

Projector Setup Menu Options

Lists items within the PROJECTOR SETUP menu.

Security and Network Menu Options

Lists items within the SECURITY and NETWORK menus.

[PICTURE] Menu: Modes and Adjustments

Picture Mode Selection Guide

Explains different picture modes for various image sources.

Adjusting Contrast and Brightness Levels

Details how to adjust contrast and brightness levels for the image.

[PICTURE] Menu: Color and Sharpness Settings

Adjusting Color, Tint, and Sharpness

Covers color saturation, skin tone, and sharpness adjustments.

Color Temperature and Gamma Settings

Explains color temperature switching and gamma adjustments.

[PICTURE] Menu: Advanced Image Settings

Advanced Menu Adjustments for RGB Colors

Details advanced settings for contrast and brightness by color.

Daylight View for Bright Environments

Explains how to optimize image vividness in bright conditions.

[PICTURE] Menu: Cinema Processing and Light Control

Digital Cinema Reality Processing Features

Describes cinema processing for improved resolution and image quality.

Dynamic Contrast and Light Source Control

Explains automatic contrast adjustment and light source off conditions.

[PICTURE] Menu: Signal Format and RGB System

Setting RGBYCBCRYPBPR Signal Format

Details automatic signal detection and manual setting options.

Configuring RGB System for Analog Signals

Explains selecting signal parameters for analog RGB input.

[POSITION] Menu: Keystone and Screen Adjustment

Realtime Keystone Correction Function

Describes automatic vertical trapezoidal distortion correction.

Screen Adjustment for Distortion Correction

Covers correcting various distortions and extending projection distance.

[POSITION] Menu: Zoom Extender and Keystone Correction

Digital Zoom Extender Functionality

Explains using digital zoom to extend projection distance beyond optical zoom.

Keystone Correction Procedure

Details how to adjust keystone correction for trapezoidal distortion.

[POSITION] Menu: Corner and Curve Correction

Corner Correction for Image Distortion

Describes how to correct distortion at the four corners of the image.

Curved Correction for Image Warping

Explains how to correct curved distortion in projected images.

[POSITION] Menu: Advanced Distortion Control

Adjusting Keystone and Arc Correction

Provides details on adjusting keystone and arc parameters for screen correction.

Six-Point Correction for Complex Shapes

Describes the 6-point correction for projecting onto irregular surfaces.

[POSITION] Menu: Image Shifting and Timing Adjustments

Adjusting Image Position (Shift Function)

Explains how to move the image vertically or horizontally.

Dot Clock and Clock Phase Adjustments

Details adjustments for reducing noise and fixing flickering/smearing.

[POSITION] Menu: Image Scaling and Aspect Ratio

Over Scan and Aspect Ratio Settings

Covers cropping image periphery and switching image aspect ratios.

Frame Lock Functionality for Computer Signals

Explains the frame lock setting for computer signals.

[POSITION] Menu: Clamp Position Adjustment

Adjusting Clamp Position for Image Quality

Details how to adjust clamp position for blunt or green black parts.

[LANGUAGE] Menu: Display Language Selection

Changing the On-Screen Display Language

Explains how to select the display language from a list of options.

[DISPLAY OPTION] Menu: On-Screen Display Settings

Configuring Input Guide and OSD Position

Details settings for input guide display and OSD positioning.

Adjusting On-Screen Display Size

Explains how to change the size of the menu screen (OSD).

[DISPLAY OPTION] Menu: Warning Messages and Signal Levels

Warning Message Display Settings

Covers enabling or disabling warning messages on the projected image.

HDMI and Digital Link Signal Level Settings

Explains adjusting signal levels for HDMI and DIGITAL LINK connections.

[DISPLAY OPTION] Menu: Screen and Startup Settings

Screen Setting and Startup Logo Configuration

Details screen size, position, and startup logo settings.

Shutter Setting on Power On

Explains enabling or disabling the shutter function automatically.

[DISPLAY OPTION] Menu: Auto Setup, Signal Search, and Timer

Auto Setup and Signal Search Configuration

Covers automatic setup execution and signal search enabling.

Back Color and Presentation Timer Mode Settings

Explains background color options and presentation timer modes.

[DISPLAY OPTION] Menu: Timer and Uniformity Settings

Countdown Timer and Presentation Timer Usage

Details setting countdown timers and using the presentation timer.

Uniformity Adjustment for Color Unevenness

Explains adjusting uniformity based on lens zoom position.

[DISPLAY OPTION] Menu: Other Functions Control

Other Functions: Auto Setup and Freeze

Describes using auto setup and freeze functions via the menu.

Other Functions: Shutter and Digital Zoom

Explains using shutter and digital zoom functions via the menu.

Digital Zoom Function Details

Digital Zoom Magnification and Movement Controls

Details how to adjust magnification and move the enlarged image.

[PROJECTOR SETUP] Menu: Status and Initialization

Displaying Projector Status Information

How to view projector status like firmware version, runtime, etc.

Projector ID and Initial Startup Settings

Covers setting projector IDs and initial startup methods.

[PROJECTOR SETUP] Menu: Projection and ECO Management

Setting the Projection Method

Explains how to set projection orientation based on installation.

Auto Power Save Settings Configuration

Details ambient light and signal detection for power saving.

[PROJECTOR SETUP] Menu: Light Power and Power Management

Adjusting Light Power Output Levels

Explains settings for normal, eco, quiet, and user light power.

Power Management and Standby Settings

Covers automatic standby and timer settings for power saving.

[PROJECTOR SETUP] Menu: Standby and Startup Modes

Setting Standby and Quick Startup Modes

Explains normal/eco standby modes and quick startup options.

Quick Startup Valid Period Configuration

Details setting the validity period for the quick startup function.

[PROJECTOR SETUP] Menu: RS-232 C Communication

Configuring RS-232 C Communication Settings

Details baud rate, parity, and emulation settings for serial communication.

[PROJECTOR SETUP] Menu: Emulation, Function Button, and Audio

RS-232 C Emulation for Compatibility

Explains emulation settings for compatibility with older projector models.

Function Button Assignment and Audio Settings

Covers assigning functions and basic audio adjustments.

[PROJECTOR SETUP] Menu: Audio Configuration

Audio Mute and Standby Output Settings

Details how to mute audio and configure output during standby.

Setting Audio Input Terminals

Explains selecting audio input sources for different terminals.

[PROJECTOR SETUP] Menu: Audio Inputs, Test Patterns, and Filters

HDMIDigital LinkNetwork Audio Input Routing

Specifies audio input routing for different terminals.

Test Patterns and Air Filter Counter Management

Covers displaying test patterns and managing air filter usage time.

[PROJECTOR SETUP] Menu: Filter Reset and HDMI CEC

Resetting the Air Filter Counter

Provides steps to reset the air filter usage timer after maintenance.

HDMI CEC Functionality and Device Operation

Explains enabling HDMI CEC and operating connected devices.

[PROJECTOR SETUP] Menu: HDMI CEC Link Control

Changing HDMI CEC Menu Code Settings

How to adjust menu codes for CEC device compatibility.

Setting Projector-to-Device Link Control

Details power link control settings from projector to CEC device.

[PROJECTOR SETUP] Menu: Device-to-Projector Link and Initialization

Setting Device-to-Projector Link Control

Explains link control for device power and input switching to projector.

Initializing All Projector Settings

Describes how to reset all settings to factory defaults.

[SECURITY] Menu: Password Protection Setup

Enabling and Setting the Security Password

Details how to enable and set the security password for access.

[SECURITY] Menu: Text Display, Menu Lock, and Passwords

Text Display and Change Features

Covers displaying security text and customizing it.

Menu Lock and Password Management

Explains locking menu operations and setting menu lock passwords.

[SECURITY] Menu: Control Device Setup

Limiting Control Panel and Remote Operations

Details how to enable or disable projector controls.

[NETWORK] Menu: Ethernet and DIGITAL LINK Configuration

Setting Ethernet Transmission Path

Explains selecting LAN or DIGITAL LINK for Ethernet signals.

Digital Link Communication Mode Settings

Details auto, digital link, long reach, and Ethernet modes.

[NETWORK] Menu: Digital Link Status and Quality

Checking Digital Link Connection Status

Covers link status, HDCP, and signal quality checks.

Digital Link Menu Access

Describes accessing the menu of connected DIGITAL LINK devices.

[NETWORK] Menu: Extron XTP and Wired LAN Setup

Extron XTP Connection Settings

Details connection settings for Extron XTP transmitters.

Wired LAN Configuration (DHCP and IP Settings)

Explains wired LAN settings, including DHCP and manual IP configuration.

[NETWORK] Menu: Projector Name, Status, and Admin Account

Setting Projector Name and Network Status

Covers naming the projector and viewing network status.

Administrator Account Password Policy

Displays password requirements for administrator accounts.

[NETWORK] Menu: Administrator Account Setup

Administrator Account Creation Process

Step-by-step guide to create the administrator account.

[NETWORK] Menu: Modifying Administrator Account

Changing Administrator Account Credentials

Details how to change the administrator username and password.

[NETWORK] Menu: Security and Control Settings

Network Security: Command Protect Settings

Explains enabling/disabling command control authentication.

Network Control Options Configuration

Covers enabling web control, command control, and Crestron connection.

[NETWORK] Menu: AMX and PJLink Configuration

AMX Device Discovery Settings

Details settings for AMX device discovery.

PJLink Password Setup Procedure

Explains setting the PJLink password for authentication.

[NETWORK] Menu: PJLink, Memory Viewer, and Slideshow

PJLink Control and Notification Settings

Covers enabling PJLink control and notifications.

Memory Viewer Slideshow Setup

Explains setting up slideshow transition effects.

[NETWORK] Menu: Slideshow Ordering and Display

Setting Slideshow Sort Order and Rotation

Details how to sort images and rotate them.

Best Fit Image Display Setting

Explains fitting images to the screen based on display options.

[NETWORK] Menu: Slideshow Repeat and Initialization

Slideshow Repeat Playback Setting

Configures whether the slideshow will loop after the last file.

Initializing Network Settings to Factory Defaults

Resets network settings to factory defaults.

Chapter 5: Operation of Function Overview

Introduction to Function Operation Methods

Introduces the chapter on operating specific projector functions.

Projecting with Memory Viewer Input

Supported Image Formats and Usage Cautions

Lists supported image files and USB memory usage precautions.

USB Memory Attachment and Removal Procedures

Provides steps for connecting and disconnecting USB memory.

Memory Viewer: Displaying, Playing, and Exiting

Displaying and Navigating the Memory Viewer

Explains how to access and play images stored in the memory viewer.

Executing Slideshows and Terminating Viewer

Covers running slideshows and terminating the memory viewer.

Projecting via Network Input

Supported Network Applications

Lists applications like Presenter Light and Wireless Projector.

Connecting and Disconnecting Network Devices

Details connecting devices and ending network connections.

Network Connectivity Options

Projector Network Features Overview

Describes web control, monitoring software, image transfer, PJLink, and commands.

Connecting via Wired LAN

Illustrates a general network connection using a wired LAN.

Network Connections via Twisted-Pair Cable

Twisted-Pair Cable Transmitter Network Setup

Details connections using HDBaseT and required cable criteria.

Configuring Wired LAN Connection Procedure

Outlines steps to connect the projector to a computer via LAN.

Connecting via Wireless LAN

Wireless LAN Connection Requirements

States the need for a wireless module and shows connection examples.

Projector Preparation for Wireless LAN

Details turning on the projector and attaching the wireless module.

Wireless LAN Setup and Computer Configuration

Wireless LAN Network Idle Screen Details

Explains information displayed on the network input idle screen.

Computer Network Configuration for Wireless

Guides on setting up the computer for wireless connection.

Connecting via QR Code

QR Code Connection Method

Explains using QR codes to connect smartphones wirelessly.

Displaying QR Code on Projector Screen

Details how to display the QR code in OSD or network idle screen.

Smartphone Connection via QR Code

Smartphone Pairing Procedure with QR Code

Steps for connecting a smartphone using the QR code.

Using Presenter Light Software

Presenter Light Software Overview

Introduces the software for transferring images via LAN.

Downloading Presenter Light Software

Instructions for downloading and installing the software.

Web Control Functionality

Web Control Operations Overview

Describes functions controllable via web browser, like settings and status.

Accessing the Projector via Web Browser

Details starting the web browser and entering the IP address.

Web Control: Account Management and Functions

Administrator Account Password Requirements

Lists password complexity requirements for administrator accounts.

Available Functions by Account Type

Compares functions accessible by administrator and standard user accounts.

Web Control Interface: Item Descriptions

Web Control Interface Navigation Tabs

Explains the different tabs in the web control interface.

Web Control Item Functionality

Details the purpose of each item like Status, Projector control.

Web Control: Projector Status and Error Information

Viewing Projector Status Details

Lists all the status items displayed in the web interface.

Interpreting Error and Warning Information

Explains how to view error details and error codes.

Web Control: Network Status and Basic Projector Control

Viewing Network Status Details

Displays wired and wireless LAN configuration details.

Basic Projector Control Functions

Covers basic controls like input, volume, picture mode, shutter, and power.

Web Control: Detailed Control and Network Configuration

Detailed Control for Position and Picture Settings

Allows operation of position and picture quality settings.

Network Configuration Options

Explains how to change wireless LAN settings.

Web Control: Wired and Wireless LAN Configuration

Configuring Wired LAN Settings

Details projector name, DHCP, IP address, and DNS settings for wired LAN.

Configuring Wireless LAN Settings

Explains setting SSID, channel, and key for wireless LAN.

Web Control: Network Testing and ECO Management

Performing Network Ping Tests

Checks network connectivity to servers like E-mail or DNS.

Configuring ECO Management Settings

Allows adjustment of light power, auto power save, and power management.

Web Control: Network Security and Status Notifications

Network Security: Command Protect Settings

Explains enabling/disabling command control authentication.

Status Notification Configuration

Sets up push notifications for projector status changes.

Web Control: Email Setup for Alerts

Configuring Email Alerts for Projector Status

Sets up email notifications for temperature warnings or errors.

Web Control: Email Authentication and Content

Email Authentication Method Setup

Configures POP or SMTP authentication for sending emails.

Sample Email Content for Alerts

Shows examples of email content for status reports and errors.

Web Control: Error Emails and Port Setup

Sample Error Email Format

Displays the format of emails sent when errors occur.

Command Control Port Configuration

Sets the port number used for command control.

Web Control: Crestron Tools and Password Setup

Crestron Control System Integration

Information required for connecting Crestron control systems.

Setting Administrator and User Account Passwords

Accesses password setup pages for administrator and user accounts.

Web Control: Managing Administrator and User Accounts

Modifying Administrator Account Credentials

Details changing the administrator username and password.

Setting Standard User Account Credentials

Explains setting username and password for standard users.

Web Control: PJLink and Standard User Password Change

Changing PJLink Account Password

Details password modification for PJLink access.

Changing Standard User Account Password

Explains how to change the password for standard user accounts.

Web Control: Open Source License Download

Downloading Projector Software Licenses

Instructions for downloading open source software licenses.

Using HDMI-CEC Functionality

Connecting CEC-Compatible Devices

Explains how to connect devices like Blu-ray players via HDMI.

Operating CEC Devices with Projector Remote

Details using the projector remote to control CEC devices.

HDMI-CEC Link Control Features

Projector-to-Device Link Control Settings

Explains power link control from projector to CEC device.

Device-to-Projector Link Control Settings

Describes link control for device power and input switching to projector.

Chapter 6: Maintenance Overview

Introduction to Maintenance Procedures

Introduces the chapter on inspection, maintenance, and replacement.

Indicator Lights for Light Source and Temperature

Light Source Indicator Status Meanings

Explains blinking red indicators for light source issues.

Temperature Indicator Status and Remedies

Details blinking red indicators for temperature issues and troubleshooting.

Maintenance Procedures: Outer Case, Lens, and Air Filter

Cleaning the Outer Case and Lens Surface

Instructions for cleaning the projector's exterior and lens.

Air Filter Unit Maintenance Guide

Explains when and how to clean the air filter unit.

Air Filter Unit Removal and Cleaning

Procedure for Removing the Air Filter Unit

Step-by-step guide to remove the air filter unit.

Washing and Drying the Air Filter Unit

Details the process of cleaning and drying the air filter.

Air Filter Unit Installation and Counter Reset

Attaching the Air Filter Unit and Cover

Instructions for reinstalling the cleaned or new air filter unit.

Resetting the Air Filter Usage Counter

How to reset the filter usage counter after maintenance.

Replacing the Air Filter Unit

When to Replace the Air Filter Unit

Explains when replacement is necessary and how to obtain.

Air Filter Replacement Procedure

Steps for replacing the unit and resetting the counter.

Troubleshooting Common Issues

Power and Image Display Problems

Addresses issues like no power, no image, fuzzy image, and incorrect display.

Audio, Remote, and Connectivity Issues

Covers problems with audio, remote control, and signal compatibility.

Troubleshooting: USB Power and Operation Noise

No Power Supplied from USB Terminal

Checks for issues related to USB power supply.

Addressing Loud Operation Noise

Explains causes of loud noise, like high temperatures and air filters.

[SELF TEST] Display and Error Measures

Interpreting Self-Test Error Codes

Lists error codes and their corresponding details and action numbers.

Actionable Steps for Errors and Warnings

Provides solutions based on action numbers for identified issues.

Chapter 7: Appendix Overview

Introduction to Specifications

Introduces the chapter containing technical specifications.

Technical Information: PJLink Functionality

Overview of PJLink Protocol Support

Explains PJLink support for projector control and status querying.

PJLink Command Reference Table

Lists supported PJLink commands, control details, and parameters.

Technical Information: PJLink Commands and Security

Additional PJLink Command Details

Lists more commands for model names, input, volume, filter, etc.

PJLink Security Authentication Setup

Explains PJLink password requirements for security authentication.

Technical Information: Control Commands via LAN

LAN Control Command Connection Method

Details connecting in protected mode and obtaining IP/port.

LAN Command Data Format and Transmission

Explains the structure of transmitted data and hash value calculation.

Technical Information: LAN Command Data Handling

LAN Command Received Data and Error Responses

Describes received data formats and error responses.

Non-Protected Mode LAN Connection Method

Details connection method when command protection is disabled.

Technical Information: LAN Communication Flow

LAN Command Data Transmission and Reception Examples

Provides examples of transmitted and received data.

Server-Client Communication Sequence Diagram

Illustrates the communication flow for sending/receiving commands.

Technical Information: RS-232 C Serial Communication

Serial IN Terminal and Connection Methods

Details the RS-232C terminal and connection types.

RS-232 C Pin Assignments and Signal Names

Lists pin assignments and signal names for serial communication.

Technical Information: RS-232 C Command Formats

RS-232 C Basic Command Structure

Explains the basic and subcommand formats for RS-232C control.

RS-232 C Command Transmission Precautions

Provides notes and attention points for sending commands.

Technical Information: Cable Specs and Projector Control Commands

Serial Cable Specifications

Details cable connections for projector serial control.

Projector Control Command List

Lists commands for power, input switching, shutter, aspect ratio, etc.

Technical Information: Computer Input Terminal Pinouts

Computer 1 and 2 Input Terminal Pin Assignments

Details pin assignments and signal names for computer inputs.

Projector Specifications: Display and Lens

Display System and Device Specifications

Covers display system type, size, pixels, and projection lens details.

Light Source, Screen Size, and Light Output

Details light source type, screen size range, and light output brightness.

Projector Specifications: Input, Power, and Environment

Input Compatibility and Acoustic Noise Levels

Lists supported signal types and measured noise levels.

Operating Environment and Power Consumption

Details operating temperature, humidity, and power requirements.

Projector Specifications: Dimensions, Weight, and Wireless

Standby Power and Physical Specifications

Covers standby power consumption, dimensions, weight, and materials.

Laser Classification and Wireless LAN Specs

Details laser safety classification and wireless LAN standards.

Projector Dimensions Diagram

Detailed Projector Dimensions in mminch

Provides detailed measurements of the projector's physical size.

Specifications: Compatible Video Signals

Compatible Video Signal Resolutions and Formats

Lists supported video signal types, resolutions, and formats.

Specifications: Compatible Computer Signals

Compatible Computer Signal Resolutions and Formats

Lists supported computer signal types, resolutions, and formats.

Ceiling Mount Bracket Installation Precautions

Bracket Installation Safety and Guidelines

Covers using specified brackets and professional installation.

Ceiling Mount Screw Hole Specifications

Provides dimensions for ceiling mount screw holes.

Disposal of Old Equipment and Batteries

Environmental Disposal Guidelines for EU

Information on recycling old products and batteries in the EU.

Related product manuals