12 Service Position
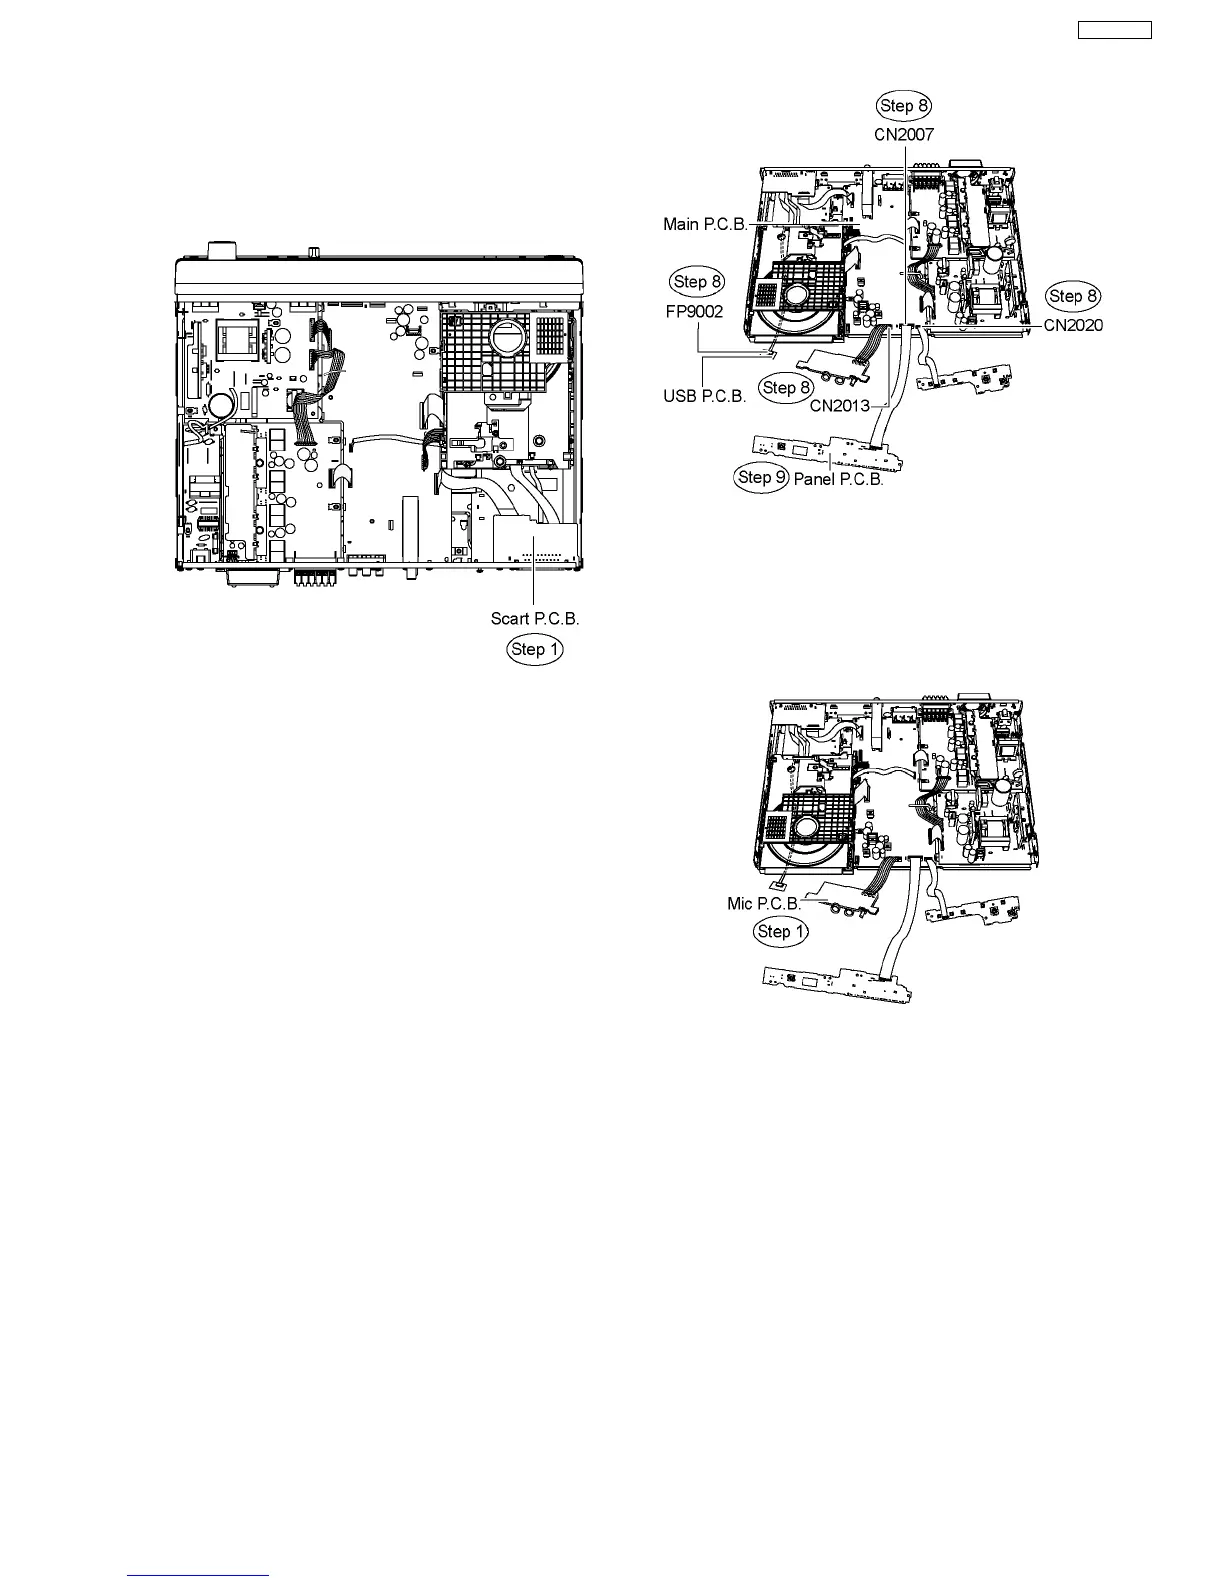
12.1. Checking & Repairing Scart
P.C.B.
Step 1 Remove the top cabinet to service Scart P.C.B.
12.2. Checking & Repairing Panel
P.C.B.
Step 1 Remove the top cabinet.
Step 2 Remove the DVD lid.
Step 3 Disassemble the front panel.
Step 4 Disassemble Panel P.C.B.
Step 5 Disassemble Volume P.C.B.
Step 6 Disassemble Mic P.C.B.
Step 7 Disassemble USB P.C.B.
·
Servicing Position of Panel P.C.B.
Step 8 Connect FFC cable at the connectors (CN2020,
CN2013 & CN2007) on Main P.C.B and (FP9002) on USB
P.C.B.
Step 9 Turn over Panel P.C.B horizontally and place it
according to the diagram shown below.
12.3. Checking & Repairing Mic
P.C.B.
·
Follow (Step 1) to (Step 8) of Item 12.2.
Step 1 Turn over Mic P.C.B horizontally and place it according
to the diagram shown below.
12.4. Checking & Repairing Main
P.C.B.
Step 1 Remove the top cabinet.
Step 2 Remove the DVD lid.
Step 3 Disassemble the front panel.
Step 4 Disassemble Volume P.C.B.
Step 5 Disassemble Mic P.C.B.
Step 6 Disassemble Panel P.C.B.
Step 7 Disassemble USB P.C.B.
Step 8 Disassemble Scart P.C.B.
Step 9 Disassemble the rear panel.
Step 10 Disassemble the DVD mechanism unit.
Step 11 Disassemble DVD Module P.C.B.
Step 12 Disassemble Main P.C.B.
Step 13 Disassemble D-Amp P.C.B.
Step 14 Disassemble SMPS & AC-Inlet P.C.B.
55
SA-PT850EE
 Loading...