EasyManua.ls Logo

Paradox MG5000+ User Manual

Paradox MG5000+
55 pages
To Next Page IconTo Next Page
To Previous Page IconTo Previous Page
Page #31 background imageLoading...
Page #31 background image
MG5000+ / MG5050+ Installation Guide
31
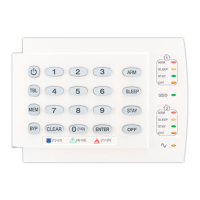
Programming the Remote Control Buttons
Sections [611] to [642]: Remote Controls 1 to 32 respectively.
Each remote control can be programmed to perform up to 4 different actions. Each digit in sections [611] to [642] represents a button or combination of buttons.
Digits 1 through 4 can be programmed, while digits 5 through 8 are reserved for future use and must be defined as empty (reminder: [SLEEP] = empty).
Warning: When section [610] is accessed, the panel will copy the saved value of that section to all remotes.
How Do I Program the Remote Control’s Buttons?
1. Press the [
ENTER] key.
2. Enter your [
INSTALLER CODE] (default: 0000 / 000000) or [MAINTENANCE CODE] (empty by default)
3. Enter the desired [
SECTION NUMBER] (from sections [610] to [642]).
4. Enter the [
HEXADECIMAL VALUE] (0 to F) of the desired button option from table 2 on page 31 in the appropriate space. If you do
not wish to program a button combination, press the [
SLEEP] key to skip.
Table 2: Button Options
[0] = Button Disabled* [8] = Generate a Panic 1 Alarm
[1] = Regular/Regular Force arming [9] = Generate a Panic 2 Alarm
[2] = Stay/Stay Force arming [0] or [0(10)] = Generate a Panic 3 Alarm
[3] = N/A [
OFF] = Activates any PGMs that have Event Group #08 as their Activation Event
[4] = Sleep/Sleep Force arming [
BYP] = Activates any PGMs that have Event Group #09 as their Activation Event
[5] = N/A [
MEM] = Activates any PGMs that have Event Group #10 as their Activation Event
[6] = N/A [
TBL] = Activates any PGMs that have Event Group #11 as their Activation Event
[7] = N/A
[] = Paramedic alarm
* If you do not enter a value for a button, that button is disabled.

Table of Contents

Question and Answer IconNeed help?

Do you have a question about the Paradox MG5000+ and is the answer not in the manual?

Paradox MG5000+ Specifications

General IconGeneral
StayD ModeYes
Zones32
Wireless ExpansionYes
Remote ControlYes
PGMs2
Remote ControlsCompatible with MG/SP remote controls
Battery Backup12V 7Ah battery (not included)
Outputs2 programmable outputs

Summary

Introduction to MG5000+/MG5050+ Security System

System Features

Details the capabilities and functionalities of the MG5000+/MG5050+ security system.

MG5050+ Installation Requirements

Lists the essential hardware and software prerequisites for installing the MG5050+.

System Overview and Modules

Provides a breakdown of system modules and their maximum per system count.

Module Current Consumption List

Details the current draw for various system modules under different operating conditions.

MG5000+/MG5050+ Technical Specifications

Installation Guide

Location and Mounting Guidelines

Guides on selecting an optimal installation site and physically mounting the control panel.

EN 50131 Compliancy Requirements

Lists the necessary components and firmware for meeting EN 50131 security standards.

Earth Grounding Procedures

Explains the proper grounding procedures for safety and lightning protection.

AC Power Connection Details

Details the requirements and connection methods for the AC power transformer.

Backup Battery Installation

Provides instructions for connecting a backup battery for power loss protection.

MG5000+ PCB Layout and Connections

MG5050+ PCB Layout and Connections

PCB Metal Box Installation Instructions

Auxiliary Power Terminals Usage

Telephone Line Connection Guide

Alarm Transmission Process

Bell Output Connection

Programmable Output Connections (PGMs)

Single Zone Inputs Configuration

Advanced Technology Zone (ATZ) Connections

Fire Circuits Wiring and Programming

System Programming Methods

BabyWare Software for Windows

Instructions for programming the system using the BabyWare PC software.

Programming Using a Keypad

Guides on entering programming mode and performing system setup via keypad.

Single Digit Data Entry Method

Explains the method for entering data using decimal or hexadecimal values.

Feature Select Programming Method

Describes how to program features by selecting options via keypad keys.

Data Display Mode on Keypad

How to view programmed data on the keypad without making changes.

Configuring Keypad Zone Numbers

LCD Keypad Labeling

LCD Keypad Input Keys

Details the special function and alphanumeric keys available on LCD keypads.

Label Sections for Programming

Lists the sections for programming custom labels for zones, PGMs, users, and modules.

Special Characters and Letter Assignment

Provides character catalogues and assignment methods for various languages.

Access Codes Management

Access Code Length Configuration

Defines whether access codes are 4 or 6 digits and the implications of changing this setting.

Installer Code Setup

Details the default and programming method for the Installer Code.

Maintenance Code Setup

Explains the default and programming method for the Maintenance Code.

System Master Code Setup

Describes the default and programming for the System Master Code.

User Code Options Overview

Defines how users can arm/disarm partitions and activate PGMs.

Partition 1 Assignment for User Codes

Allows assignment of user codes to partition 1, affecting arming/disarming capabilities.

User Code Options for Partitions and Features

Partition 2 Assignment for User Codes

Allows assignment of user codes to partition 2, affecting arming/disarming capabilities.

Bypass Programming Permissions

Enables user codes to perform bypass programming on assigned partitions.

Stay/Sleep Arming Permissions

Allows user codes to perform Stay or Sleep arming on assigned partitions.

Force Arming Permissions

Allows user codes to perform Force arming on assigned partitions.

Arm Only User Code Option

Enables user codes to arm partitions but not disarm them.

PGM Activation Control via User Code

Configures user codes to activate or deactivate PGMs.

Duress Code Functionality

Enables a silent alert transmission when a duress code is entered.

Lock Master Code Setting

Locks or unlocks the System Master Code, preventing its modification.

StayD Mode Operation

StayD Mode Overview

Explains the StayD mode for integrated, simplified security and automatic rearming.

StayD Entry/Exit Paths

Defines programmed pathways for users to enter and exit the property securely.

Entry/Exit with a Keypad

Describes how to use a keypad for entering and exiting while maintaining StayD.

Entry/Exit with a Remote Control

Explains using remote controls for entry/exit within the StayD mode.

Window Mode and Re-arm Delay

Allows opening one exterior zone in Stay mode and sets re-arm delay.

StayD Advanced Settings

Configuration for Flex-Instant delay and re-arm delay timers.

Zone Programming Basics

Zone Definitions Explained

Defines the behavior of zones, including alarm types and states.

Entry Delay 1 Zones Setup

Configures zones for a primary entry delay timer upon system arming.

Entry Delay 2 Zones Setup

Configures zones for a secondary entry delay timer upon system arming.

Entry Delay 1 (Full Arm) Zones

Sets entry delay for full arming; bypassed during Stay/Sleep arming.

Zone Programming - Delay and Instant Types

Entry Delay 2 (Full Arm) Zones

Sets entry delay for full arming; bypassed during Stay/Sleep arming.

Follow Zones Behavior

Zones that generate an alarm after an entry delay or when another entry delay zone opens.

Follow (Sleep / Full Arm) Zones

Zones that follow entry delay during regular/sleep arming, bypassed during Stay arming.

Follow (Full Arm) Zones

Zones that follow entry delay during regular arming; bypassed during Stay/Sleep.

Instant Zones Activation

Zones that trigger an immediate alarm when opened while armed.

Instant (Sleep / Full Arm) Zones

Zones that trigger immediate alarm during regular/sleep arming; bypassed during Stay.

Instant (Full Arm) Zones

Zones that trigger immediate alarm during regular arming; bypassed during Stay/Sleep.

Instant Fire Zones

Zones that trigger an immediate alarm, with audible siren, for fire events.

Zone Programming - Fire and Burglary Types

Delayed Fire Zones

Zones that trigger a delayed alarm for fire events, with pulsed siren output.

Instant Fire Silent Zones

Zones that trigger an immediate, silent alarm for fire events.

Delayed Fire Silent Zones

Zones that trigger a delayed, silent alarm for fire events.

24 Hr. Buzzer Zones

Zones that provide keypad buzzer notification for breaches, without siren activation.

24 Hr. Burglary Zones

Zones that trigger an immediate alarm for burglary, type defined by options [4]/[5].

24 Hr. Hold-up Zones

Zones that trigger an immediate alarm for hold-up situations.

24 Hr. Gas Zones

Zones that trigger an immediate alarm for gas detection.

24 Hr. Heat Zones

Zones that trigger an immediate alarm for heat detection.

24 Hr. Water Zones

Zones that trigger an immediate alarm for water detection.

Zone Programming - Special Types and Status

24 Hr. Freeze Zones

Zones that trigger an immediate alarm for freeze detection.

24Hr. Panic Zone Configuration

Zones that trigger an alarm based on panic options set in section [702].

Instant No Pre-Alarm Zone

Zone definition that ignores Flex-Instant delay, acting as a traditional Instant zone.

Follow No Pre-Alarm Zone

Zone definition that ignores Flex-Instant delay, acting as a traditional Follow zone.

Zone Definition Status Table

Table showing how zone definitions change based on arm status and Flex-Instant.

Zone Partition Assignment

Assigns zones to Partition 1, Partition 2, or both for independent system operation.

Zone Options Selection

Allows selection of various options for zones using the Multiple Feature Select Method.

System Arming Configuration Options

Auto Zone Shutdown Feature

Automatically disables zones after a programmed number of alarms within a single armed period.

Bypassable Zones Configuration

Enables user codes to bypass specific zones, preventing them from triggering alarms.

RF Zone Supervision Settings

Monitors wireless transmitters for status signals, generating troubles if signals are lost.

Alarm Types Configuration

Defines how alarms are reported: steady audible, pulsed audible, silent, or report only.

Intellizone Feature

Reduces false alarms by delaying immediate zone alarms for a set period.

Delay Alarm Transmission

Delays the transmission of alarm signals to the monitoring station after an event.

Advanced Zone Configurations

Force Zones Setup

Zones that are considered deactivated at arming time; re-activated upon closing.

EOL Zones Configuration

Configuration for enabling or disabling the use of End-of-Line (EOL) resistors for zones.

ATZ Zone Doubling Setup

Enables the ATZ feature to install two detection devices per input terminal.

Tamper Input Configuration for Modules

Configures specific inputs on expansion modules as tamper detection points.

Zone Input 1 as 2-Wire Smoke Input

Sets Zone Input 1 to function as a 2-wire smoke input.

Zone Timers Configuration

Defines the response time for the control panel to react to an open zone.

Keyswitch Programming

Keyswitch Numbering

Assigns hardwired inputs to any of the 32 keyswitch zones in the control panel.

Keyswitch Definitions

Determines how a keyswitch is used, such as Maintained or Momentary.

Keyswitch Options

Configures options like Stay/Sleep Disarm, Arm Only, and specific arming types.

Wireless Features and Supervision

Supervision Options for Wireless Devices

Defines how the system monitors wireless transmitters for status and potential issues.

RF Module Supervision Timer Settings

Sets the interval for wireless transmitter check-in signals and defines supervision actions.

RF Jamming Supervision

Enables detection and reporting of RF jamming or interference.

Remote Control Programming

Assigning Remote Controls to the Panel

Guides on assigning up to 32 programmable remote controls to the panel.

Deleting Assigned Remote Controls

Instructions for removing previously assigned remote controls from the system.

Programming Remote Control Buttons

Arming and Disarming Options

Stay Arming Logic

Configures system to switch to Stay arming if exit delay is not used.

Bypass Logic for Follow Zones

Sets follow zones to entry delay 2 when a delay zone is bypassed.

Force Arming Defaults

Determines if Regular, Stay, or Sleep arming defaults to Force Arming when zones are open.

Arming Restrictions

Prevents arming if the system detects battery, tamper, or wireless supervision failures.

Auto-Arming Features

Timed Auto-Arming

Allows partitions to automatically arm daily at a programmed time.

No Movement Auto-Arming

Automatically arms partitions if no movement is detected for a set period.

Auto-Arming Options

Specifies the arming method (Regular, Sleep, Stay) for auto-arming features.

One-Touch Arming and Bypass

One-Touch Arming Methods

Allows users to arm the system (Regular, Stay, Sleep) by pressing and holding a single key.

One-Touch Bypass Programming

Enables one-touch bypass programming by pressing and holding the [BYP] key.

Exit Delay Management

Exit Delay Settings

Sets the time allowed for users to leave the protected area after arming.

Beep On Exit Delay

Enables audible beeps on the keypad during the exit delay period.

Bell Squawk Control

Configures bell squawks on keypad or remote arm/disarm and disables for Stay/Sleep arming.

Fast Exit Procedure

Allows a faster exit procedure when the system is already Stay or Sleep armed.

Alarm Options and Behavior

Bell Cut-Off Timer

Sets the duration the bell or siren remains active after an audible alarm.

Recycle Alarm Logic

Defines how the system re-verifies zone status after the Bell Cut-Off Timer elapses.

Tamper and Supervision Settings

Configures tamper detection, bypass, and supervision for system components.

Panel Tamper and Panic Features

Tamper Supervision on Panel

Enables or disables tamper detection and reporting for the main control panel.

Keypad Panic Options

Configures silent or audible panic alarms triggered by keypad key combinations.

Panic Lockout Timer

Prevents remote control disarming for a set period after a panic alarm.

Flex-Instant Delay Function

Delays alarms for Stay/Sleep armed premises, allowing time to disarm.

Reporting and Dialer Settings

Zone Reporting Codes

Programs report codes for specific zone events like alarms and restores.

User Reporting Codes

Programs report codes for user actions like arming, disarming, and alarm cancel.

Special Arming Report Codes

Defines report codes for special arming methods like Auto-Arming and Quick Arming.

Special Disarming Report Codes

Defines report codes for special disarming methods like Cancel Auto-Arm.

Special Alarm Report Codes

Defines report codes for specific alarm types like Emergency Panic and Duress.

System Report Codes

System Trouble Report Codes

Defines report codes for system troubles like AC Failure, Battery Failure, and RF Interference.

System Trouble Restore Report Codes

Defines report codes for when system troubles are restored to normal.

System Special Report Codes

Defines report codes for events like Cold Start, Test Report, and BabyWare communication.

Reporting Management Functions

Clear Reporting Codes

Options to clear zone, user, arm/disarm/alarm, and trouble reporting codes.

Reset Reporting Codes

Resets zone, user, arm/disarm/alarm, and trouble reporting codes to their default values.

Monitoring Station Telephone Numbers

Programming up to two different monitoring station telephone numbers and a backup number.

Personal Dialing Numbers Setup

Programming personal numbers for alarm or panic calls, including call parameters.

Reporting Formats and Event Call Direction

Reporting Formats Selection

Selects reporting formats (Ademco, Silent Knight, SESCOA, SIA) for communication with monitoring stations.

Standard Pulse Formats

Details standard pulse reporting formats like Ademco slow, Silent Knight, and SESCOA.

Ademco Express Format

Explains the Ademco Express high-speed reporting format for transmitting report codes.

Ademco Contact ID Format

Describes Ademco Contact ID, a fast tone reporting format with industry standard messages.

Event Call Direction Configuration

Determines which telephone numbers (MSTN 1/2, Pager) are dialed for specific event types.

Dialing Parameters Configuration

Account Numbers Setup

Sets 3 or 4-digit Partition Account Numbers for correct identification during communication.

Dialing Method Selection

Selects between Pulse Dialing and Tone/DTMF Dialing for communication.

Pulse Ratio Settings

Specifies the pulse ratio (1:2 or 1:1.5) for Pulse Dialing methods.

Maximum Dialing Attempts

Sets the number of times the control panel attempts to call a monitoring station number.

Maximum Dialing Attempts - VDMP3

Sets the number of attempts for the VDMP3 Plug-in Voice Dialer to call a number.

Delay Between Dialing Attempts

Defines the time delay between consecutive dialing attempts.

Switch to Pulse on 5th Attempt

Automatically switches to Pulse Dialing on the 5th dialing attempt if unsuccessful.

Alternate Dial Option

Determines if the backup number is dialed after every failed attempt or only after all attempts.

Force Dial Option

Enables dialing a telephone number even if no dial tone is detected.

Report Timing and Event Logging

Recent Closing Delay

Sets a delay period after arming; alarms during this period trigger a Recent Close report.

Auto Test Report Scheduling

Schedules periodic test reports to be transmitted to the monitoring station.

Armed and Disarmed Report Delays

Sets delay for reports to be sent after arming or disarming events.

Closing Delinquency Delay

Reports if a partition is not armed within a programmed number of days.

Power Failure Report Delay

Defines the delay before transmitting an AC Failure report code.

Report System Disarming Configuration

Configures when disarming report codes are sent: always or only after an alarm.

Communication and Supervision Settings

Zone Restore Report Options

Determines when Zone Alarm Restore report codes are sent to the monitoring station.

Telephone Line Monitoring (TLM)

Monitors the telephone line status, generating troubles or alarms if the line fails.

TLM Fail Timer

Sets the duration the telephone line must be absent for a TLM failure condition.

Pager and Personal Reporting Settings

Configures delays and message repetition for pager and personal reporting.

Disable Reporting Feature

Enables or disables the system's ability to report events to a monitoring station.

Programmable Outputs (PGM) Configuration

PGM Activation Event Setup

Programs PGMs to activate based on specific system events.

PGM Deactivation Event Setup

Sets events or delays for PGMs to return to their normal state after activation.

PGM Delay Configuration

Sets a delay period for PGM deactivation after an activation event.

PGM Options Settings

Configures PGM behavior such as pulse mode, state (NO/NC), and supervision.

PGM Programming and Management

PGM Programming Process

Two-step process to assign and program PGMs for system control.

Assigning and Deleting PGMs

Instructions for assigning and removing PGMs from the control panel.

System Settings and Configuration

Version Number Display

Displays the current firmware version of the control panel.

Push Button Power Reset

Resets the control panel to factory default settings using a physical button.

Installer Lock Feature

Locks programming to prevent unauthorized changes, even after a hardware reset.

Keypad Lockout Feature

Denies keypad access after a specified number of invalid code entries.

Partitioning the Security System

Divides the system into two independent areas (Partition 1 and 2) for localized control.

Confidential Mode Settings

Turns off keypad LEDs until a key press or access code entry to enhance privacy.

Installer Function Keys Access

Accesses special installer functions through key combinations.

Time and Warning Settings

Daylight Savings Time Adjustment

Automatically adjusts the system clock for daylight saving time changes based on country code.

Customized Daylight Saving Programming

Allows manual setting of custom daylight saving time start and end periods.

Audible Trouble Warnings

Enables audible trouble warnings for all system troubles, including AC failure.

Display Entry Delay on LCD Keypad

Shows entry delay status on K32LCD+ keypads when enabled.

Keypad Display Settings

Display Exit Delay on LCD Keypad

Shows exit delay status on K32LCD+ keypads when enabled.

BabyWare Software Configuration

Panel Answer Options

Defines how the panel answers incoming calls from the BabyWare software.

Answering Machine Override Delay

Sets delay for panel to override answering machine and answer calls.

Number of Rings Setting

Specifies the number of rings the panel waits before answering a call.

Panel Identifier Setup

Sets a unique 4-digit code to identify the panel to the BabyWare software.

PC Password Configuration

Sets a 4-digit password for the PC to identify itself to the panel.

PC Telephone Number Programming

Stores the telephone number the panel dials to communicate with the PC.

Initiating BabyWare Software Communication

Initiates communication from the panel to the BabyWare software.

Answering BabyWare Software Calls

Allows the panel to manually answer incoming BabyWare software calls for upload/download.

BabyWare Software Communication Methods

Automatic Event Buffer Transmission

Uploads event buffer to BabyWare when 90% capacity is reached.

Call Back BabyWare Security Feature

Enhances security by having the panel call back to verify codes and re-establish communication.

Connecting to BabyWare Software

Diagram and instructions for establishing a physical connection for BabyWare software.

User Operation Interface

Alarm Display on Keypad

How zone alarms are indicated on the keypad, including memory and clearing.

Trouble Display on Keypad

How to view and acknowledge system troubles on the keypad.

Related product manuals