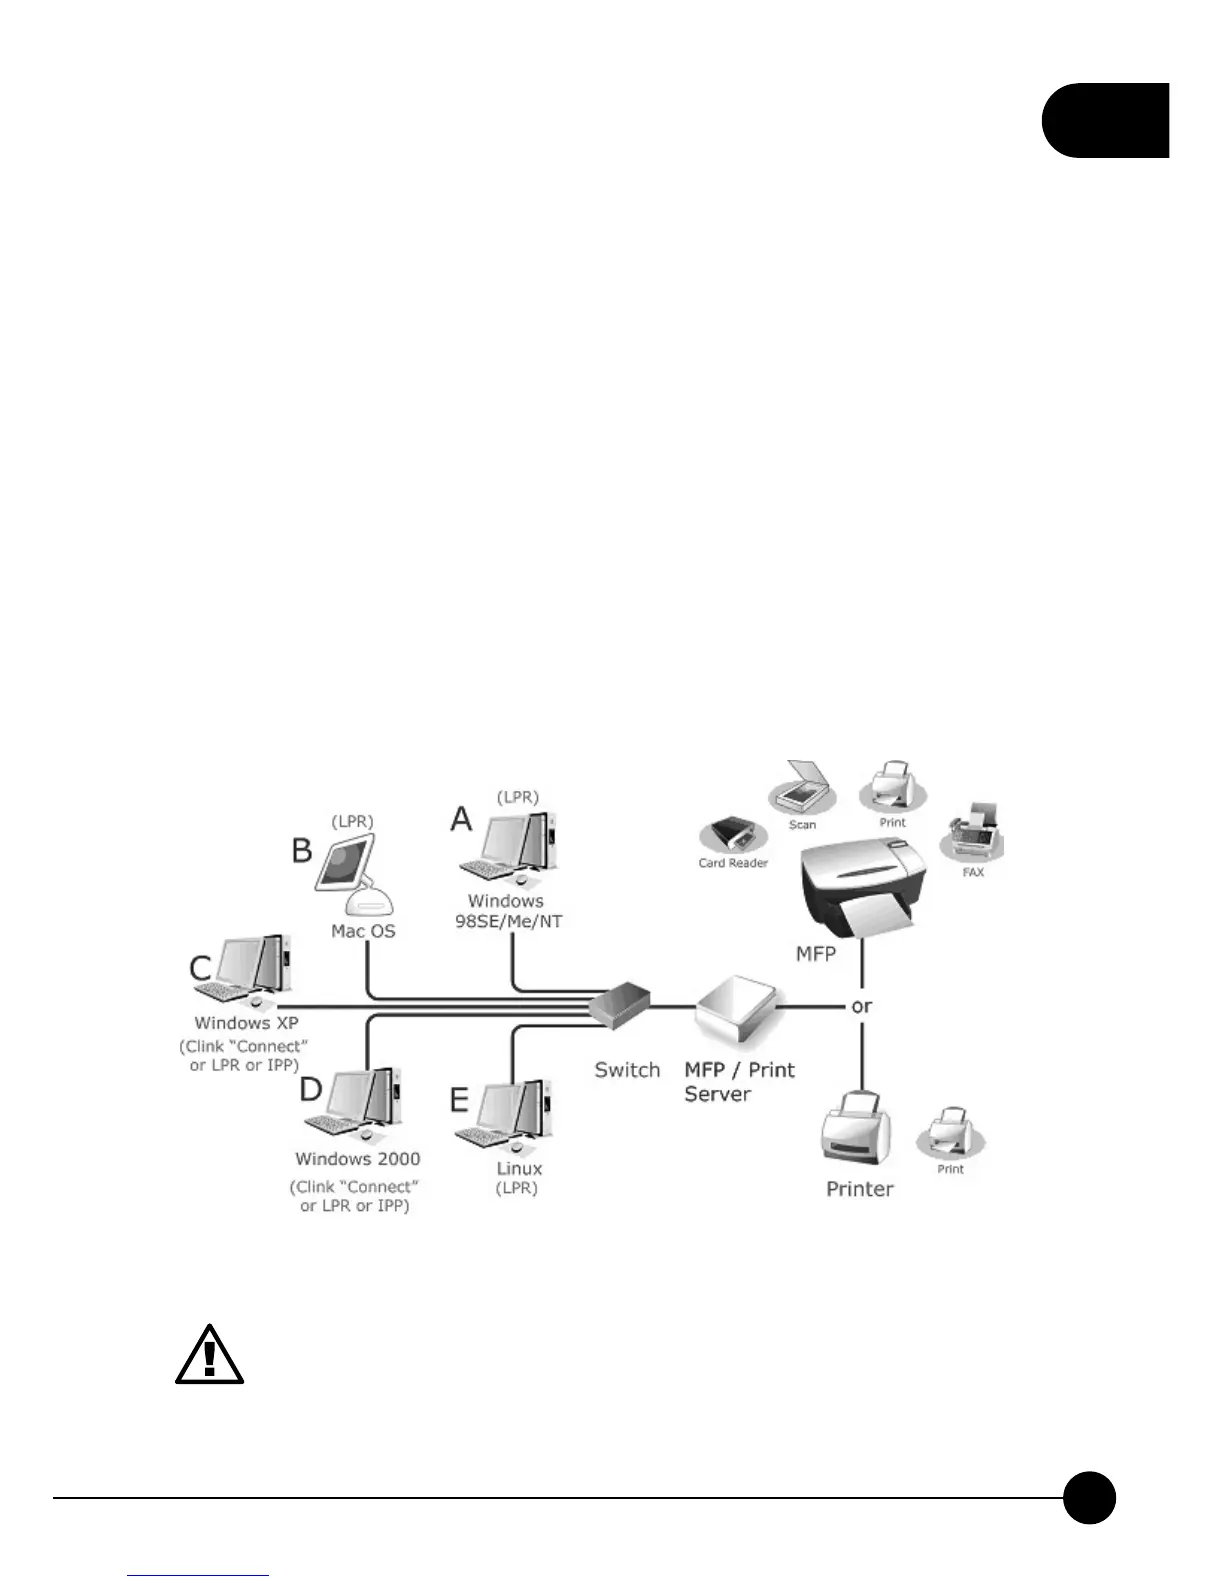
4. How to Set Up Mini-101M
1.Unwrap t he package o f Mini-101M P rint Server a nd check if t he
components are complete with nothing missing.
2.Use USB cable to connect Mini-101M Print Server with the printer
which you want to share with others.
3.Plug the RJ-45 cable into the UTP port on Mini-101M Print Server.
4.At last, connect the AC adapter with Mini-101M and plug the other
side of the power cord into the power socket. Power on Mini-101M
Print Server and it will automatically start the POST (Power-On-Self-
Test). While detecting, the Ready LED will be on and LAN LED will
be blinking for a while and then the Mini-101M will be ready in a short
time.
1.P lug the A C Adapter w hich comes with Mini-101M i n a
different voltage power supply will cause damage on Mini-
101M, and it is not included in warranty.
2.To prevent the compatibility problems between Mini-101M and
a few MFPs or printers, it is recommended that you power on
Mini-101M before the connected MFP or printer.