EasyManua.ls Logo

Peak 212 - User Manual

Peak 212
38 pages
Print Icon
To Next Page IconTo Next Page
Loading...
TWO-POST LIFT
Model:212
Original

Questions and Answers

  • K
    Kaitlin PetersonJul 29, 2025
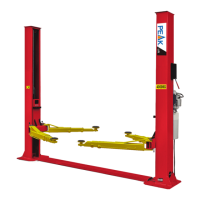
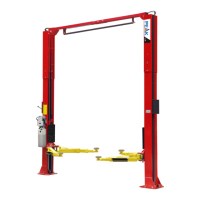
    Why is my Peak 212 lift raising slowly?
    • J
      John LamJul 29, 2025
      If your Peak Lifting Systems lift is raising slowly, here are some potential causes and solutions: 1. The hydraulic system may be jammed: Clean the hydraulic system. 2. The motor might be running on low voltage: Check the electrical system. 3. The oil could be mixed with air: Fill the tank. 4. The gear pump might be leaking: Repair or replace the gear pump. 5. You may be overloading the lift: Check the load.
  • J
    jonesspencerAug 4, 2025
    What to do if the motor runs but the Peak 212 Lifting Systems lift is not raised?
    • J
      Jorge MeyerAug 4, 2025
      If the motor in your Peak Lifting Systems is running but the lift isn't raising, consider these potential causes and solutions: * The motor might be running in reverse rotation: Reverse two power wires. * The gear pump could be out of operation: Repair or replace it. * The release valve may be damaged: Repair or replace it. * The relief valve or check valve might be damaged: Repair or replace them. * The oil level could be low: Fill the tank.
  • P
    Patrick BenderAug 10, 2025
    What to do if my Peak 212 lift cannot lower?
    • M
      Mark HernandezAug 10, 2025
      If your Peak Lifting Systems lift is stuck and cannot lower, here's what could be happening and how to address it: * Safety devices may be locking: Release the safeties. * The release valve might be damaged: Repair or replace it. * The safety cable could be broken: Replace it. * The oil system might be jammed: Clean the oil system.
  • C
    Christina HeathAug 15, 2025
    Why does my Peak 212 Lifting Systems lift not stay up?
    • J
      James WolfeAug 15, 2025
      If your Peak Lifting Systems lift is not staying up, here are possible reasons and solutions: * The release valve might be out of work: Repair or replace it. * There could be leakage from the relief valve or check valve: Repair or replace them. * The cylinder or fittings may have leaks: Repair or replace them.
  • C
    Chris HamiltonAug 21, 2025
    How to fix a Peak 212 Lifting Systems motor that doesn't run?
    • W
      williamstammyAug 21, 2025
      If the motor of your Peak Lifting Systems doesn't run, here's what might be happening and how to address it: * The button might not be working: Replace the button. * Wiring connections could be in poor condition: Repair all wiring connections. * The motor might be burned out: Repair or replace the motor. * The AC contactor may be damaged: Repair or replace it.

Summary

Product Features and Specifications

Model 212 Features

Key features and design aspects of the Model 212 lift.

Model 212 Specifications

Technical specifications including capacity, dimensions, and weight.

Installation Requirements

Tools Required for Installation

A comprehensive list of tools needed for the installation process.

Equipment Storage and Handling

Guidelines for storing, unloading, and transferring the lift equipment.

Concrete Specifications

Requirements for the concrete base to ensure safe installation.

Power Supply Requirements

Electrical power specifications for operating the lift.

Steps of Installation

Location Selection and Layout Marking

Choosing the installation location and marking the layout with a chalk line.

Initial Parts Verification

Checking the packaged lift and hydraulic power unit before assembly.

Detailed Parts Verification

Taking parts from packaging, removing columns, and checking against lists.

Parts Bag Verification

Checking parts in the parts bag according to the parts bag list.

Column Placement and Top Plate Installation

Positioning columns and installing the top plate assembly.

Column Positioning and Anchor Bolt Installation

Placing columns, installing anchor bolts, and checking plumbness.

Securing Anchor Bolts

Steps for drilling and fixing the anchor bolts into the concrete.

Safety Device Installation

Installing the safety devices on both the power and offside columns.

Carriage Synchronization

Lifting and locking the carriages at the same level for synchronization.

Synchronization Cable Installation

Passing and installing the synchronization cables between carriages.

Synchronization Cable Routing

Routing and securing cables for 3692mm width configurations.

Synchronization Cable Finalization

Completing the cable routing as indicated by the diagram.

Safety Cable Installation

Installing the safety cable from the offside to the power side device.

Hydraulic Power Unit and Hose Assembly

Connecting the hydraulic power unit and oil hoses to the lift.

Floor Cover Installation

Installing the floor cover based on column distance requirements.

Lifting Arm and Lock Adjustment

Installing lifting arms and adjusting the arm locks for proper engagement.

Hydraulic System Fill and Tightening

Tightening hydraulic fittings and filling the reservoir with hydraulic oil.

Power Supply Connection (Single-Phase)

Connecting the single-phase power supply according to wiring diagrams.

Power Supply Connection (Three-Phase)

Wiring steps for connecting the 380V three-phase motor.

Power Supply Connection (Three-Phase)

Wiring diagram for the 380V three-phase motor connection.

Exploded View Overview

Model 212 Assembly Diagram

A general exploded view showing all major components of the Model 212 lift.

Exploded View Details

Lifting Arm Assembly

Detailed exploded view and parts list for the lifting arm assembly.

Chain Pulley Bearing Assembly

Detailed exploded view and parts list for the chain pulley bearing assembly.

Oil Cylinder Assembly

Detailed exploded view and parts list for the oil cylinder components.

Power Unit Assembly (Single-Phase)

Detailed exploded view and parts list for the single-phase power unit.

Power Unit Assembly (Three-Phase)

Detailed exploded view and parts list for the three-phase power unit.

Hydraulic Valve Illustration

Illustration showing the hydraulic valve components of the power unit.

Test Run Procedures

Synchronous Cable Adjustment

Adjusting cable tension for synchronized lift operation.

Safety Cable Adjustment

Adjusting the safety cable to ensure proper functionality.

Lowering Speed Adjustment

Modifying the lift's lowering speed using the throttle valve.

Load Testing

Performing tests with load to verify lift performance and safety.

Operation Instructions

Lifting a Vehicle

Step-by-step guide for safely lifting a vehicle onto the lift.

Lowering a Vehicle

Step-by-step guide for safely lowering a vehicle from the lift.

Maintenance Schedule

Monthly Maintenance

Tasks to be performed monthly to maintain the lift.

Semi-Annual Maintenance

Tasks to be performed every six months for maintenance.

Oil Cylinder Maintenance

Specific maintenance procedures for the oil cylinder.

Troubleshooting

Motor Issues

Diagnosing and resolving problems related to the motor not running.

Lifting Performance Issues

Troubleshooting when the motor runs but the lift does not raise.

Lift Holding Issues

Diagnosing and resolving issues with the lift not staying up.

Slow Lifting Speed

Troubleshooting causes and remedies for slow lift operation.

Lowering Issues

Diagnosing and resolving problems when the lift cannot be lowered.

Lift Disposal

Parts List for Model 212

Major Components

List of major components including columns, power unit, and carriages.

Peak 212 Specifications

General IconGeneral
BrandPeak
Model212
CategoryLifting Systems
LanguageEnglish

Related product manuals