INTELLIVALVE
™
Valve Actuator Installation and User’s Guide
Installing the IntelliValve
™
Valve Actuator
INSTALLATION
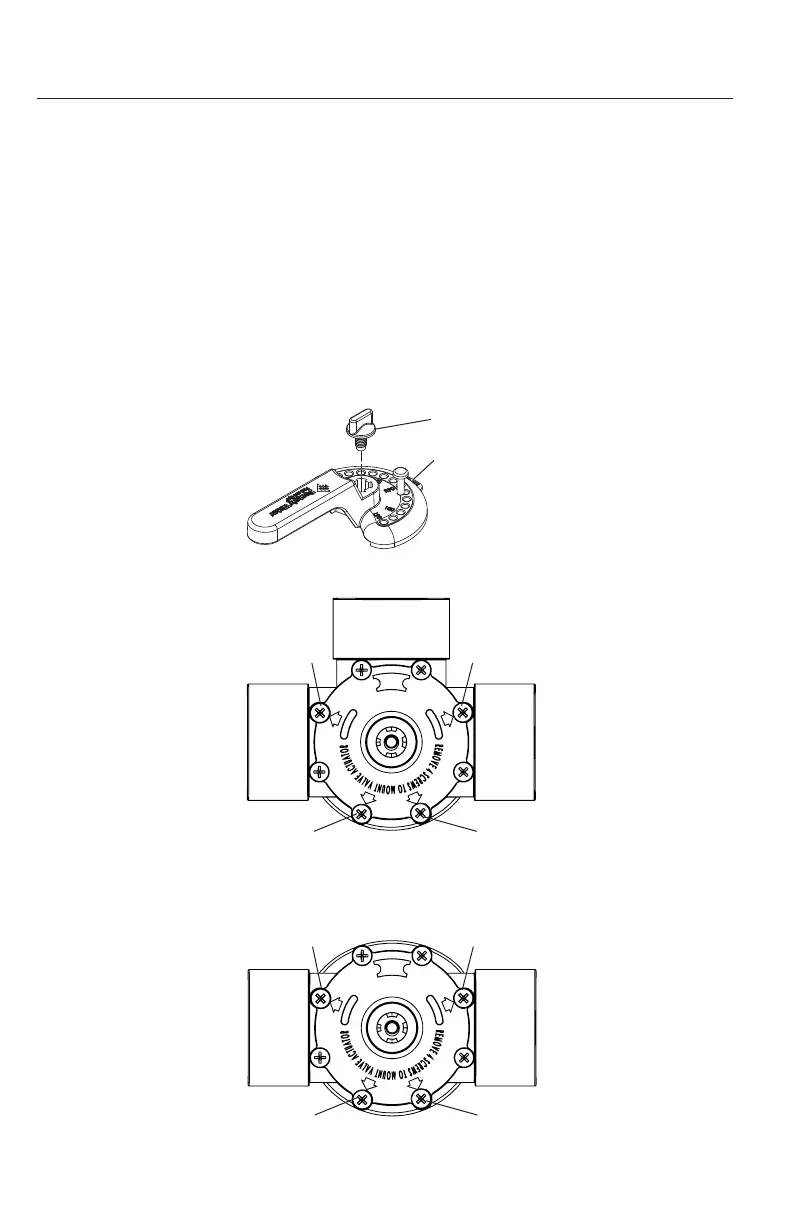
To install the IntelliValve valve actuator (2 and 3-way valve assembly example shown):
Valve assembly without actuator:
• Unscrew and remove the diverter valve knob and handle. Remove the
four (4) screws from the valve assembly top cover (embossed arrows
indicate the screw locations). See Figure 1, 2 and 3.
Valve knob
Valve handle
Remove screw
Remove screw Remove screw
Remove screw
Figure 2. 3-Port Valve
Figure 3. 2-Port Valve
Remove screw
Remove screw Remove screw
Remove screw
Figure 1. Diverter Handle/Knob
The IntelliValve
Valve Actuator can be installed on a 2-way, 3-way or 3-way Y valve
assembly.
Note: To connect the IntelliValve
valve actuator power cable to the automation
control system, see page 17 and 18.
Note: After installing the IntelliValve actuator, proceed to “Setting Home Position”
on page 9.
5
 Loading...