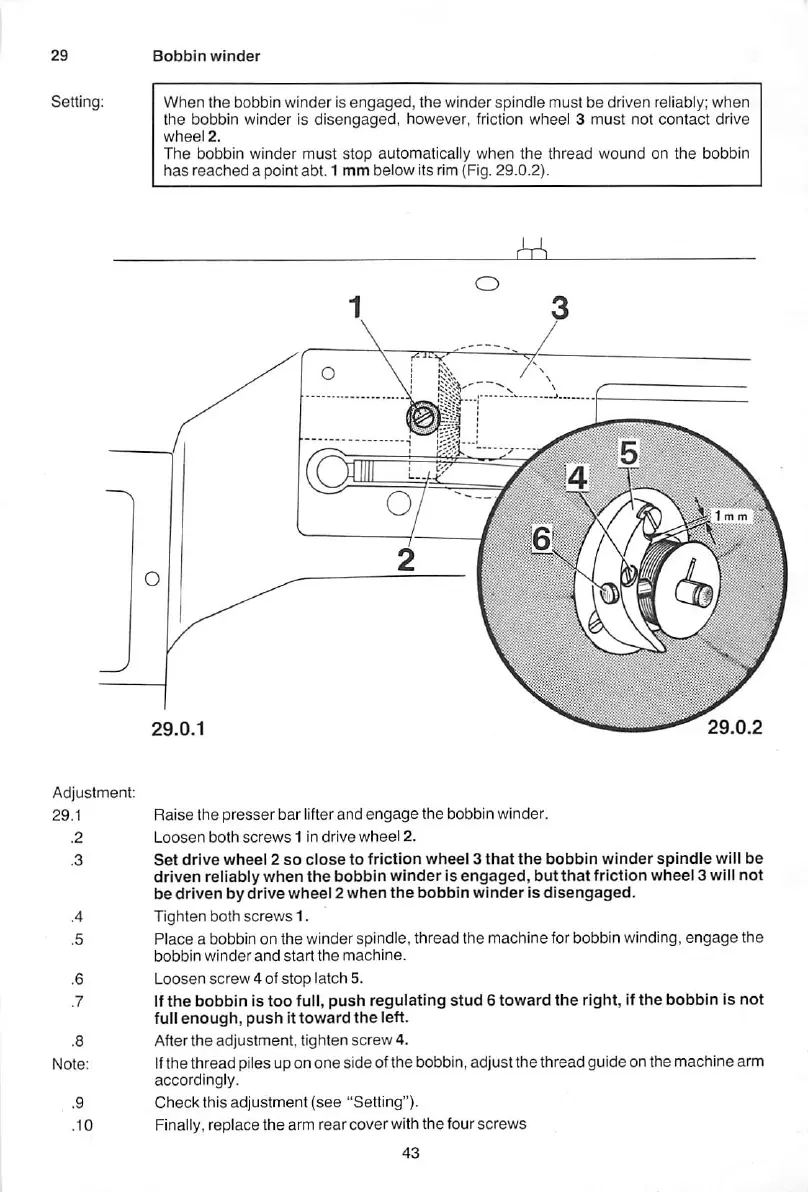
Bobbin
winder
When
the
bobbin winder is
engaged,
the
winder spindle must be driven reliably;
when
the bobbin winder is
disengaged,
however, friction wheel 3
must
not
contact
drive
wheel
2.
The
bobbin winder
must
stop
automatically
when
the
thread
wound on
the
bobbin
has
reached
a point abt. 1 mm below its rim(Fig. 29.0.2).
29.0.2
Raise
the
presser
bar
lifterand
engage
the bobbin winder.
Loosen
both
screws
1 in
drive
wheel
2.
Set
drive
wheel
2
so
close
to
friction
wheel
3
that
the
bobbin
winder
spindle
will
be
driven
reliably
when
the
bobbin
winder
is
engaged,
but
that
friction wheel 3 will
not
be driven by drive wheel 2
when
the
bobbin
winder
is
disengaged.
Tighten
both
screws
1.
Place a bobbin on the winder spindle, thread the machine forbobbin winding,
engage
the
bobbin
winder
and
start
the
machine.
Loosen
screw
4 of
stop
latch 5.
If
the
bobbin
is
too
full,
push
regulating
stud
6
toward
the
right, if
the
bobbin
Is
not
full
enough,
push
it
toward
the
left.
After
the
adjustment,
tighten
screw
4.
If
the
thread
piles up on
one
side
of
the
bobbin, adjust the
thread
guide
on the
machine
arm
accordingly.
Check
this
adjustment
{see
"Setting").
Finally, replace the arm
rear
cover
with
the
four
screws
From the library of Superior Sewing Machine & Supply LLC - www.supsew.com
 Loading...