- Remove the drainage screw from the tank, wash
and blow it properly and make sure the accelera-
tion pump pipes are clean.
- Operate the acceleration pump piston repeatedly
and blow with compressed air.
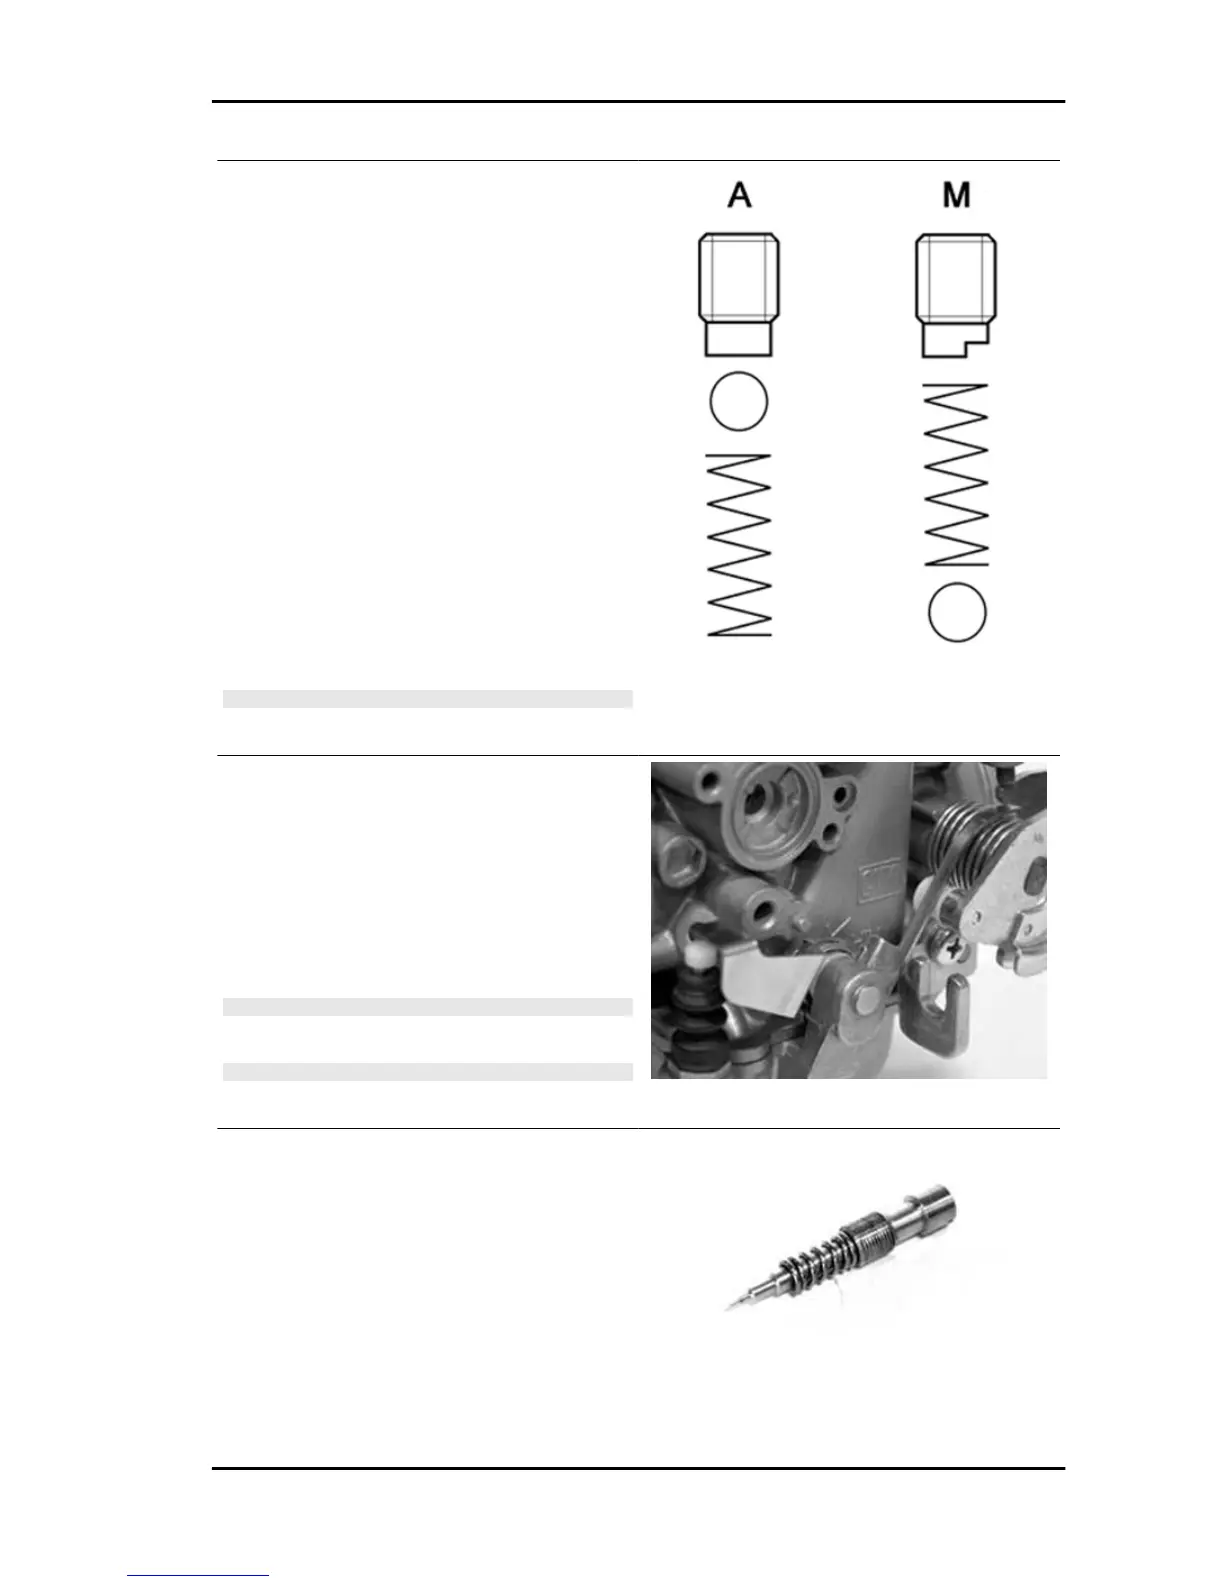
- Reassemble the acceleration pump valves fol-
lowing this order:
INTAKE VALVE (A)
•
Spring
•
Ball
•
Nozzle
IN VALVE (M)
•
Ball
•
Spring
•
Nozzle
N.B.
THE IN VALVE NOZZLE, CORRESPONDING TO THE AC-
CELERATION PUMP, IS MILLED.
-Check the screw tightness introducing a small
amount of fuel in the tank.
- Assemble a new gasket on the tank.
- Assemble the tank on the carburettor body fas-
tening the 4 screws.
- Check that the control roller is free to rotate in its
own seat.
N.B.
MAKE SURE THE TANK GASKET IS CORRECTLY INTRO-
DUCED
N.B.
AVOID DEFORMING THE ACCELERATION PUMP CON-
TROL ROCKING LEVER.
- Wash and blow the flow screw properly.
- Check that screw is not deformed and/or rusty.
- Assemble the spring on the screw.
- Screw the flow screw on the carburettor body.
- The screw final position should be determined by an exhaust fume analysis.
- Adjust the carburettor by turning the screw twice from the close position.
Runner 125 - 200 Engine
ENG - 203