7 INSTALLING THE X-RAY UNIT
18 Planmeca ProOne Installation Manual
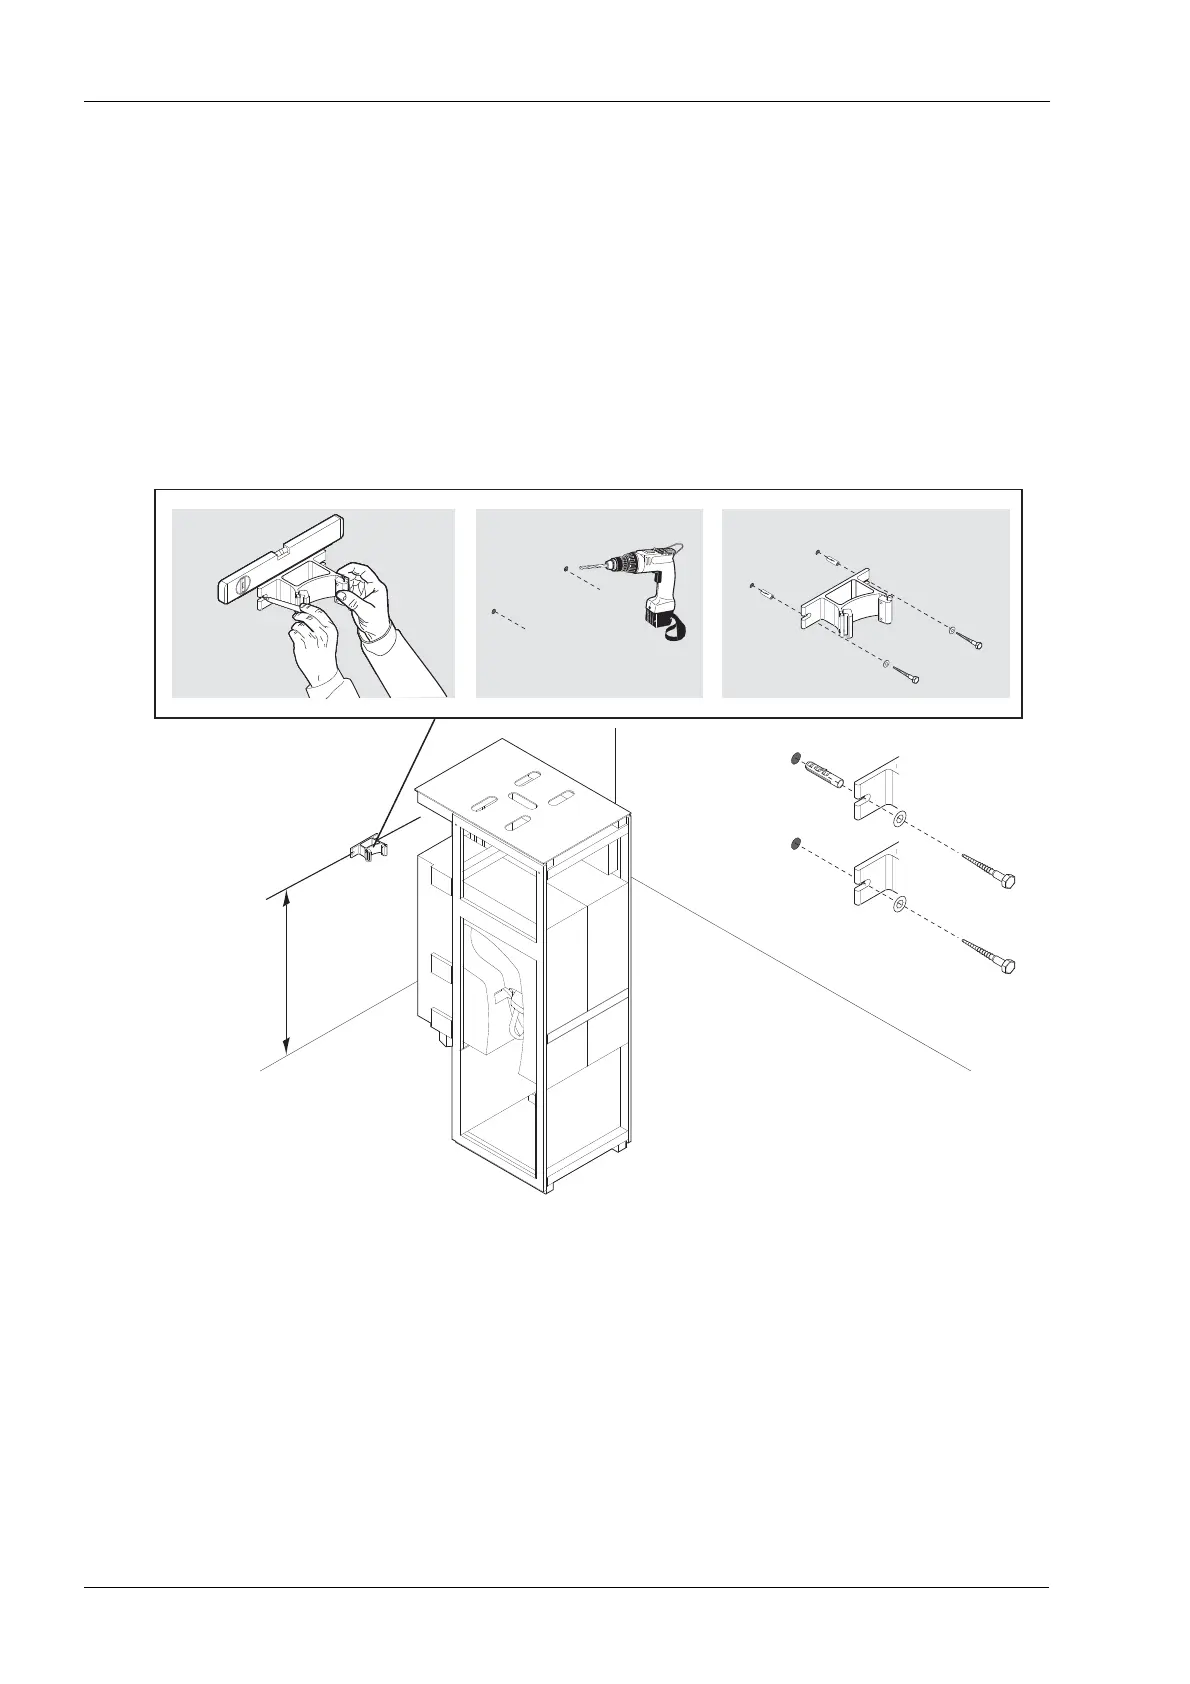
1. Use the wall bracket to mark the positions of the mounting screws. The wall bracket
must be secured to the wall with two mounting screws. Position the wall bracket
approximately 1700 mm (66.9 in.) from the floor. Use a spirit level to ensure that the
wall bracket is level.
• If the wall is made of concrete or brick, use the 10x70 DIN 571 lag screws and the
14x70 expansion anchors to secure the wall bracket / extension plate in position.
Drill two securing holes (ø14mm (0.55 in.), 85 mm (3.3 in.) in depth) and insert
the expansion anchors into the holes.
• If the wall is made of wood, use the 10x70 DIN 571 lag screws. Do not use
expansion anchors with wooden wall. Drill two securing holes (ø7 mm (0.3 in.),
70…75 mm (2.75...3 in.) in depth) for the mounting screws.
If needed, place protective caps (included in the delivery) on the lag screws.
1
2
3
4
5
6
~1700mm
(66.9 in.)
ProO _Pack6.eps
Wall made of concrete or stone
Wooden wall