9 INSTALLING THE DIGITAL SYSTEM
32 Planmeca ProOne Installation Manual
9 INSTALLING THE DIGITAL SYSTEM
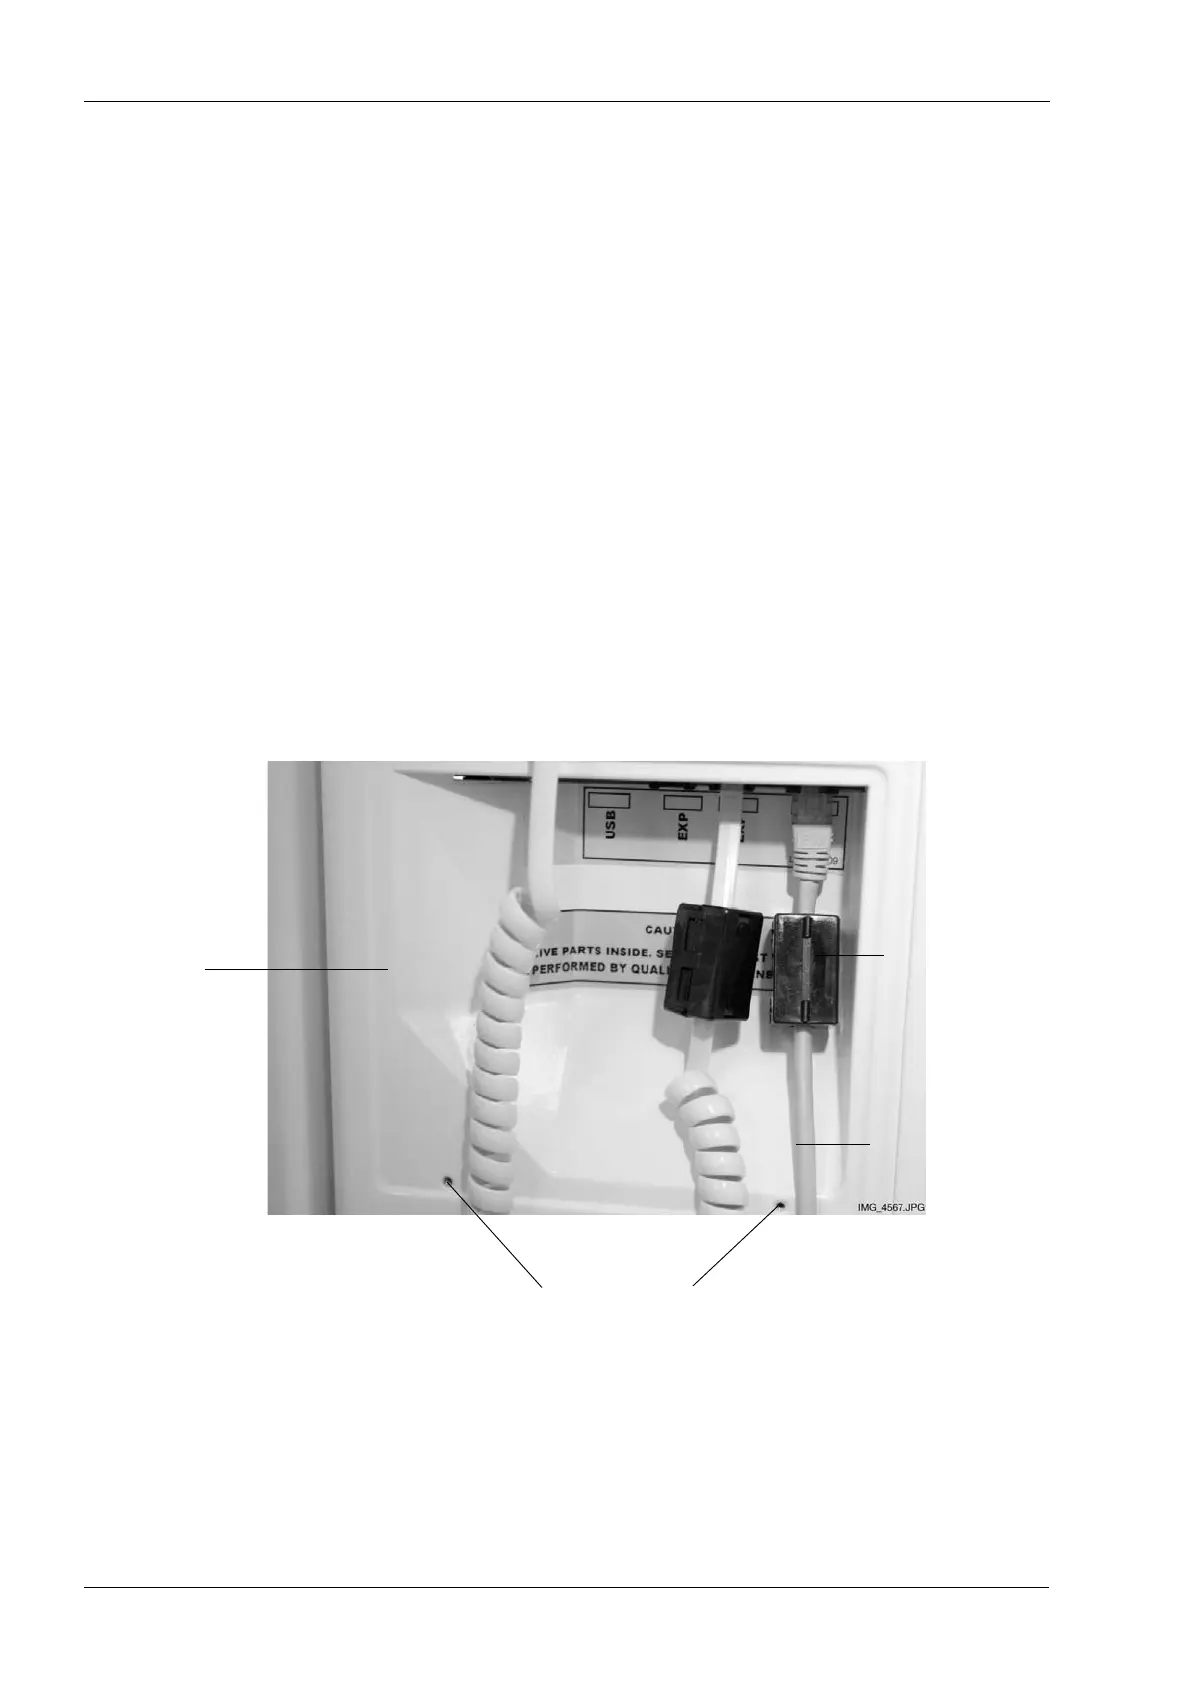
9.1 Connecting the Ethernet cable
The ProOne X-ray unit is connected to the local (10/100 Base) network and used from a
PC with the Romexis imaging software. Use an Ethernet cable to connect the X-ray unit to
the network.
Connect the Ethernet cable to the terminal on the back of the moving column. To do this,
remove the cover that protects the terminals if it is not already off. Remove the protective
cover by unscrewing the two screws at the bottom and then unlatching the cover at the
top.
First attach a ferrite bead (included in the delivery) to the Ethernet cable. Then connect the
cable to the right hand side terminal (marked ETH).
Only the Ethernet cable can be connected to the right hand side terminal. Do not connect
any other cables to this terminal.
The left hand side terminal is a USB port and it is reserved for a USB memory stick. Do not
plug any other USB devices into the USB port.
Reattach the cover that protects the terminals by first latching the cover in place at the top
and then fastening the two screws at the bottom.
Back of
moving column
Ethernet cable
Screws that hold the protective cover in position
Ferrite bead