EasyManuals Logo

Planmeca ProX User Manual

Planmeca ProX
64 pages
To Next Page IconTo Next Page
To Previous Page IconTo Previous Page
Page #15 background imageLoading...
Page #15 background image
Planmeca ProX 11
PREPARATIONS FOR THE EXPOSURE
User’s Manual
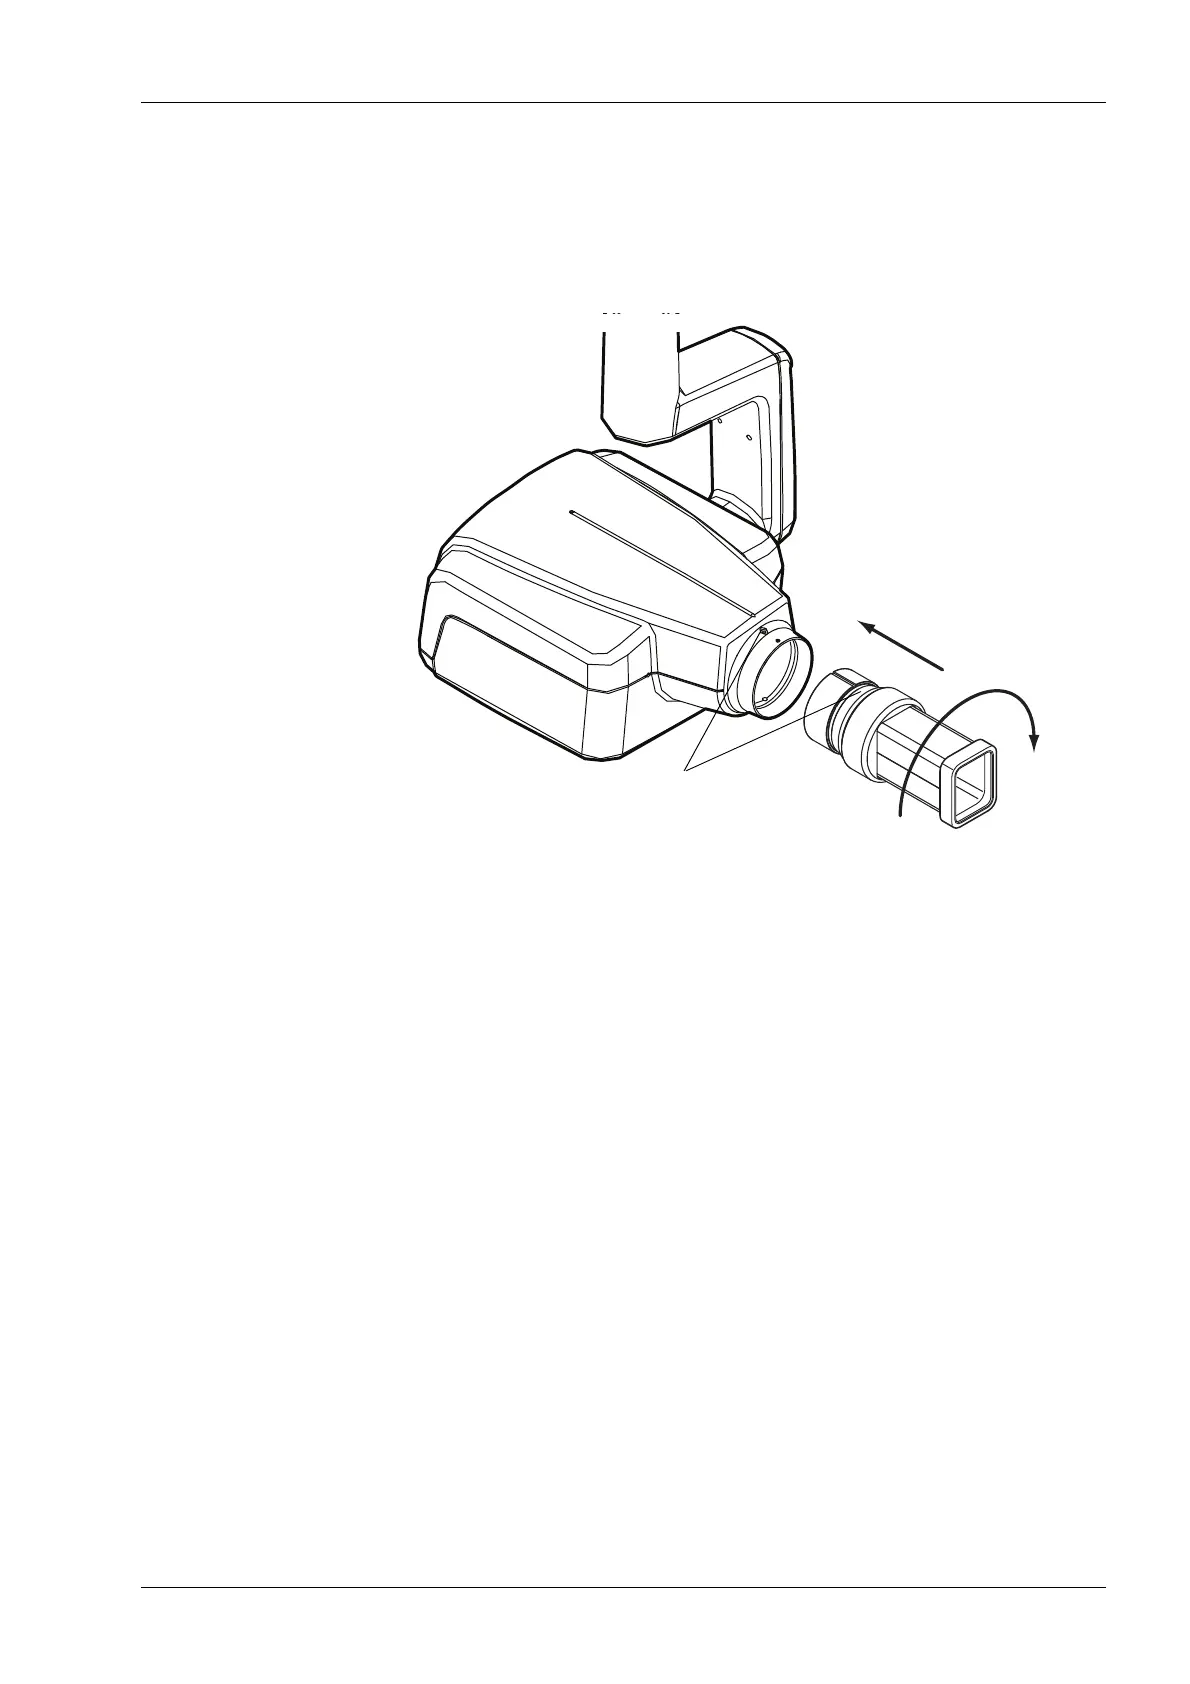
7.2.4 Long rectangular cone
Push the rectangular cone into the short cone so that the
red dots on the short cone and on the rectangular cone are
in line (1), and rotate the cone 180°, until the black dot on
the rectangular cone and the red dot on the short cone are
in line (2). The cone can be now rotated in its position ±90°.
The rectangular cone can be removed when the red dots
on the short cone and on the rectangular cone are in line.
18
1.
2.
Prox_attaching_cone2.eps
Red points

Table of Contents

Other manuals for Planmeca ProX

Questions and Answers:

Question and Answer IconNeed help?

Do you have a question about the Planmeca ProX and is the answer not in the manual?

Planmeca ProX Specifications

General IconGeneral
TypeIntraoral X-ray
Tube current7 mA
Imaging TechnologyDigital
Focal spot0.4 mm
X-ray generatorHigh-frequency
Power Requirements100–240 V AC, 50/60 Hz
Tube voltage60-70 kV

Related product manuals