44
PowerBox-Systems − World Leaders in RC Power Supply Systems
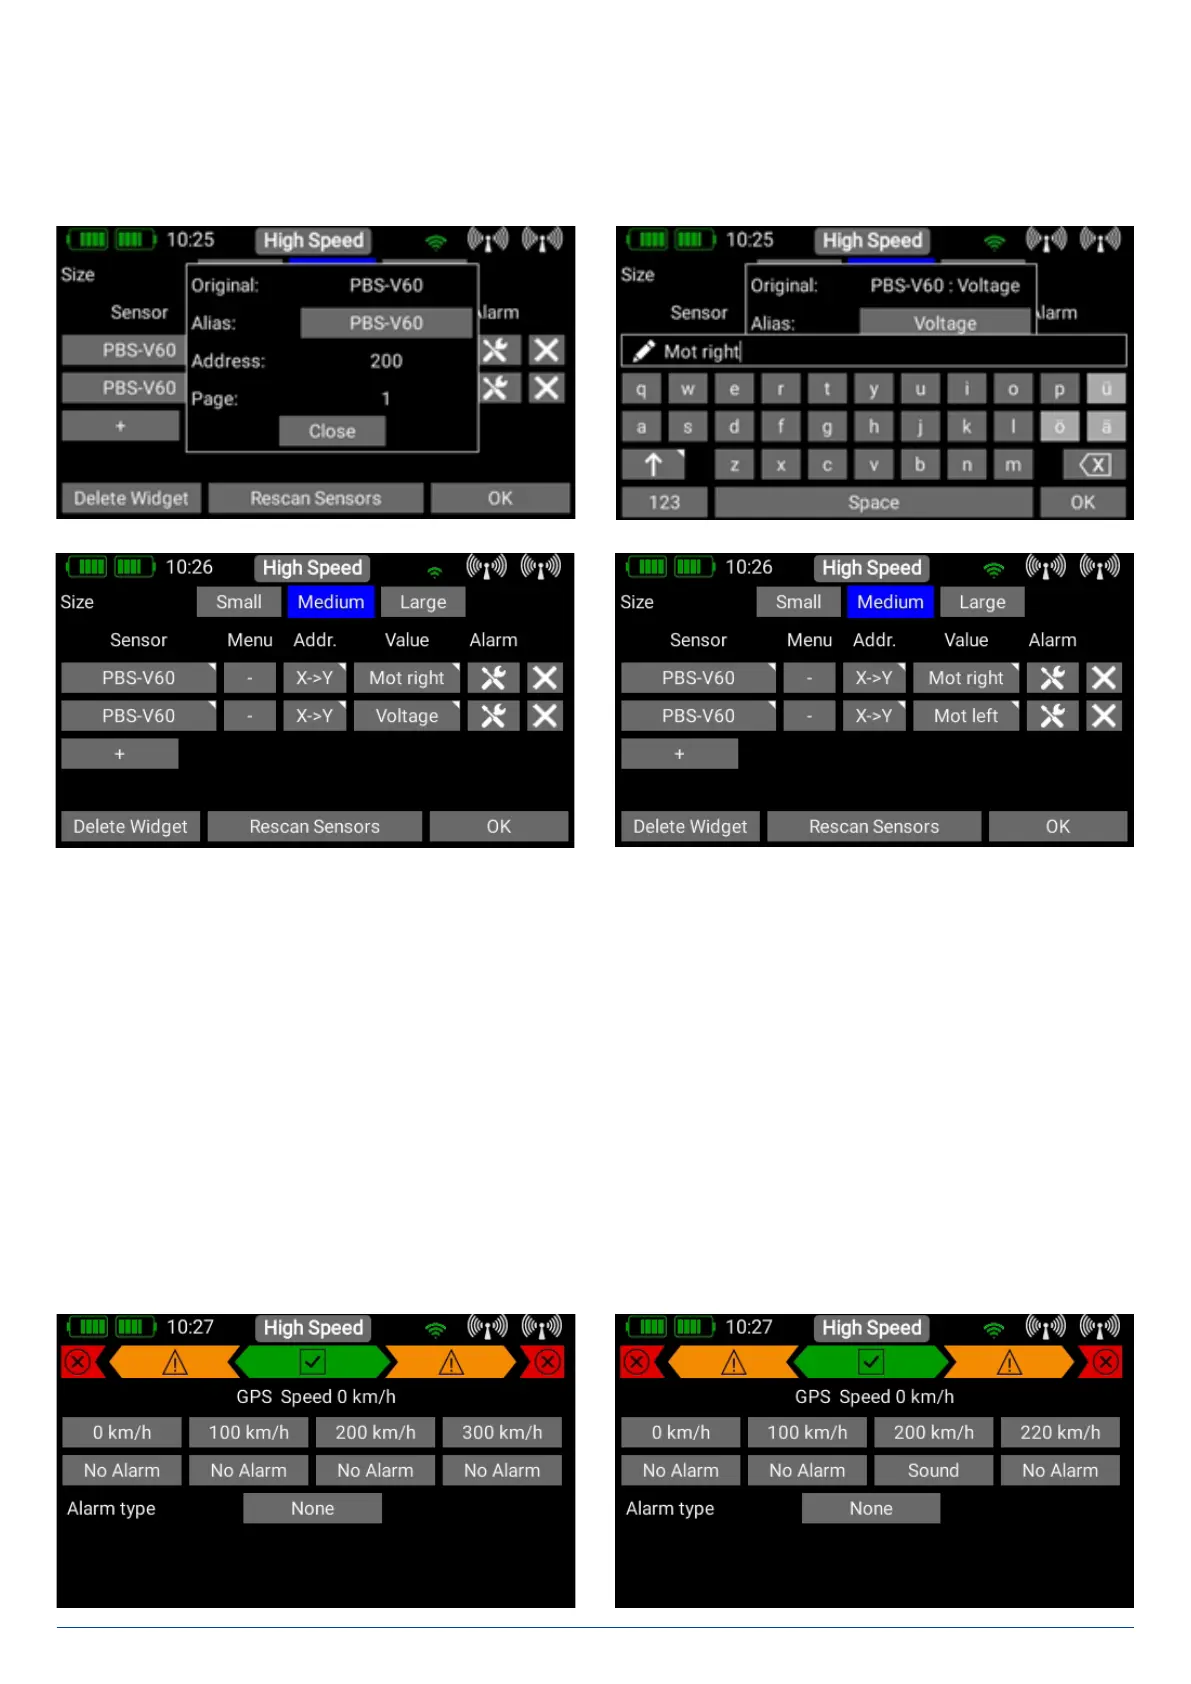
4.1.8. Value
In the column below Value, you will see the name of the sensor value. If you press the name briefly, the screen will display all
available values generated by the sensor.
If you keep your finger on the button, a new window appears which displays the name and the current address of the sensor
value. If you wish to change the name of the value, press the grey field after Alias.
This procedure lets you give the sensor value a new name – and it also lets you adjust the speech outputs to your personal
preference.
4.1.9. Alarm
After the individual sensor values you will see the Alarm button. In the Alarm menu you can set a maximum of four alarm thres-
holds: one yellow alarm and one red alarm for each direction. Starting from the green area in the middle, in which there is no
alarm, you can set an alarm in the two left-hand fields which are tripped if the value falls below a threshold. In the two fields to
the right of the green area you can set the alarms which are tripped when the value exceeds a threshold. For each threshold
you can select different sounds, text or vibration.
In our example we want the GPS speed value to generate a warning when the model flies too fast. When you select the alarm
screen for the first time, default values are already entered which vary according to the current sensor value. You can now change
the threshold values to meet your requirements.