▶
35
Duecanali User Guide
a general indication of the mains levels. Please refer to other
sources (such as calibrated multimeters) for reliable and exact
mains voltage and current measurements.
11.4 Amplier Name
The “Amplier Name” menu gives access to two menu branches:
the “Display Amp data” function and the “Edit Amplier name”
menu.
When the “Display Amp data” function is activated, the main
amplier screen shows the amplier name (20 characters, bold)
blinking to a second screen showing the current selected preset
name (40 characters). If the preset has been altered in any way,
the displayed preset name will have a “Modied” prex to indicate
this.
The amplier name can be assigned by entering the “Edit amplier
name” menu. For information regarding on-screen text editing,
please see “12.4 Save local preset” on page 36.
12 Local presets
All Duecanali Series ampliers have an on board memory capable
of storing up to 50 presets. An amplier preset is a snapshot of the
current amplier status, including the basic amplier settings and
the KDSP board settings if a DSP board is present.
12.1 Locked presets
When the “locked presets” function is active, a number of presets,
determined by the “Locked bank size” menu, is not over writable.
This function’s status can be toggled on/off by entering the Lock
code. For instructions on how to enter and edit text, please see
section “12.4 Save local preset” on page 36.
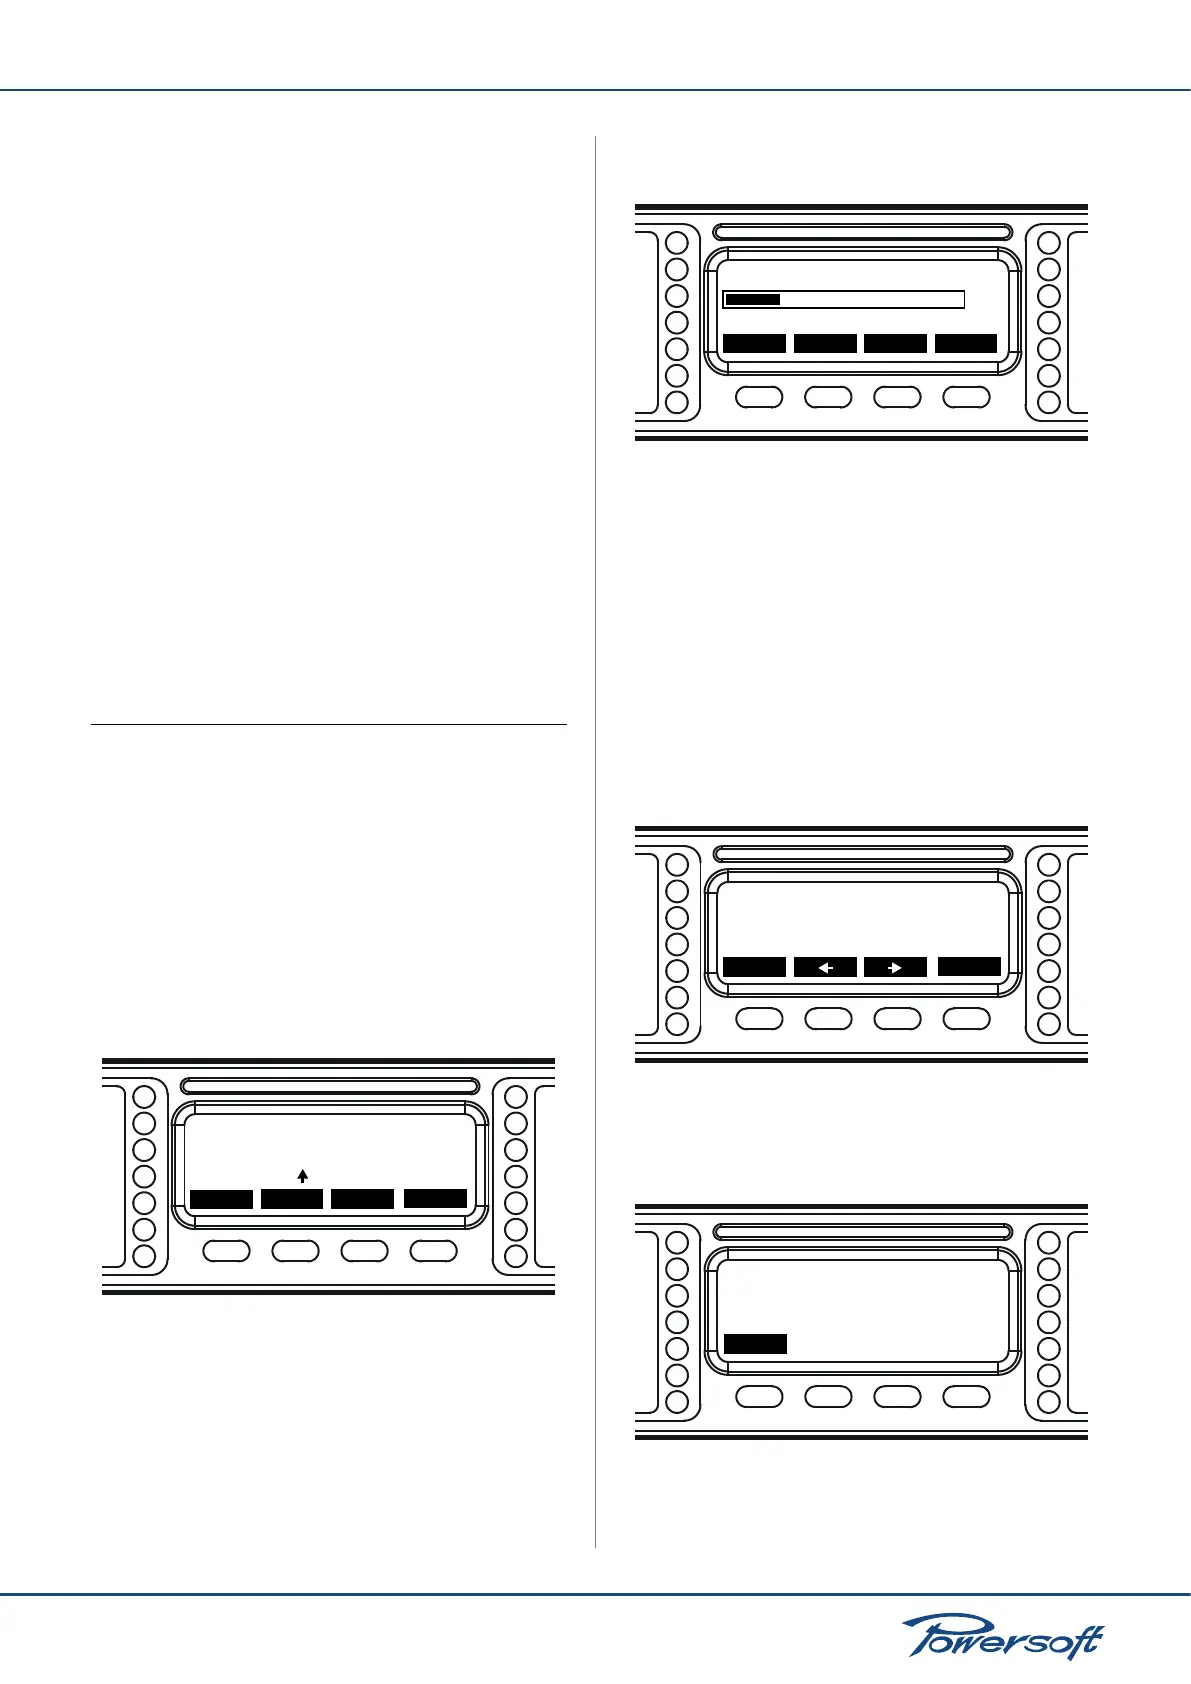
Lock code
000000
ok sel
-
+
FIGURE 58: Enter the lock code. Select correct digit by using “+” and
“-” buttons. Move to the digit to the right by pressing the “sel” button
If the wrong code is entered, the system simply returns to the
previous local presets menu.
12.2 Locked bank size
This menu allows the user to set the number of locally stored
presets that cannot be overwritten. Either all (50) or none (0) of
the presets can be locked. After entering the correct lock code,
select the number of presets to be write protected.
Locked bank size
ok -
+
10
slow
FIGURE 59: Change the number of locked presets by pressing the “+”
or the “-” buttons. The slow editing mode uses one preset steps; the
fast mode uses 10 presets steps.
When done, press the left most button labelled “ok” to return to
the previous screen.
12.3 Recall local preset
In order to recall on of the 50 locally stored presets, press ok
when the “Recall local preset” line is highlighted. Then use the
middle buttons to navigate forwards or backwards in the existing
presets list. If a preset number is not used, it is labelled <empty>.
Once the desired preset has been found, press the right most
button labelled “ok” to load it.
Select Preset #3
flat
back
ok
FIGURE 60: Preset number 3, named “at” is selected. To load it,
press “ok”. Press “back” to return to the previous screen
Once the preset has been loaded correctly, press the left most
button labelled “back” to return to the local presets menu.
Preset loaded
back
FIGURE 61: The chosen preset has been loaded correctly. The
amplier’s current settings match those store in the loaded preset

 Loading...