22
PreSonus StudioLive
™
16.4.2
Overview Hookup Controls Connecting
to a
Computer
Tutorials Technical
Information
Trouble-
shooting
and Warranty
Scenes, Presets,
and System Menu
Software: Universal Control,
SL Remote, Capture,
and Studio One Artist
1 Quick Start
Quick Start:
Level
Setting
in your StudioLive provide plenty of headroom; take advantage of it.
• Your P.A. and studio equipment should be powered on in the following order:
A. Sound sources (keyboards, direct boxes, microphones,
etc.) connected to the StudioLive inputs
B. StudioLive 16.4.2
C. Computer (if applicable)
D. Power ampliers or powered monitors
When it’s time to power down, your system should be turned o in the reverse order.
Now that you know what not to do, let’s get some audio going!
2
2
1
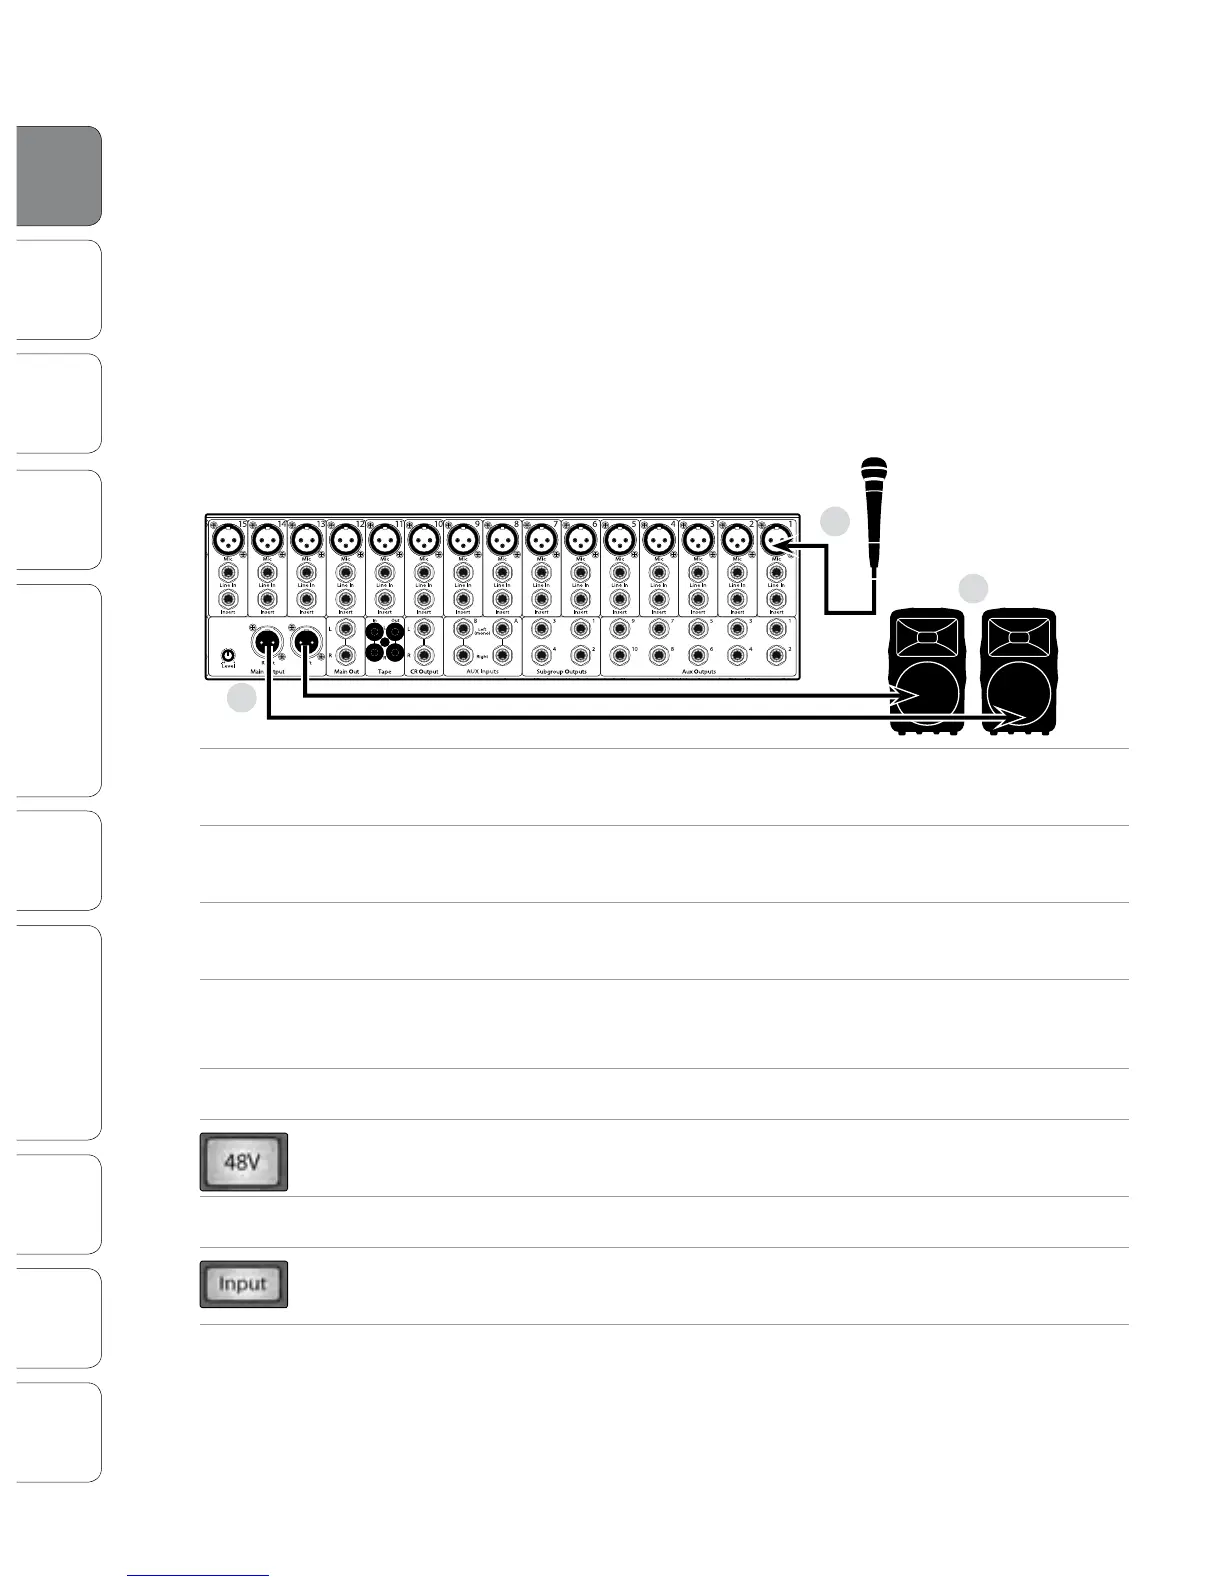
1. Grab a microphone and a mic cable and plug them
into the StudioLive’s Channel 1 mic input.
2. Connect the Main Outs (TRS or XLR) of your Studio Live
to your power amplier or powered monitors.
3. If you’re using passive speakers, connect them to your
power amplier using speaker cable.
4. Bring down all the faders on your StudioLive to the
∞
setting.
Make sure that the Trim knob on Channel 1 is all the way counter-clockwise.
5. Plug your StudioLive into a power outlet and turn it on.
6. If your microphone requires phantom power, engage the 48V button on Channel 1
of your StudioLive.
7. Turn on your amplier or powered monitors.
8. Press the Input button in the Meter section.
9. Speak or sing into your microphone at about the same
volume as during the upcoming performance.
Turn the trim knob on Channel 1 clockwise while watching the rst meter in the Fat
1.1 Level Setting
 Loading...