29
3C. Adjusting the Print Alignment
If your previous experience with printing is limited to printing letters and cards to 8.5
inch by 11-inch paper, you probably are not familiar with an essential part of a label
printing - Print Alignment. Standard printers feed a sheet and start printing based on
the start of the sheet. They also prohibit printing to the edge of the sheet. This is to
avoid any need for alignment. The LX3000 senses the beginning of the label with an
optical sensor and is capable of printing to the top, bottom, left, and right edge.
Because of this, it is necessary to align the Printer to work with specific types of label
stock.
The LX3000 comes factory calibrated to print exactly to the edge of Primera label stock.
However, due to variations in the left margins and other variables, it may be necessary
to fine-tune these settings at the beginning of each roll. This is especially true for other
non-Primera brand label stock.
Important Note: Before adjusting alignment settings, first print one label at the quality level you
intend for the entire job. This will ensure the label stock is moving at the same speed,
and the stock sensor will sense the gap in the same way.
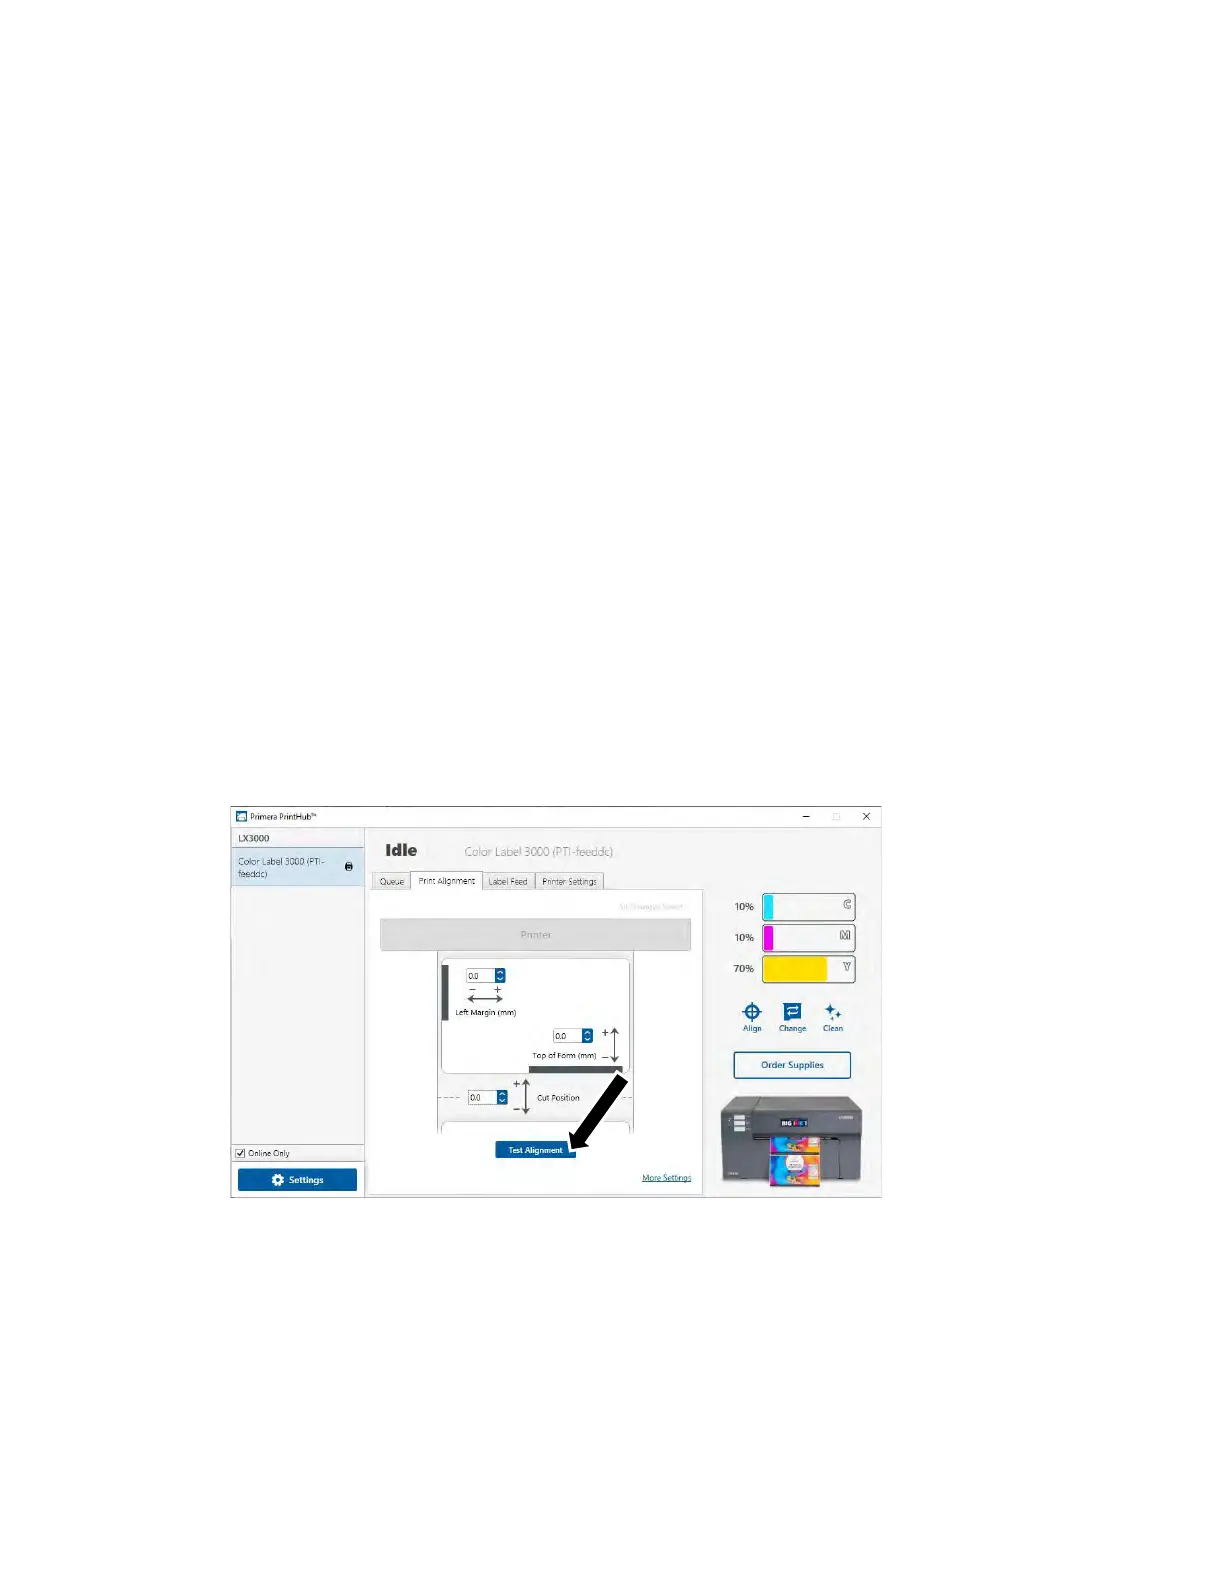
Adjust print alignment using the PrintHub. Go to the Print Alignment Tab (second tab).
Important! Before adjusting any values, print the test alignment to see how close you are to
alignment. The on-screen graphic is the same as the print, which makes it easier to
adjust these values.
Three items can be adjusted here:
• Tear off/Cut Position. This value adjusts the position of the last label printed after
it has been presented for tear-off or for cutting. This only applies if the output
mode is set to "Present the label." Add to the current value to move the tear point
 Loading...