Start Here MVI56E-GSC/GSCXT ♦ CompactLogix or MicroLogix Platform
User Manual Enhanced Generic ASCII Serial Communication Module
Page 22 of 140 ProSoft Technology, Inc.
April 24, 2017
1.8.3 Setting Up a Permanent IP Address
Note: For alternative methods of connecting to the module with your PC, refer to Using
CIPconnect
®
to Connect to the Module (page 24) or Using RSWho to Connect to the Module (page
33).
These steps show you how to set a permanent IP address on the module. This
example assumes module’s default IP address is 192.168.0.250.
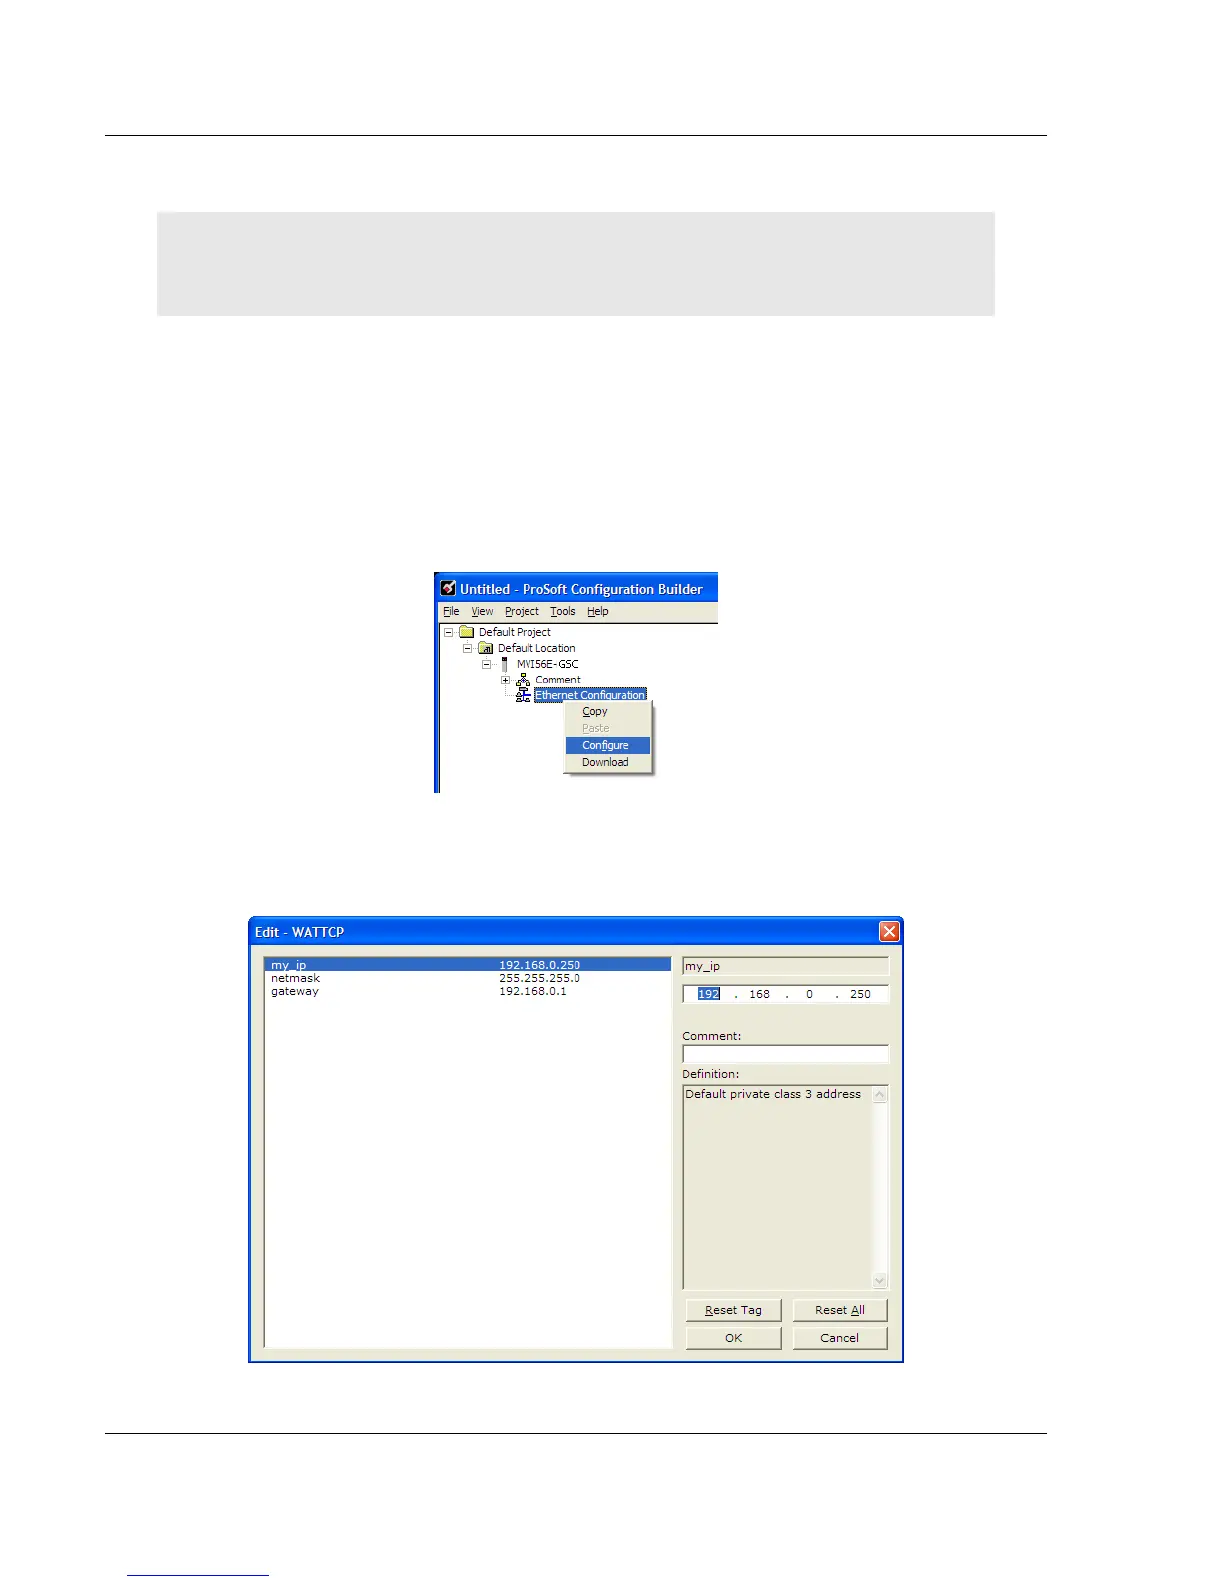
1 Start ProSoft Configuration Builder.
2 Select the MVI56E-GSC icon, and then click the [+] symbol to expand the
MVI56E-GSC tree.
3 Select ETHERNET CONFIGURATION, and then click the right mouse button to
open a shortcut menu.
4 On the shortcut menu, select CONFIGURE.
This action opens the Edit-WATTCP dialog box. Use this dialog box to enter
the MVI56E-GSC module’s permanent IP Address (MY_IP), SUBNET MASK
(NETMASK) and DEFAULT GATEWAY (GATEWAY).