Recording DVDs
17
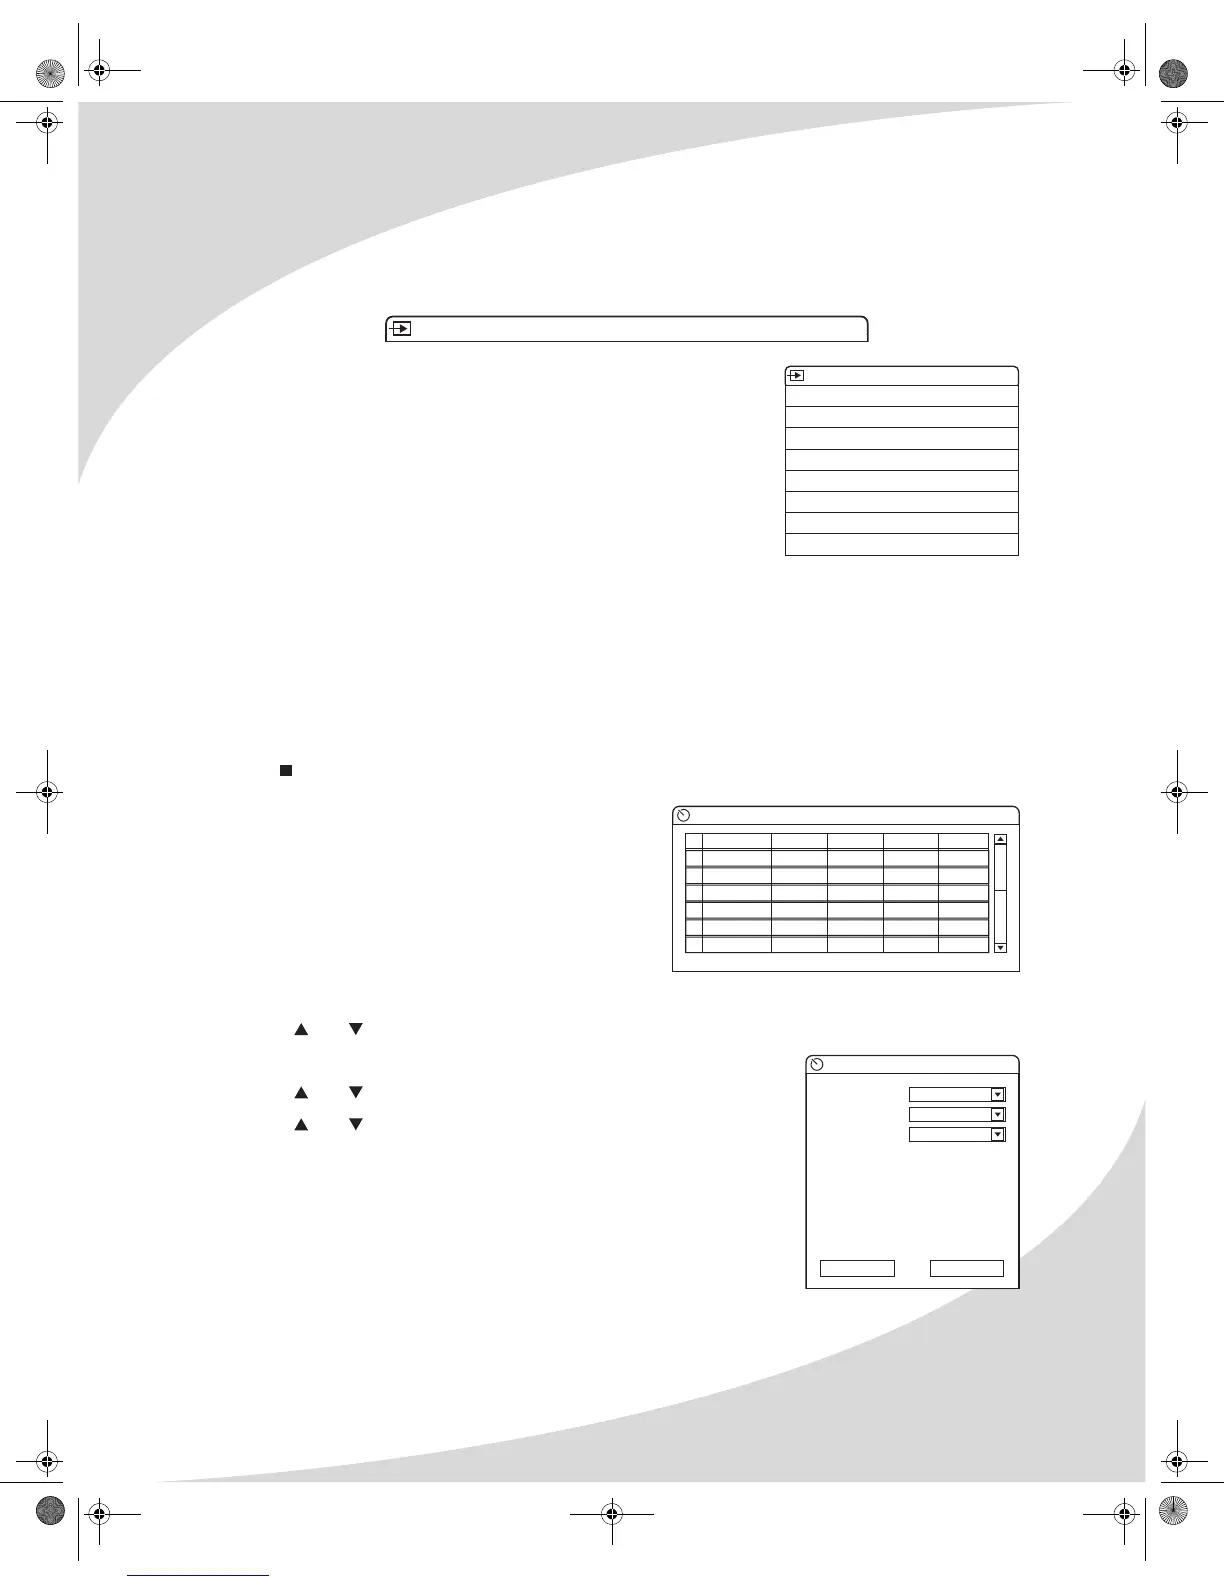
The On-Screen Display
The DVD recording OSD has two modes:
The first mode (press DISPLAY once) shows the current signal source and recording quality.
The second mode (press DISPLAY twice) displays and allows you
to change the current recording mode, signal source, recording
quality, recording state, title, chapter, and playback time.
Recording Video Manually
If you have a DVD+R or DVD+RW disc in the recorder, you can begin recording manually by
pressing the REC button. The recorder will begin recording video from the current source to the
disc.
Pressing REC again when the recorder is recording turns on timed recording, which will
automatically stop the recording after a set period of time. Pressing REC repeatedly cycles
through the options: 30 minutes, 60 minutes, 90 minutes, and Off. If there is insufficient space on
the disc for a particular timed recording mode, that mode will be unavailable.
Press to stop recording.
Scheduling Recordings
You can schedule future recordings using the
TIMER button on the remote. The TIMER button
brings up the Record Scheduler, which allows you
to schedule up to 20 recordings by source and
time.
To schedule a recording:
1. Press TIMER to bring up the Record Scheduler.
2. Use and to select the first empty slot.
3. Press ENTER to bring up the Item Editor.
4. Use and to select Source and press ENTER.
5. Use and to select the desired source and press ENTER.
Monitor Ch001 (No signal) SP
RECORD (DVD+RW)
MODE New Title
SOURCE Ch001
QUALITY SP
REC TO DVD-VIDEO
TRICK Stop
TITLE 01/03
CHAPTER 01
TIME 00:00:01 / 01:59:59
Record scheduler
Source
1
2
3
4
5
6
Quality Date Start End
Item Editor
Source
Quality
Mode
Date
Start
End
Ch001
SP
Once
1 2 / 0 1 / 0 3
1 2 : 0 0
1 2 : 3 0
OK Cancel
OMPDDVR100.book Page 17 Monday, September 19, 2005 8:35 AM