STEP 5 xLCD assembly: parts preparation
For the following steps, please
prepare:
xLCD assembly (1x)
STEP 6 Connecting the xLCD assembly
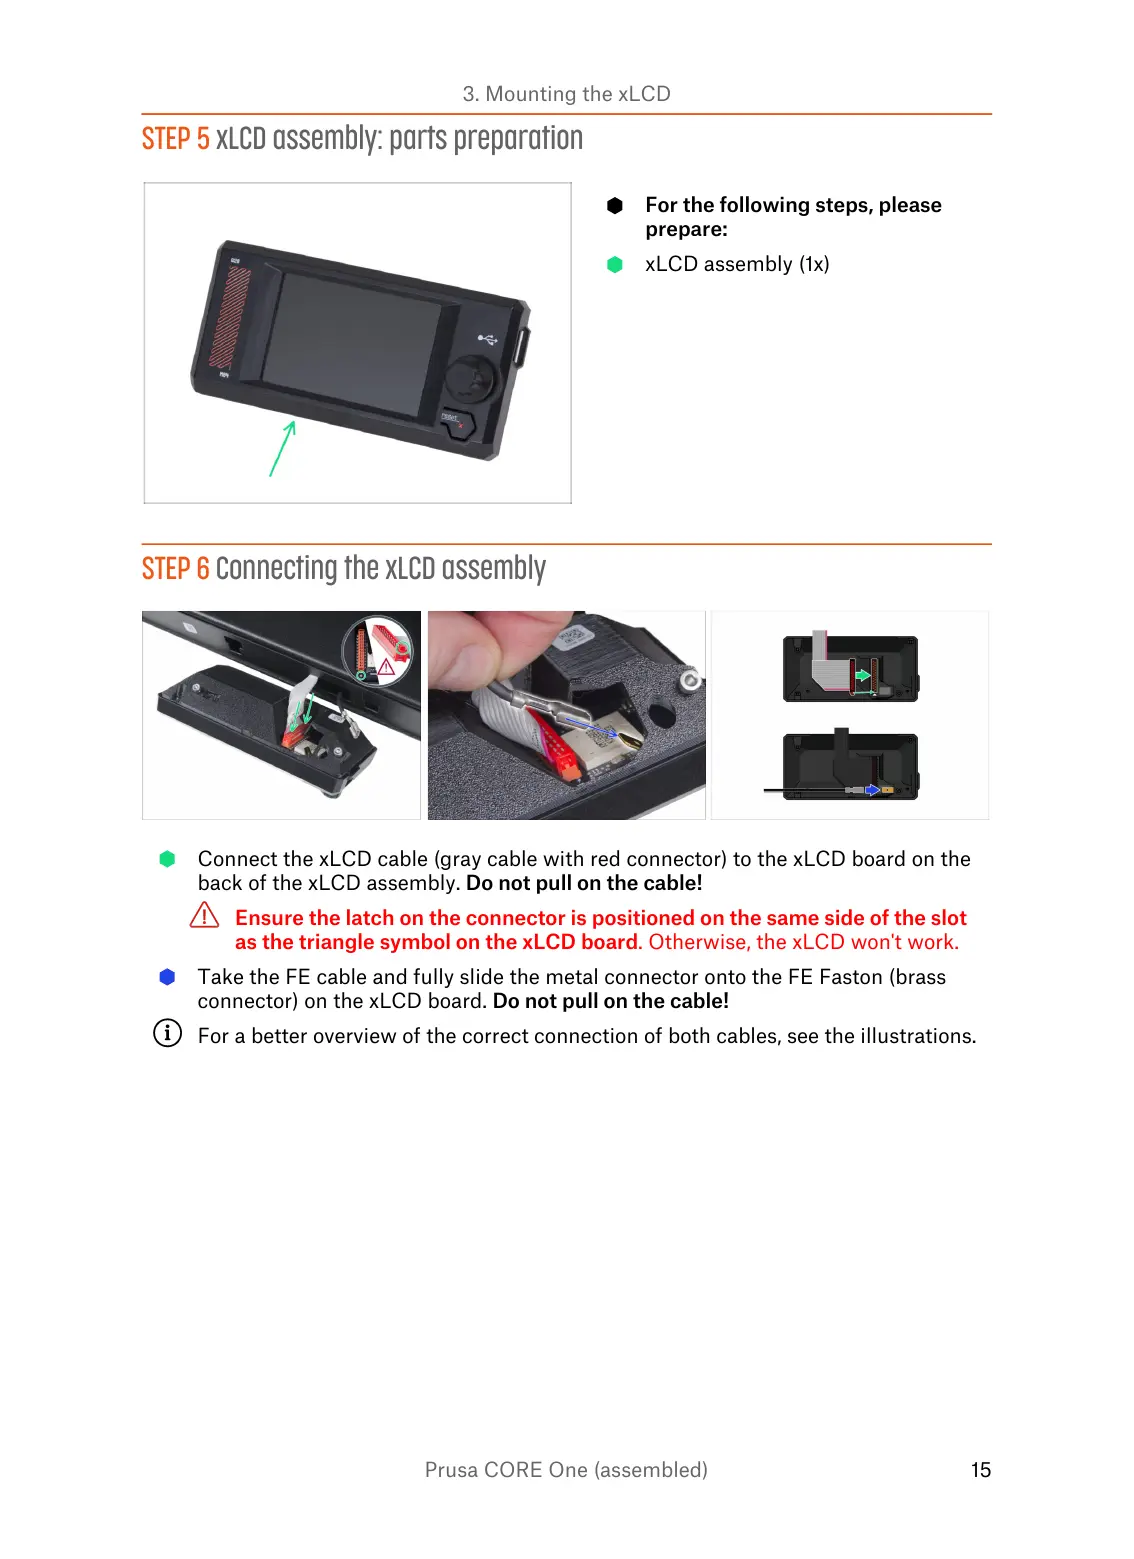
Connect the xLCD cable (gray cable with red connector) to the xLCD board on the
back of the xLCD assembly. Do not pull on the cable!
Ensure the latch on the connector is positioned on the same side of the slot
as the triangle symbol on the xLCD board. Otherwise, the xLCD won't work.
Take the FE cable and fully slide the metal connector onto the FE Faston (brass
connector) on the xLCD board. Do not pull on the cable!
For a better overview of the correct connection of both cables, see the illustrations.