3. Mounting the xLCD
Prusa CORE One (assembled) 17
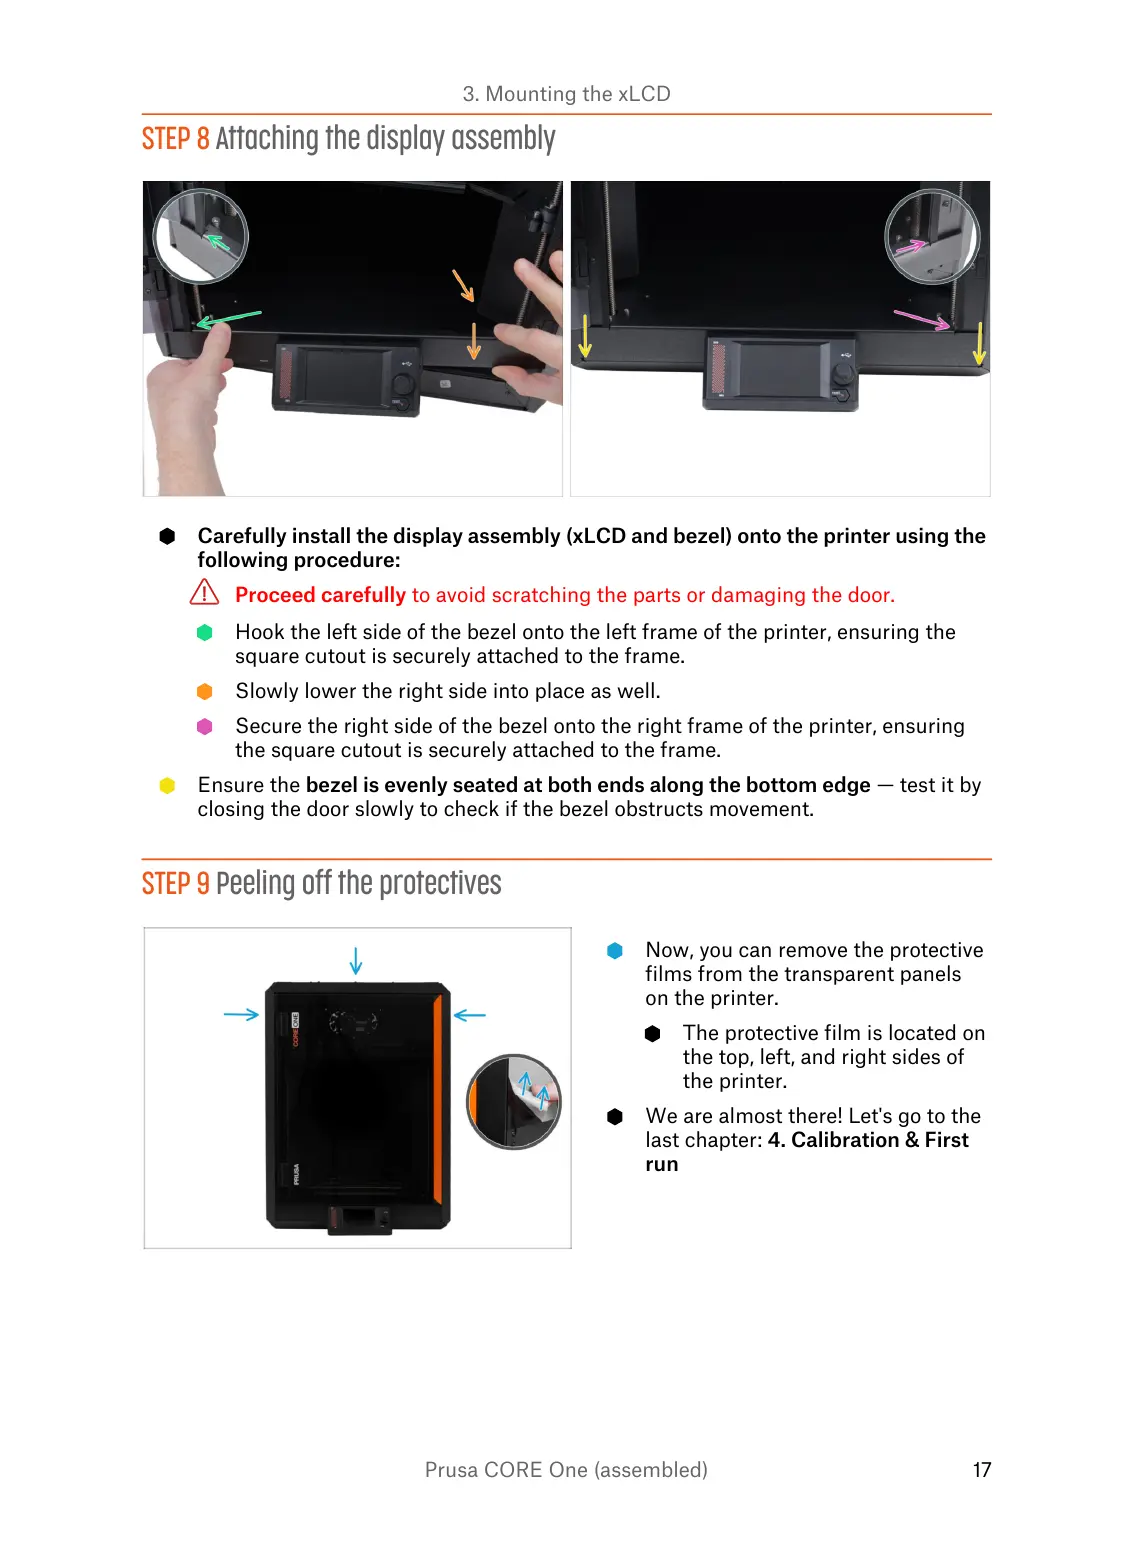
STEP 8 Attaching the display assembly
Carefully install the display assembly (xLCD and bezel) onto the printer using the
following procedure:
Proceed carefully to avoid scratching the parts or damaging the door.
Hook the left side of the bezel onto the left frame of the printer, ensuring the
square cutout is securely attached to the frame.
Slowly lower the right side into place as well.
Secure the right side of the bezel onto the right frame of the printer, ensuring
the square cutout is securely attached to the frame.
Ensure the bezel is evenly seated at both ends along the bottom edge — test it by
closing the door slowly to check if the bezel obstructs movement.
STEP 9 Peeling off the protectives
Now, you can remove the protective
films from the transparent panels
on the printer.
The protective film is located on
the top, left, and right sides of
the printer.
We are almost there! Let's go to the
last chapter: 4. Calibration & First
run