4. Calibration & First run
Prusa CORE One (assembled) 19
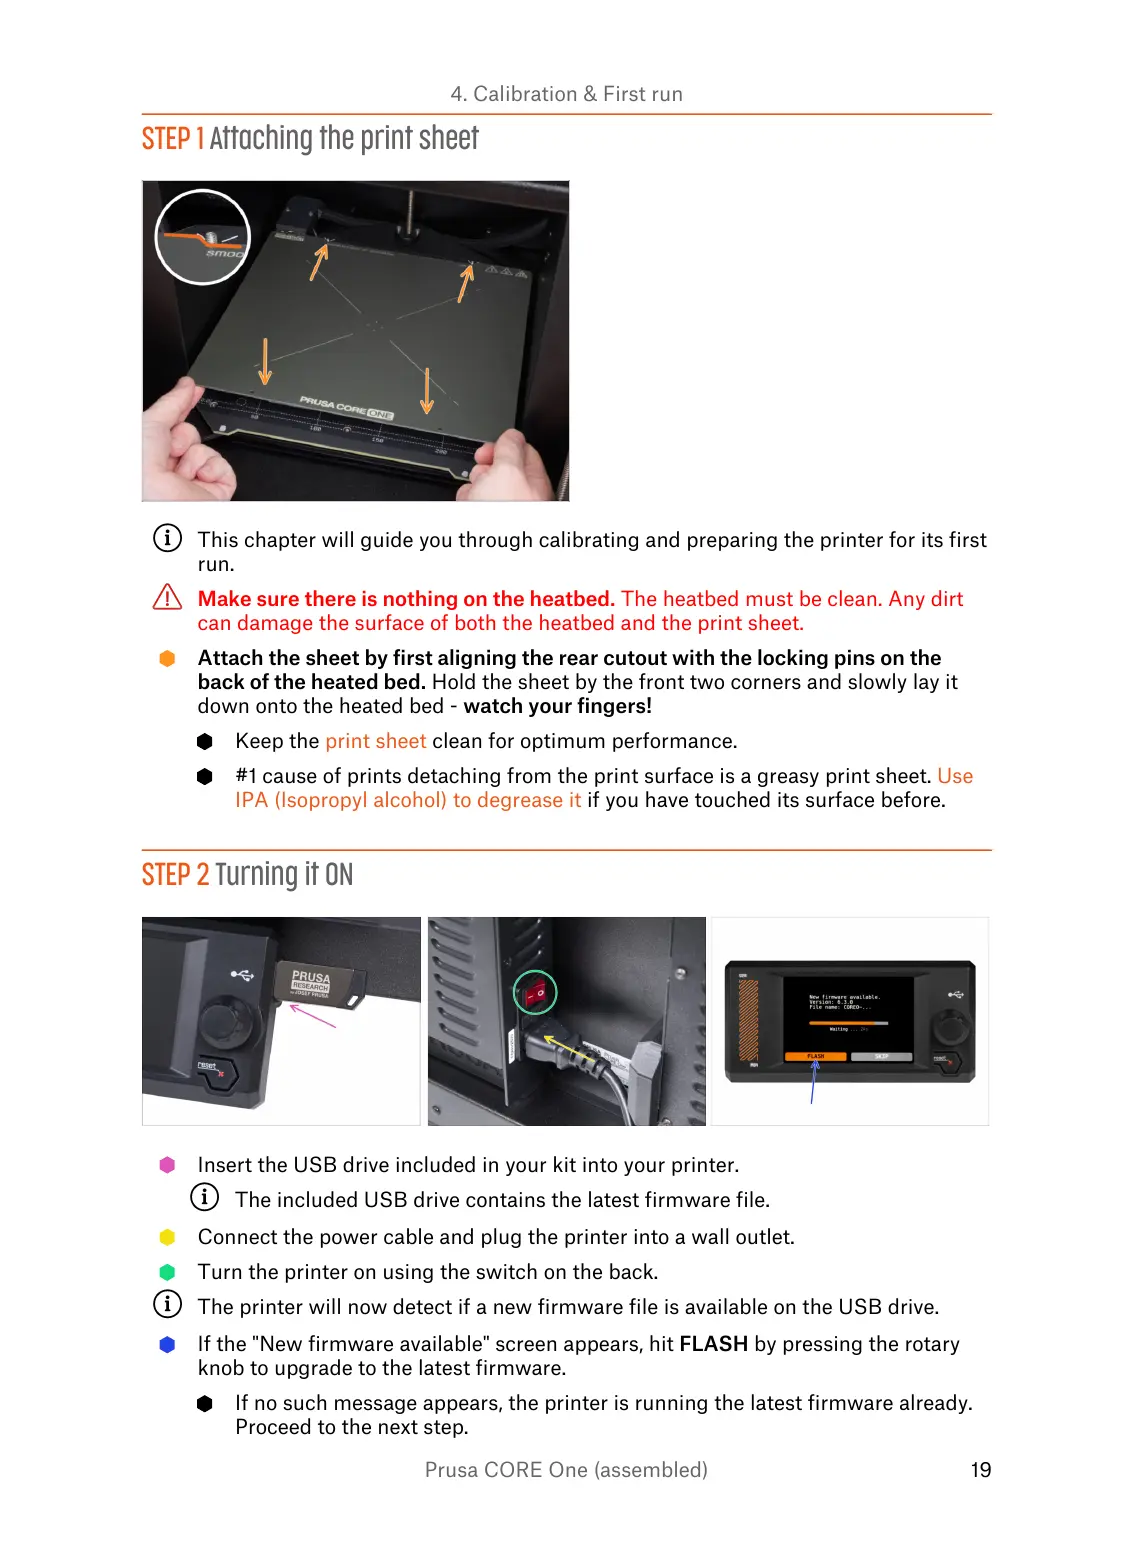
STEP 1 Attaching the print sheet
This chapter will guide you through calibrating and preparing the printer for its first
run.
Make sure there is nothing on the heatbed. The heatbed must be clean. Any dirt
can damage the surface of both the heatbed and the print sheet.
Attach the sheet by first aligning the rear cutout with the locking pins on the
back of the heated bed. Hold the sheet by the front two corners and slowly lay it
down onto the heated bed - watch your fingers!
Keep the print sheet clean for optimum performance.
#1 cause of prints detaching from the print surface is a greasy print sheet. Use
IPA (Isopropyl alcohol) to degrease it if you have touched its surface before.
STEP 2 Turning it ON
Insert the USB drive included in your kit into your printer.
The included USB drive contains the latest firmware file.
Connect the power cable and plug the printer into a wall outlet.
Turn the printer on using the switch on the back.
The printer will now detect if a new firmware file is available on the USB drive.
If the "New firmware available" screen appears, hit FLASH by pressing the rotary
knob to upgrade to the latest firmware.
If no such message appears, the printer is running the latest firmware already.
Proceed to the next step.