Pict.
22
-
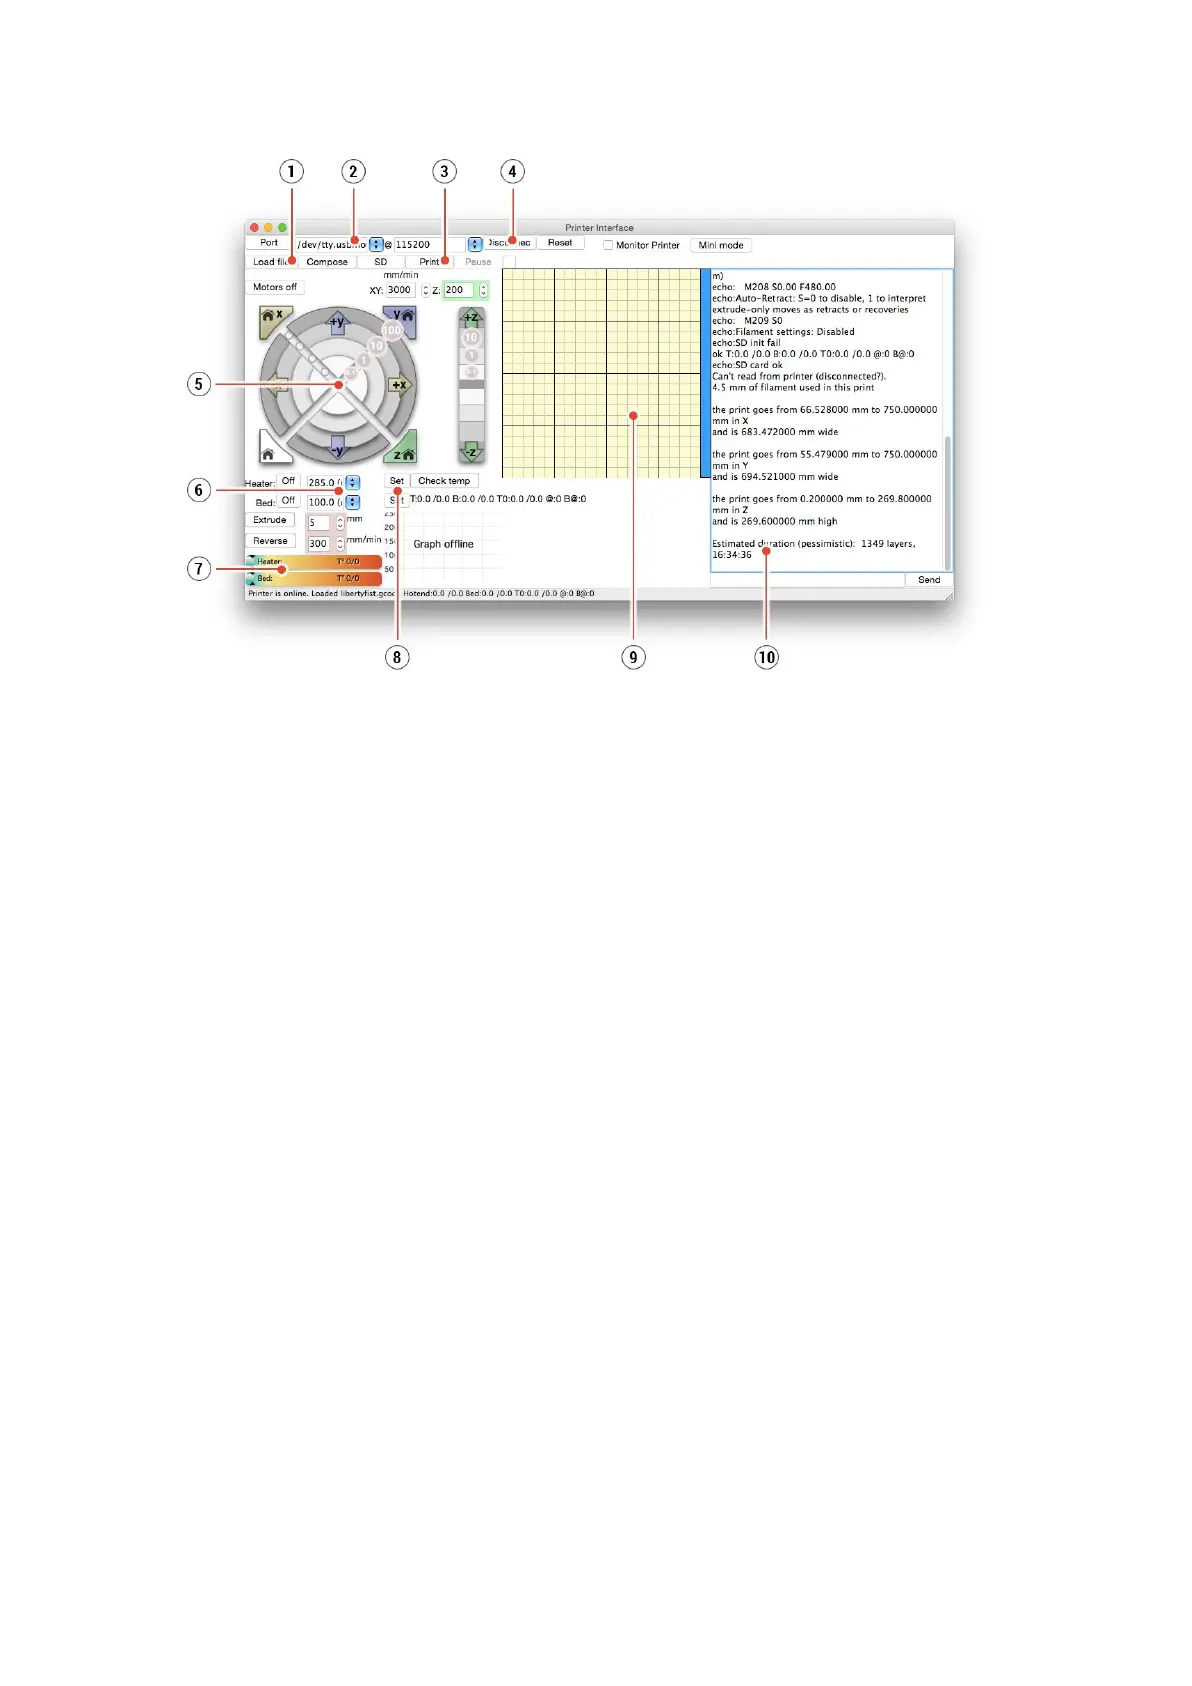
Pronterface
1. Load file button is used to load the desired model.. Model must be in *.gcode file
format.
2. Choose the port by which the printer is connected to the computer. (mostly
/usbmodem
for Mac, COM1, COM2, etc for Windows PC).
3. The Print button starts the printing process.
4. The Disconnect button disconnects the printer from the computer.
5. Printer controls. Here you can manipulate the printer axes.
6. Setting the nozzle and bed temperatures.
7. Thermometer.
8. Confirming the set temperatures, heating starts.
9. 2D print process preview.
10. Info panel. Estimated print time, axis position and other info are displayed after
loading the model.
7.2.12 Power panic
The printer can fully recover from a complete loss of power without the need for batteries. A
special sensor detects mains voltage and in case of an interruption, it immediately shuts
down the heatbed and extruder heating leaving enough power in the capacitors to store the
position and lift the print head away from print. In case of a very short power failure, the
printer will attempt to continue with printing right away without waiting for user interaction.
When power comes back, the printer will give you an option to continue the print. Keep in
mind that during long periods without power, the bed will cool down and the print can detach
itself from the sheet plate. Power panic doesn't work if you interrupt the print with the power
on/off switch.
35