74
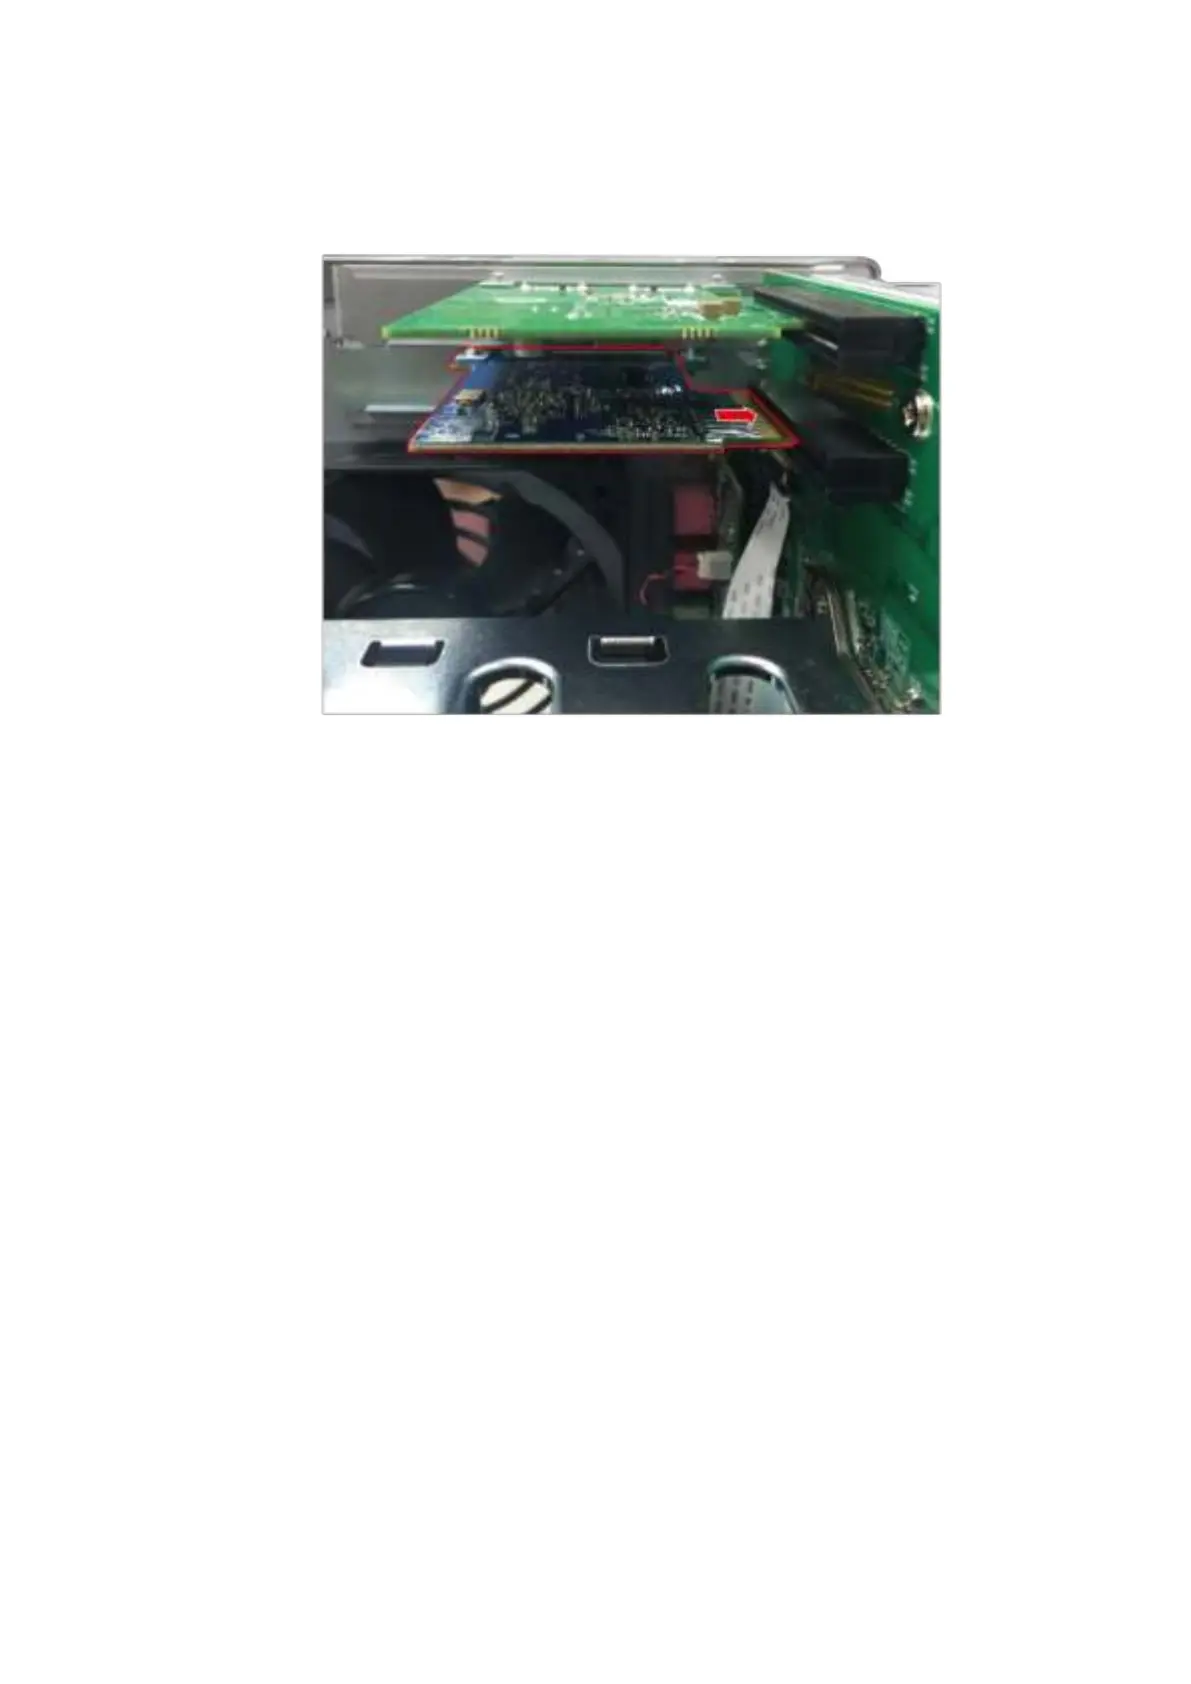
net work expansion card t o t he break in the PCI e slot . Fully insert t he net w ork
expansion card t o t he expansion slot .
10. Fast en screw t o lock in card.
11. Place PSU back t o it s original posit ion and fast en the 5 screws t hat were rem oved in
st eps 6 and 7.
12. Close t he case cover and fasten the screws. Connect the power adaptor and cables
to t he NAS.
13. To v e rify that t he net work expansion card has been installed correct ly and is being
recognized by t he operating system , log int o QTS as adm inist rator and go t o
“ Control Panel” > “ System Set t ings” > “ Syst em Status” > “ Network Stat us” and
check for the t otal num ber of net work int erfaces.
6 .4 TS- 4 3 1 XU, TS- 4 6 3 U, TS- 4 6 3 U- RP, TVS- 4 7 1 Serie s
1. Turn off the NAS. Disconnect t he power adapt or, net work cable(s) , and any ot her
connectors or cables from t he NAS.
2. Before inst alling t he network expansion card, put on an ant istatic wrist st rap t o
prevent elect rostatic discharge. The crocodile clip should be connected t o the ground.