57
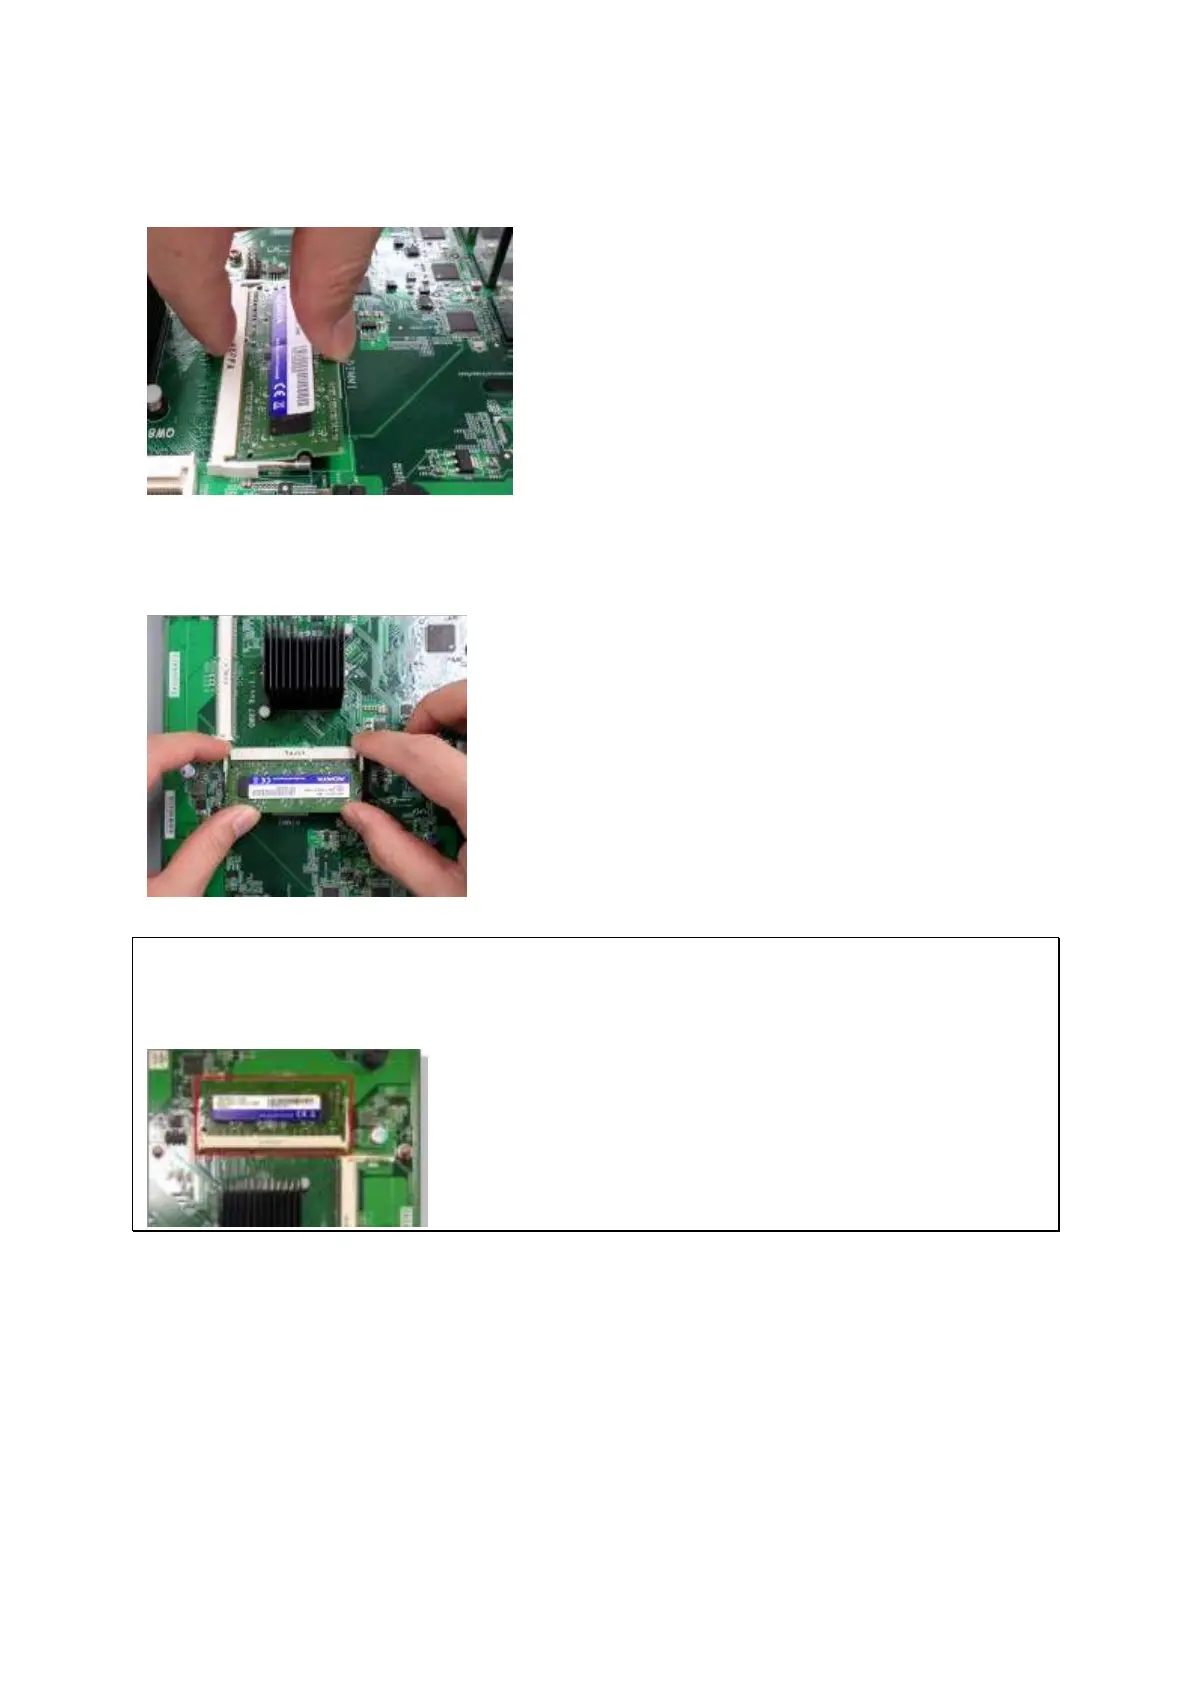
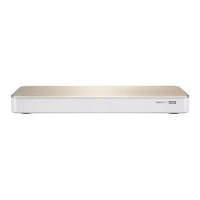
2. Slide t he m em ory m odule to t he slot at a 45-degree angle ( approxim ately) .
3. Press the m em ory m odule down. Make sure t he m em ory m odule sit s in properly w it h
the clips in place.
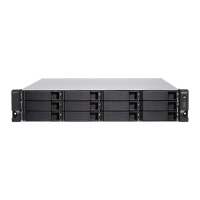
N ot e: For TS- x 5 3 U & TS- 4 5 1 U m odels, alw a ys e nsur e t hat a m e m ory m odule is
in st a lled in t h e pr im ar y slot ( red box in t he below figure,) or the syst em w ill fail t o
sta rt . The m axim um supported m em ory is 8GB com bined.
4. Close t he NAS cover and fast en t he screws. Connect t he power adapt or and cables back
to t he NAS.
5 .7 TS- 2 5 1 + , TS- 2 5 1 , TS- 4 5 1 + , TS- 4 5 1 , TS- 2 5 1 A, TS- 4 5 1 A
1. Rem ove t he screws on t he rear ( top and bottom ) of the NAS. I f you have a 2-bay NAS,