OPERATION
OM 0495SB-A [31]
PRECAUTIONS to follow BEFORE each
disconnection
1. Make sure that the environment is clear and free
of any objects that could interfere with the
disconnection.
2. Take all safety precautions when operating the
tractor.
3. Make sure the mid PTO is not activated.
Procedure for Disconnecting the
Snowblower (Figures 18 to 20)
It is important to follow these steps in the given
order.
➢ STEP 1: Start the tractor and lift the snowblower
fully up using the hydraulic control lever.
WARNING: To avoid serious injury or
death, always activate the tractor hydraulic
control lever lock, apply the parking brake and
turn off the engine before dismounting the
tractor to connect and disconnect any
equipment.
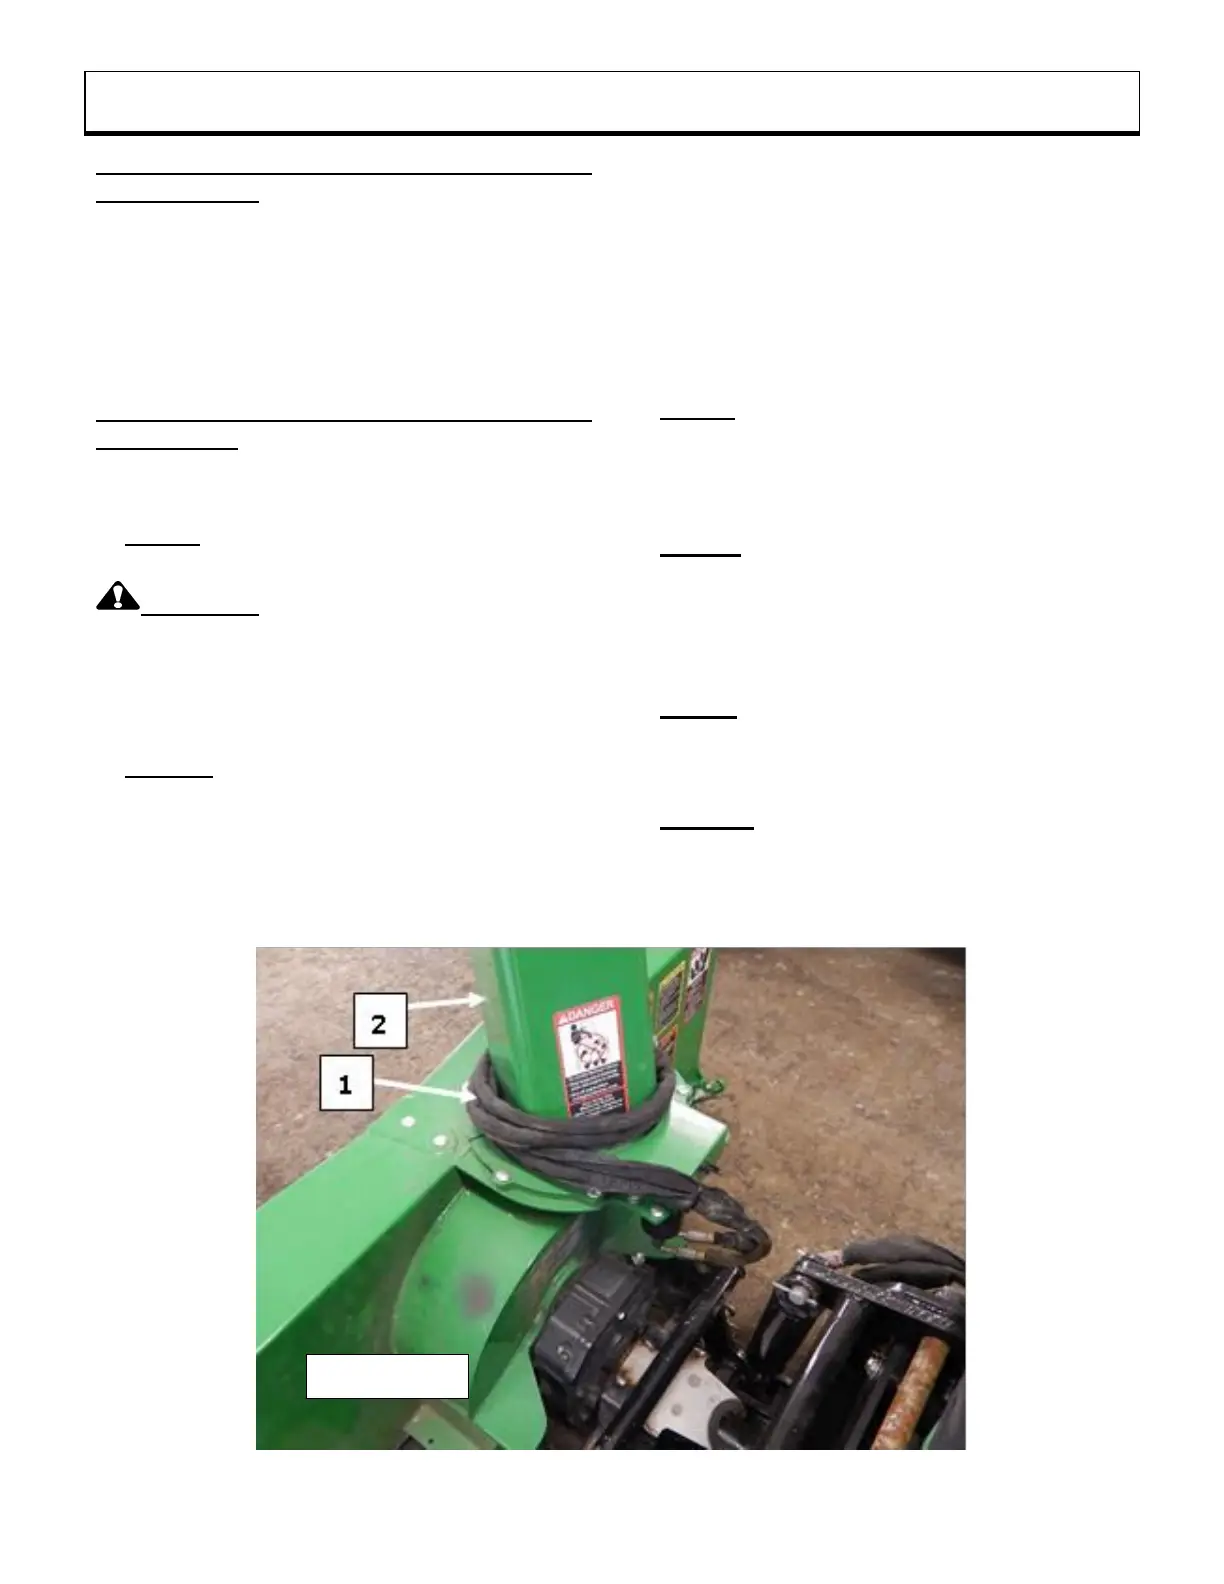
➢ STEP 2: Figure 18: Disconnect the hydraulic
couplings and electrical connectors, roll the
hoses (item 1) and electrical wires together and
place around the chute (item 2) of the
snowblower as shown in the figure
➢ STEP 3: Figures 19-20: Disconnect and remove
the male universal joint shaft (item 1) from the
subframe and place it between the female hitch
tube and the snowblower gearbox as illustrated
in figure 20.
➢ STEP 4: Figure 20: Remove the "U" bracket
(item 3) from the snowblower's protective guard
and secure it in the opposite direction
(downward) using the two 2.5mm x 40mm
hairpins (item 13) in order to retain the female
half driveline of the snowblower.
➢ STEP 5: Figure 20: Remove the ø1/4" x 1 3/4"
round locking pins (item 5) and the two
snowblower hitch pins (item 6) and place them in
the appropriate holes in the snowblower frame.
➢ STEP 6: Figure 20: Slowly lower the
snowblower to the ground using the tractor
hydraulic control lever and unhook the male
tractor hitch (item 7) from the snowblower hitch
(item 8) by slowly backing up.