ASSEMBLY
OM 0495SB-A [14]
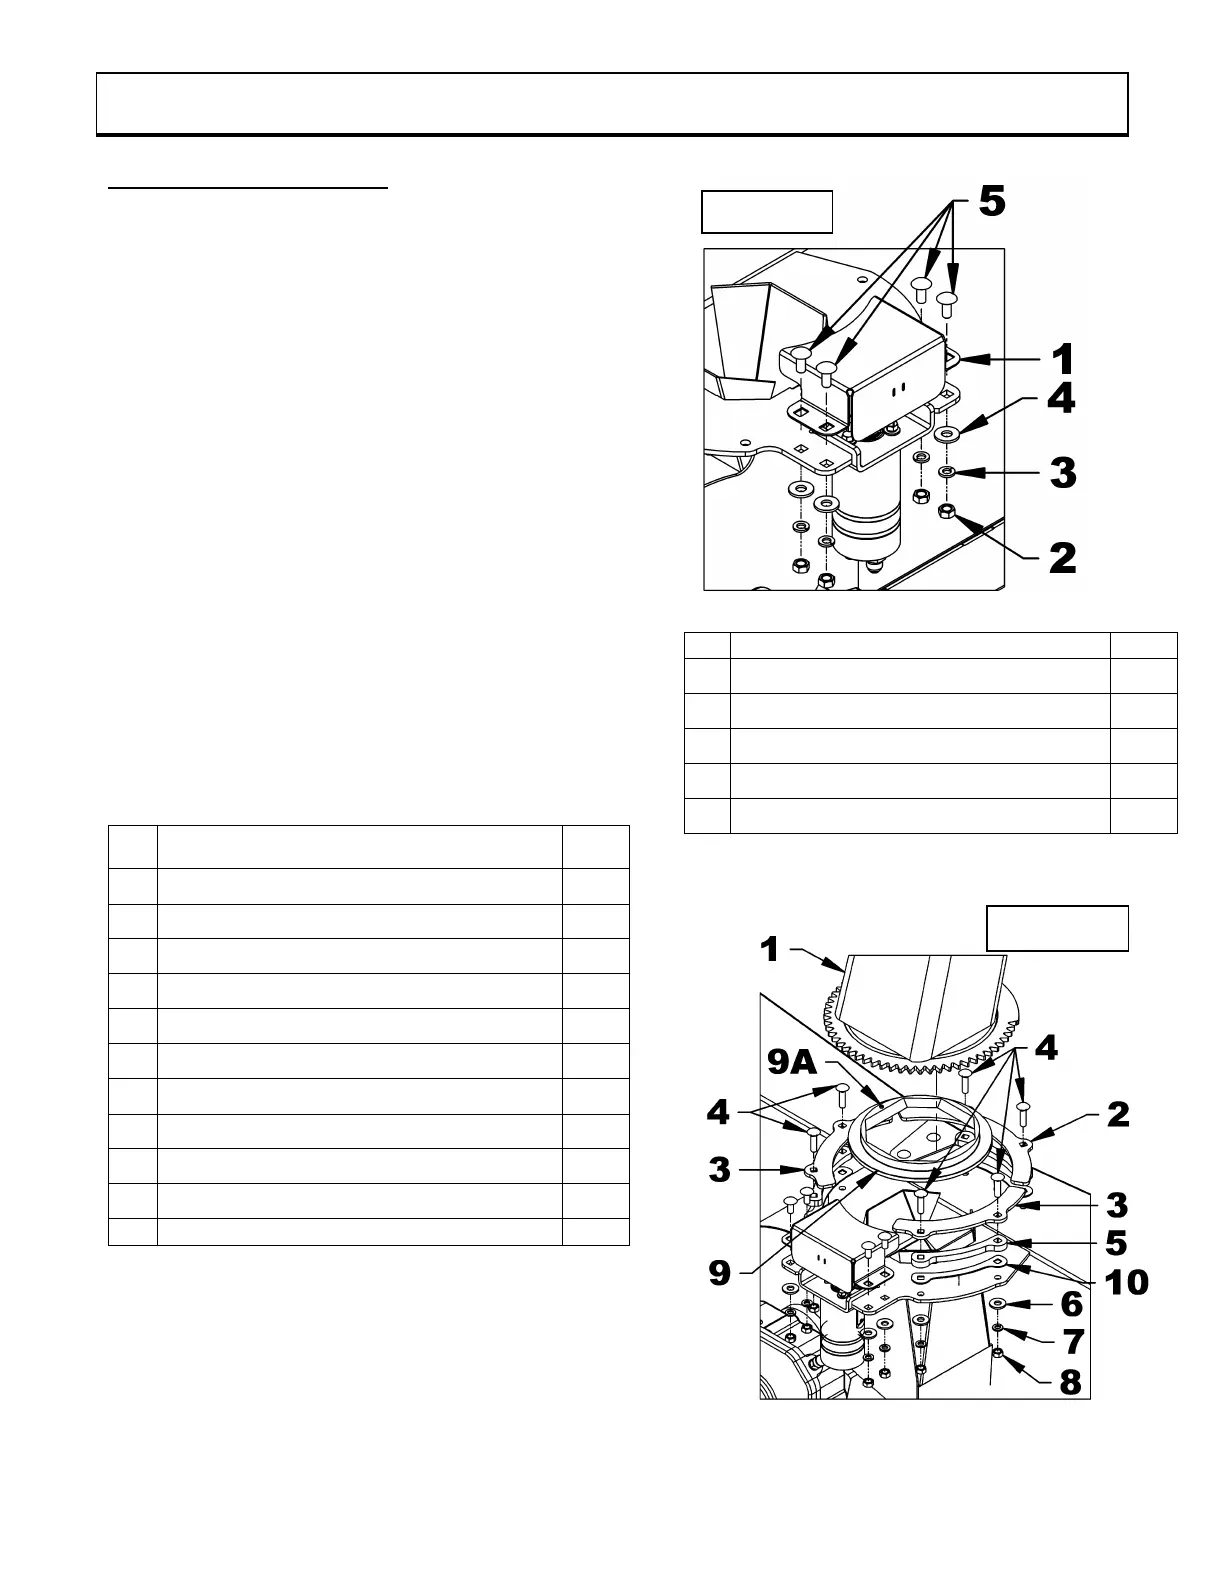
Installation of the Chute (Figures 2-4)
1. Figure 2: Remove the gear protector (item 1)
by removing the four nuts, lock washers, flat
washer and bolts (items 2-3-4-5). Keep the
parts on hand.
2. Figure 3: Grease the underside of the
retaining plates (items 2-3) before installing
them.
3. Figure 3: Place the rotation pad (item 9) over
the outlet of the fan by placing the mark
(item 9A) up and to the left of the snowblower,
then place the chute (item 1) . Align the three
3/8" spacers (item 5) and the three 16ga
spacers (item 10) with the six holes on the
outlet of the fan and place the long retaining
plate (item 2) at the front and the two short
retaining plates (item 3) on the sides Secure
each with two 5/16” x 1 1/4” lg carriage bolt
(item 4) , flat waher , lockwashers and nuts
(items 6-7-8)