ADAPTER INSTALLATION PROCESS
OM 0495SB-A [55]
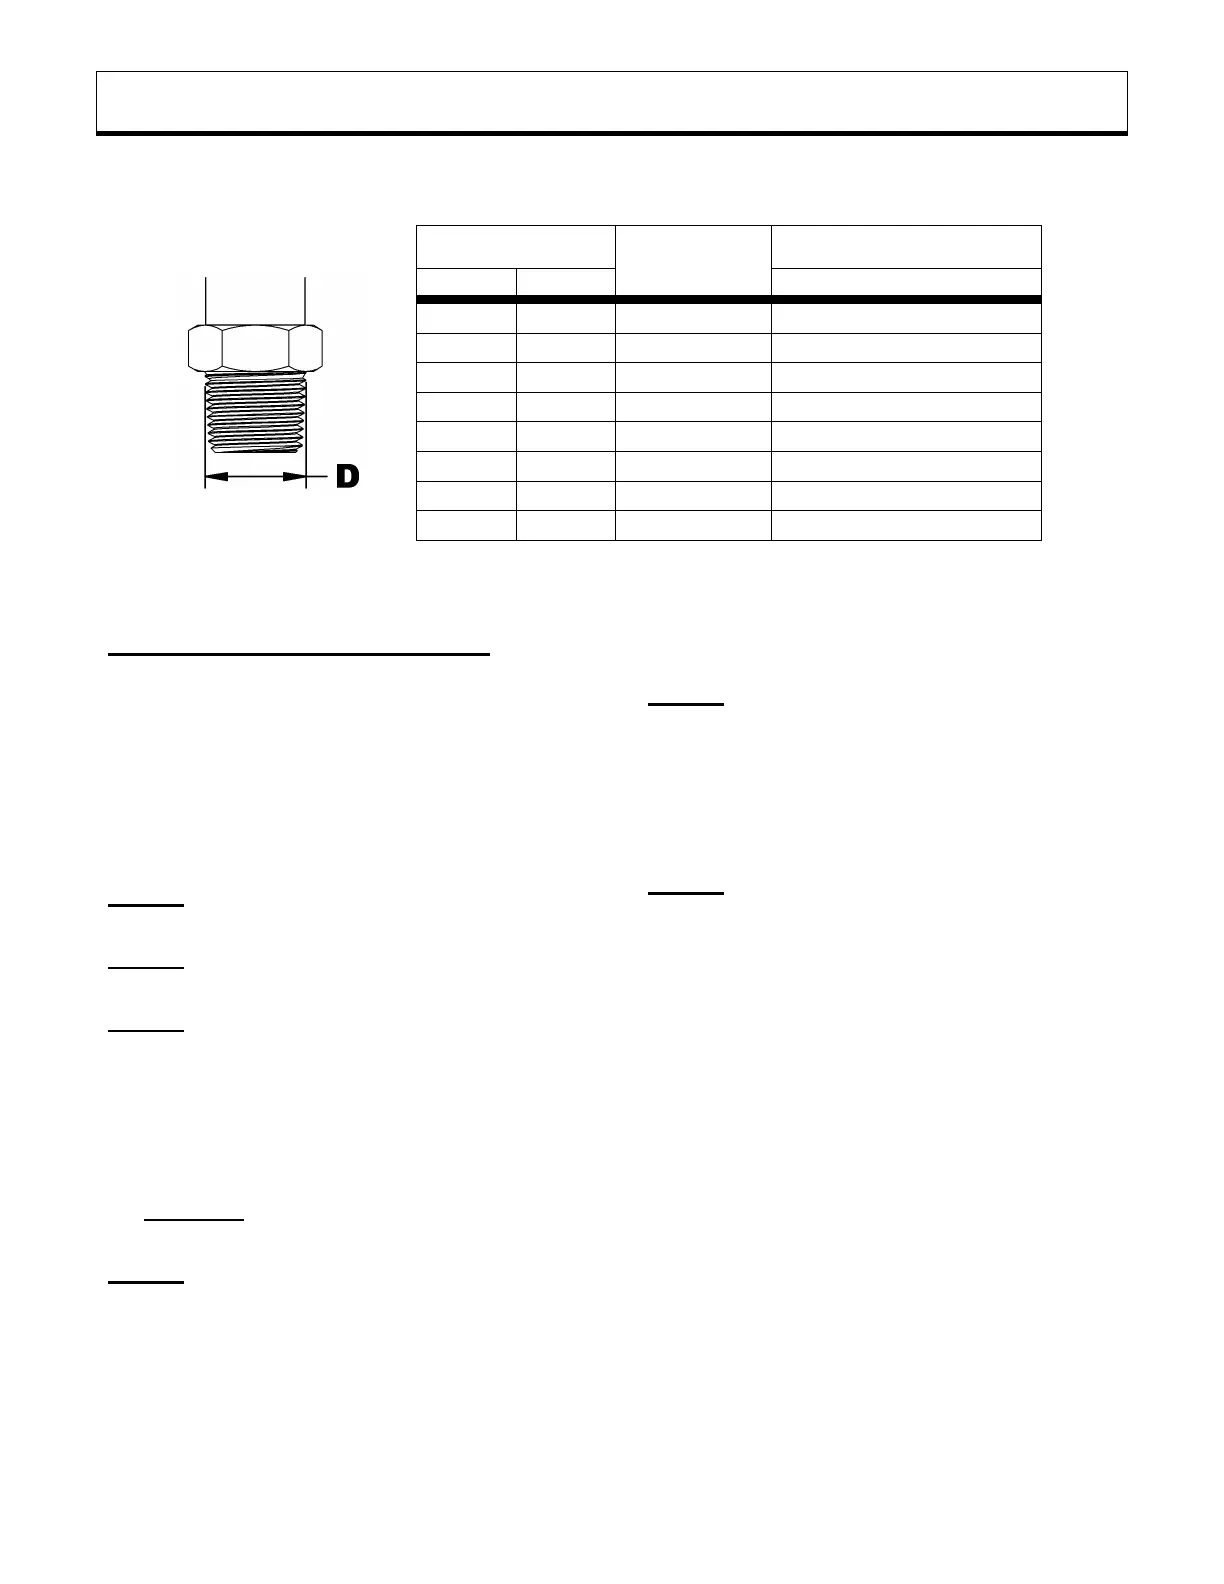
NPT THREAD IDENTIFICATION & TORQUE
RECOMMENDED ASSEMBLY
The method used to assemble fittings with
NPT threads is done in two stages. First
firmly tighten by hand then tighten once
again according to the number of turns listed
in the above table. The following steps are
recommended to minimize the risks of leaks
and/or damages to the parts.
STEP 1: Inspect threads and tapping to make
sure they are clean.
STEP 2: Measure the diameter (D) of the
adapter and take note of the size taken.
STEP 3: Apply a sealant/lubricant product to the
NPT threads (teflon covered threads
are preferable to other lubricating
products). If PTFE tape (teflon) is used,
make between 1.5 or 2 turns clockwise,
when viewed by the fitting end, keeping
free the two first threads.
CAUTION: More than 2 turns can cause
distortion or cracks in the orifice.
STEP 4: Tighten the fitting manually.
STEP 5: Screw the fitting the number of turns
listed on the above table making sure
that in the case of an elbow fitting the
end is aligned to the desired position to
connect the tube or hose. Never
unscrew a fitting to obtain the proper
alignment.
STEP 6: If a leak is detected after having
followed the preceding instructions,
check that the threads are not damaged
and the number of seated threads is
fulfilled (see details in next paragraph).
If the threads are damaged, replace the fitting. If
the tapping is damaged, retap if possible or
replace the part.
Usually, the number of threads seated is
between 3.5 and 6. If the range is different it
would indicate that the fitting was tightened too
much or not enough or that the tightening was
not within thread tolerances. If the fitting is not
tight enough, tighten but never more than one
turn. If it's too tight, inspect the threading and
tapping and replace the section that has threads
that are not within tolerances.