Installation of Harness with Fuse # 4000173 (Figures 8-8a-8b)
1. Gather all the items listed in the table in
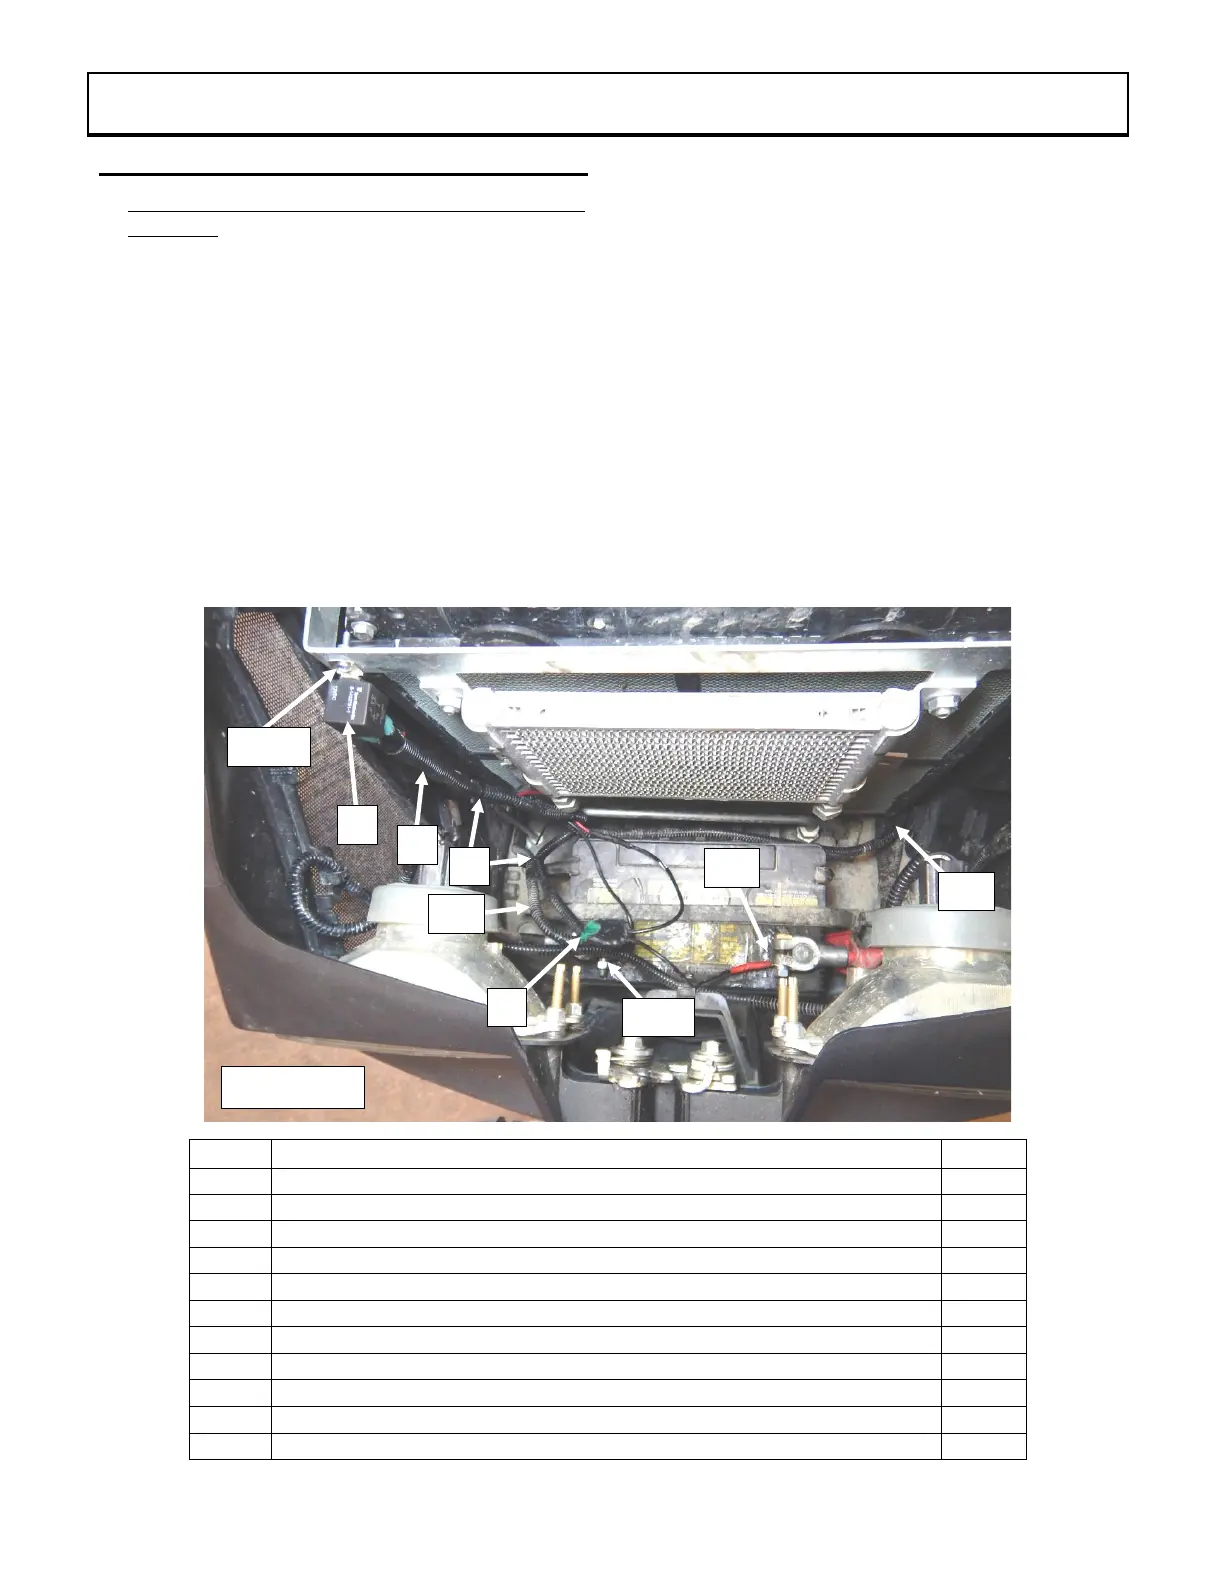
figures 8.
2. Figure 8: Temporarily remove the fuse (item 7)
from the harness fuse holder (item 5).
3. Figure 8: Attach the fuse wire (item 5a) to the
positive (+) terminal of the tractor battery.
4. Figure 8: Secure the green wire connector to
terminal 86 of the relay (item 1).
5. Figure 8: Secure the red wire connector to
terminal 30 of the relay (item 1).
6. Figure 8: Secure the relay (item 1) to the tractor
radiator plate using the round head screw
# 8 32 x ø3/4" lg, the flat washer #8 (ø3/16" int.)
and the nylon insert locknut # 8-32
(items 2, 3, 4).
7. Figures 8, 8a, 8b: Place the green wire
(item 5b) in the location shown in the figure and
follow the alternator wire (item 9) which passes
on the left side of the tractor.
8. Figures 8a, 8b: Attach the green wire (item 5b)
to the tractor red accessory wire (item 10) using
the bypass connector (item 6).
9. Figure 8b: Secure the green wire (item 5b) to
the alternator wire using a 4.8mm x 8" long
nylon tie wrap (item 8).