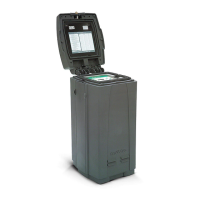
This manual shows how to install your new PAR+ES
irrigation controller� Refer to the controller’s
Operation Manual for instructions on programming
and operating your controller�
System Configuration
PAR+ES controllers may be installed in three different
configurations:
Stand-Alone Models
- Controller operates
independently and is not connected to a central
control system�
Two-Wire Models
- Controller is hard-wired
to a central control system through a 2-wire
connection�
Wireless (LINK) Models
- Controller is
connected to a central control system via a
wireless radio/modem unit�
Every Model is available with Output Station Modules
(Standard Controllers) or with Decoder Interconnect
Board (Decoder Controllers)� Standard controllers
output directly to the solenoid or remote control
valves� Decoder controllers output to decoders which
in turn activate solenoids or remote control valves�
Parts List and Tools Required
Before beginning installation, make sure you have the
following parts and required tools and materials:
Parts
PAR+ES controller Installation Manual�
PAR+ES controller�
Plastic controller mounting template�
Four L-bolts�
Eight stainless steel nuts�
Four large washers�
Four small split-ring washers�
Tools and Materials
Hammer, nails, framing lumber, concrete, trowel,
etc� (for concrete pad)�
1”, 1 ½” and 4” non-metallic conduit, sweep ells,
and appropriate fittings for routing power wires,
communication wires, valve wires and ground
wires�
Conduit cutting tool�
Adjustable wrench or pliers�
Phillips screwdriver�
Small flat blade screwdriver�
Level�
Tape measure�
Electrical wire�
Wire cutters/strippers�
Wire nuts (or other code-approved wire
connectors)�
Intermatic AG-2401 Surge Arrestor; one for each
controller being installed (recommended) if
single, or one per cluster�
Metal junction box (4” x 4” x 1½”); one for each
controller being installed (except last controller
in a cluster)�
Grounding grid installation materials (recom-
mended; see Appendix 1)�
Installation Checklist
To install your PAR+ES controller, we recommend that
you complete the following steps in order:
Choose location and prepare to
to concrete pad���������������������������������� Page 2
Mount controller pedestal on
concrete pad��������������������������������������� Page 3
Install junction box��������������������������� Page 4
Install surge arrestor������������������������� Page 4
Connect AC power supply�������������� Page 5
Connect power wiring��������������������� Page 5
Connect decoders (only required
on Decoder Controllers)����������������� Page 12
Introduction
PAR+ES Installation Manual 1
 Loading...