Install Power Wiring (120, 220 or 240 VAC)
Install Junction Box
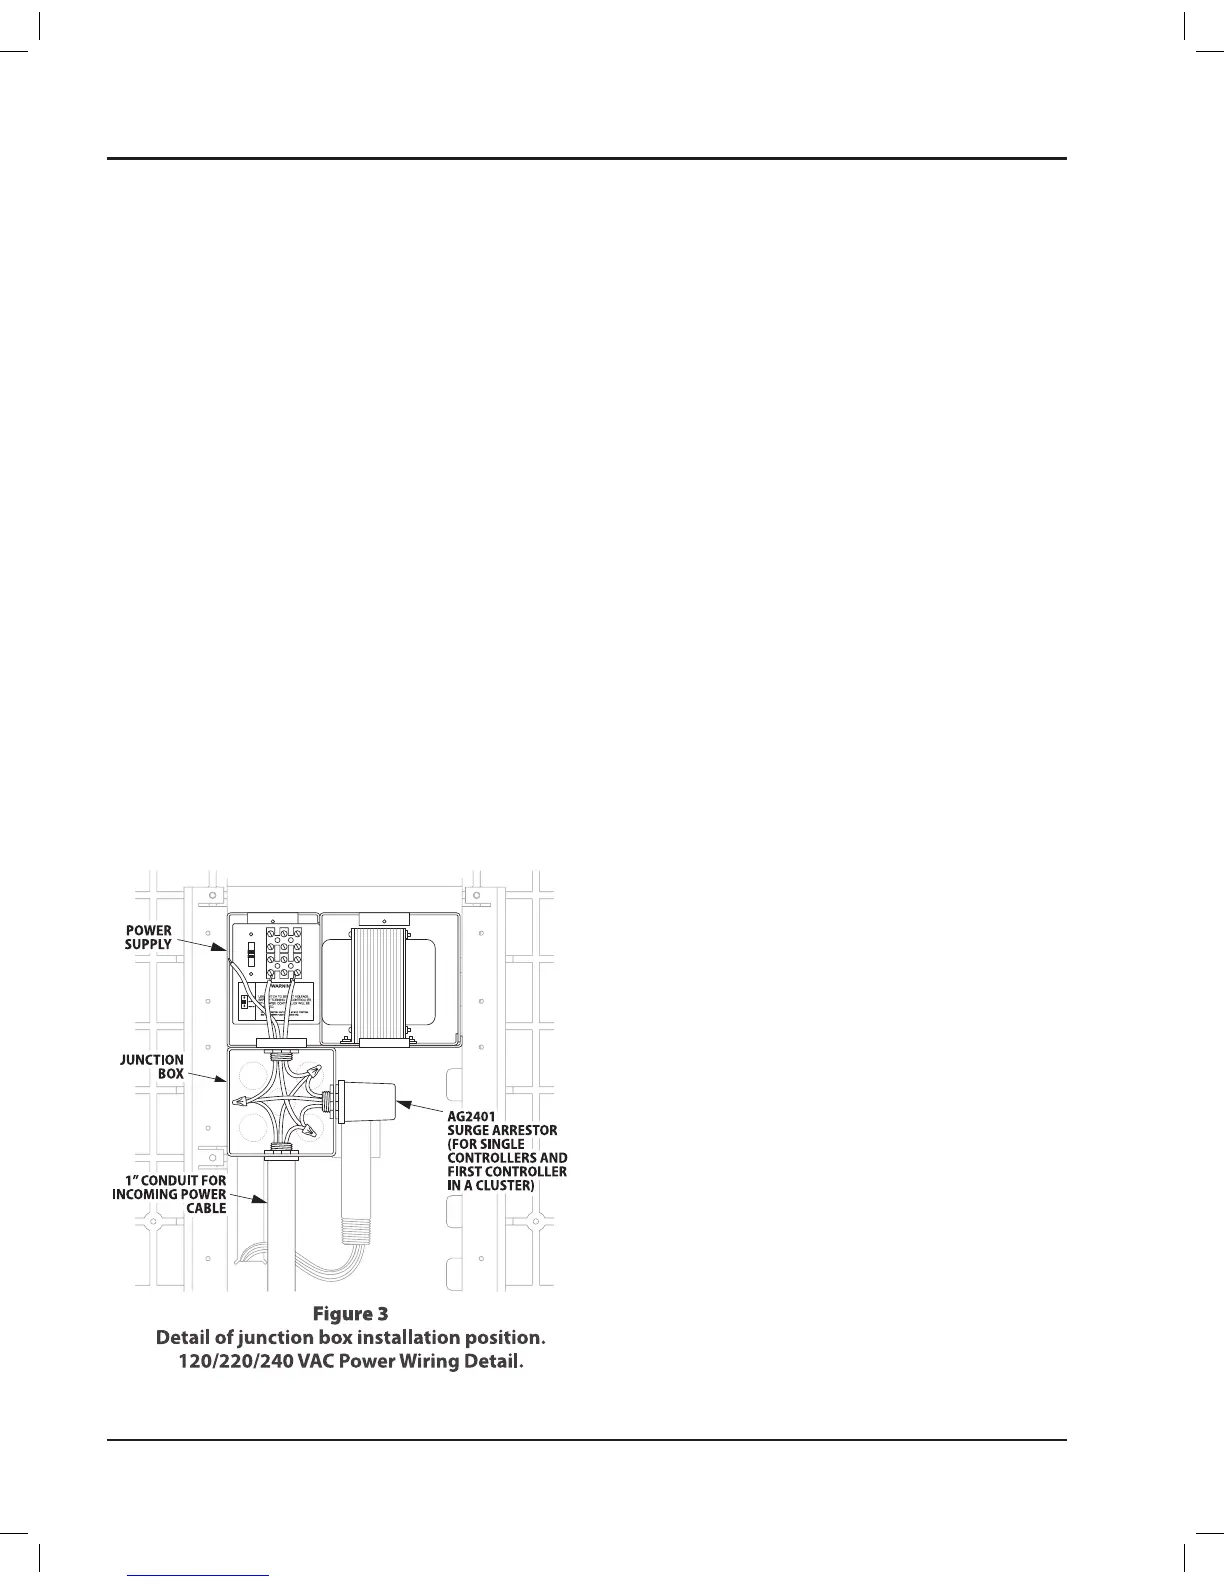
PAR+ES controllers must have a metal junction
box installed on the bottom of the controller’s
wiring compartment� The first controller in a
cluster and any other controller(s) feeding power
to another controller must be equipped with a
junction box�
CAUTION:
F
To avoid a serious shock hazard,
make sure the primary AC power source to
the controller is OFF before installing power
wiring�
First Controller(s) in the Cluster
Punch out a junction box knockout and attach
1.
the box to the 1” power wire conduit� Route the
hot (black), neutral (white), and green (ground)
power wires into the junction box�
Secure the junction box to the conduit using a
2.
short nipple and the required fittings as shown in
Figure 3�
Punch out one of the knockouts in the side of
3.
the junction box and use the hole to install the
recommended Intermatic model AG-2401 surge
arrestor (see Surge Arrestor Installation)�
Last Controller in the Cluster
No electrical junction box is required for the last
1.
controller in the cluster or for a stand-alone model
that does not feed power to another controller�
Run the 1” conduit directly to the controller wiring
2.
compartment and use an appropriate fitting to
connect the conduit to the wiring compartment�
Surge Arrestor Installation
Rain Bird recommends installing a surge arrestor
to protect the controller’s power wiring circuits
from voltage fluctuations� Recommended surge
arrestor models include the Intermatic AG-2401 (or
1G2401LA1)�
Install Surge Arrestor
Knockout a hole in the right side of the metal
1.
junction box and mount the surge arrestor in the
knockout hole�
Extend the surge arrestor wires (two black, one
2.
white) into the junction box with the AC power
wires�
Install Surge Arrestor (Alternate Location)
For stand-alone and 2-wire installations, you may
choose to install the surge arrestor in the vacant
compartment designed for the wireless transformer�
CAUTION:
F
To avoid a serious shock hazard,
make sure the primary AC power source to
the controller is OFF�
Remove the power supply access panel�
1.
Punch out the bottom left knockout hole in the 2.
power supply compartment� Mount the surge
arrestor into the knockout hole�
Connect the surge arrestor wires to the controller’s
3.
power wires (see Connect Power Wires and Surge
Arrestor Wires)�
Replace the controller’s power supply access
4.
panel�
To order a surge arrestor, contact Intermatic,
Inc. at (815) 675-2321.
PAR+ES Installation Manual4
 Loading...