Mount Controller Pedestal on Poured-In-Place Concrete Pad
Mount the controller on a poured-in-place concrete
pad� Orient the pad to provide easy access of electrical
conduit into the front of the controller� Make sure the
pad is flat and level to allow the controller’s doors and
lid to open and close properly� Avoid installing the
controller in the direct path of a sprinkler head� If the
controller is in the direct path of a sprinkler, place the
pedestal with hinge (back) side facing the sprinkler�
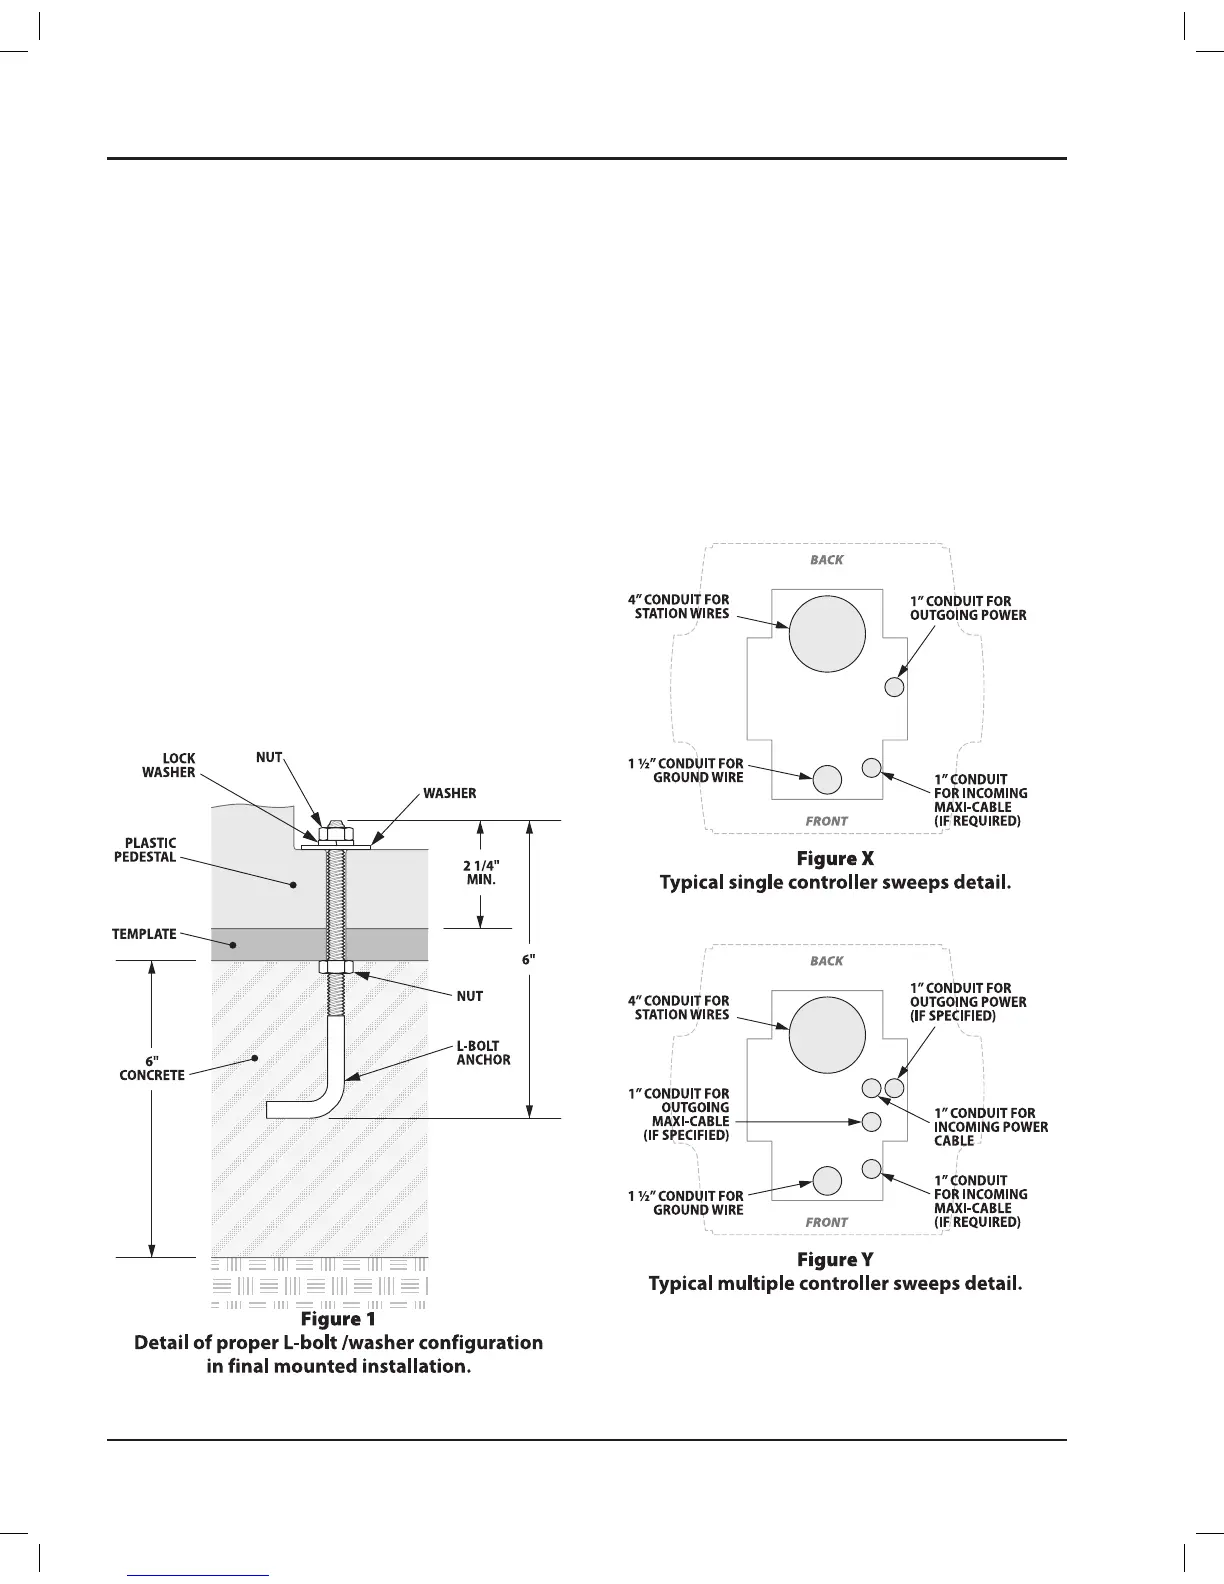
Install L-Bolts in Mounting
Template(s)
Screw four of the 5/16” stainless steel nuts onto 1.
the L-bolts (see Figure 1)�
Insert the L-bolts into the threaded holes in the
2.
plastic mounting template�
Screw another stainless steel nut onto each L-bolt
3.
to hold it in place�
Repeat steps 1-3 with templates for other
4.
controllers (if installing multiple controllers)�
Concrete Pad Requirements
Location - Any convenient outdoor location
with access to AC power�
NOTE:
!
Do not locate the concrete pad in
low-lying areas that may flood during heavy
rains� Install pad 1” above grade�
Size
- 20” x 20” minimum� If mounting multiple
controllers on the same pad, size the pad to
allow at least 6” clearance between controllers
(see Figure 2)�
Thickness
- 6” minimum�
PAR+ES Installation Manual2
 Loading...