10
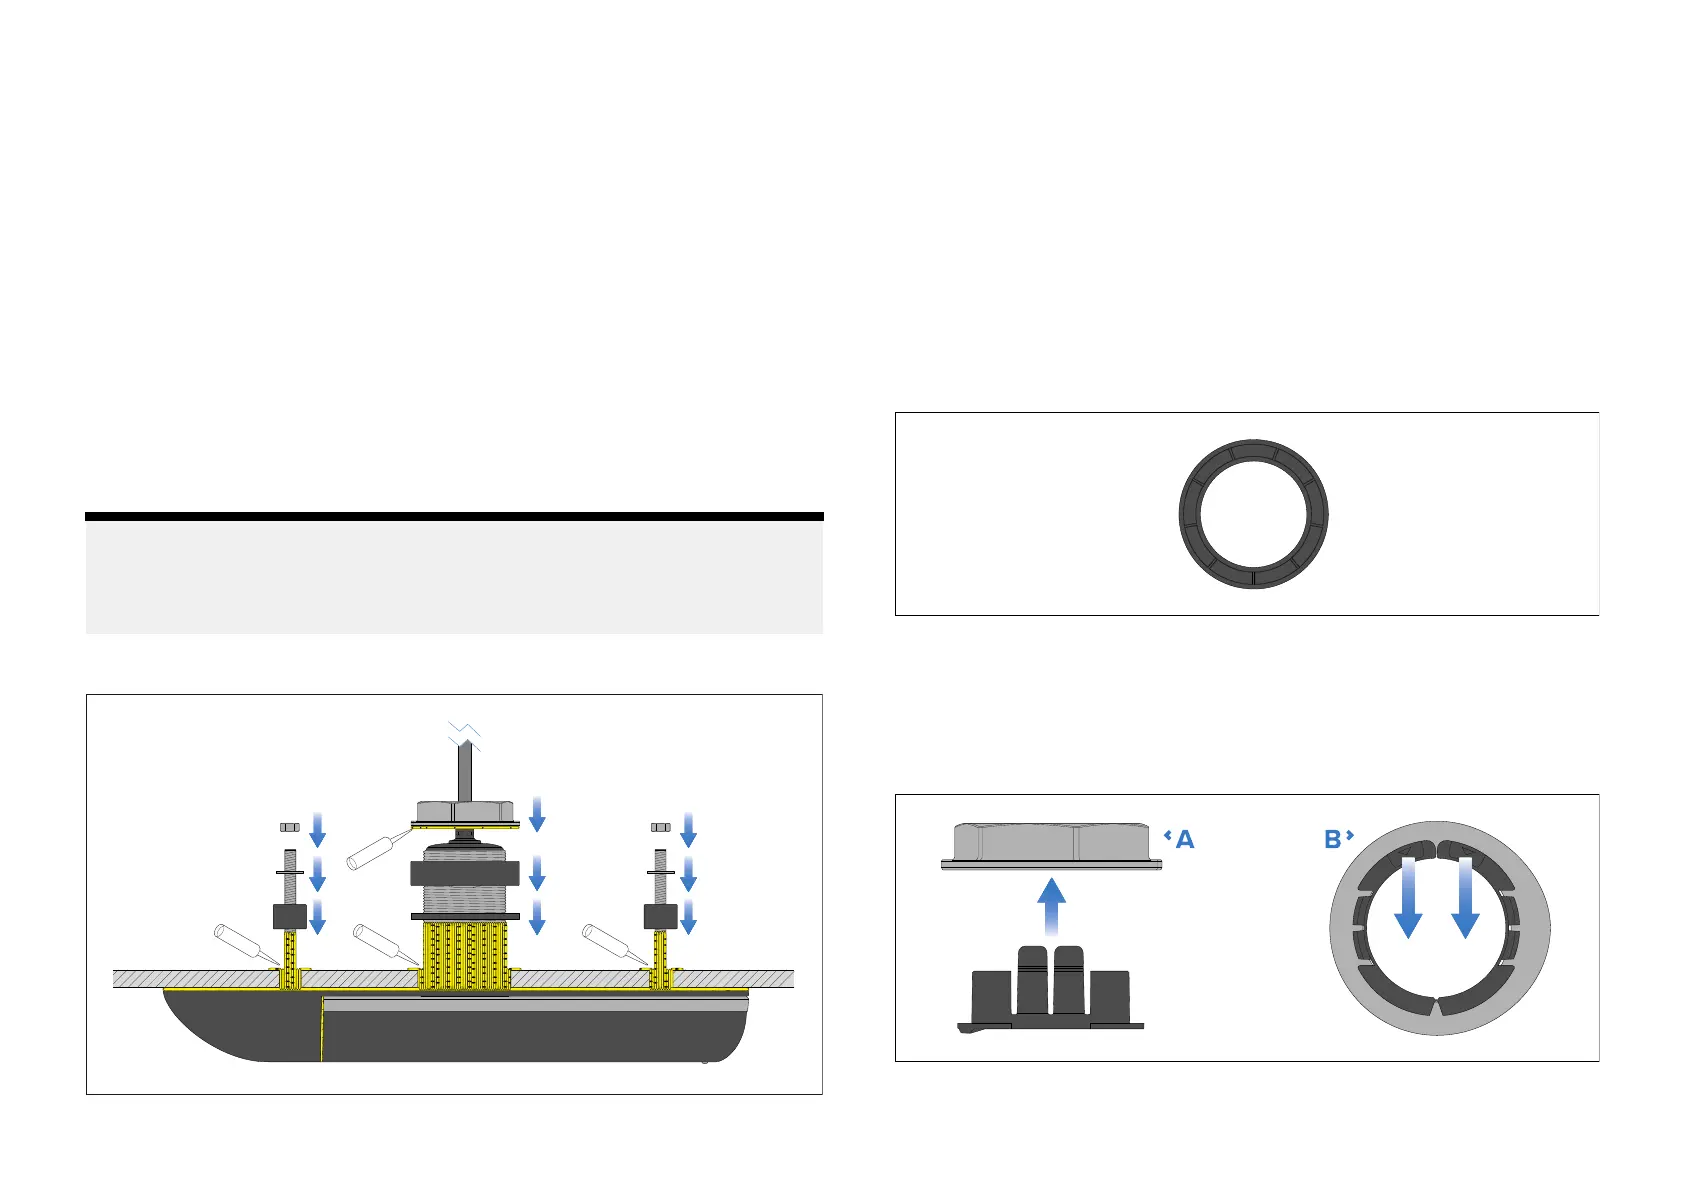
.Applyathickbeadofmarine-gradesealant:
i.alloverthetopfaceofthehighspeednosecone,externalisolator
plate,andexternalisolatorsleeves,ensuringthattheyarecompletely
covered.
ii.allaroundthebottompartofthethreadedsectionofthetransducer
stemandtheanti-rotationstuds,ensuringthatthesealantwillprotrude
approximately6mm(0.24in)abovethefinaltightenednuts.
iii.allaroundandinsidetheholesyouhavedrilledinthehull.
11.Guidethetransducercablethroughthelargestemholeinthehull.
12.Guidethetransducerstemandanti-rotationstudsupthroughtheholesin
thehull.
13.Supportthetransducerfrombeneath.
Assemblingtheinternalcomponents
Followthestepsbelowtofitthetransducertoyourhull.
Note:
T oachievealonglastingwatertightseal,ensurethatallpartsareclean
anddryandapplyagenerousamountofmarine-gradesealanttoallmating
surfaces.
Mountingandsealantapplication
1.Frominsidethevessel,applyacontinuous,thickbeadofmarine-grade
sealantallaroundthebaseoftheprotrudingtransducerstemand
anti-rotationboltthreads.
2.Guidetherubberwasherdownthetransducercable
,andoverthe
threadedsectionofthetransducerstem,compressingthesealantsothat
therubberwashersitsflushonthehull.
3.Ifnecessary,applyadditionalmarine-gradesealanttothetransducer
stem,abovetherubberwasher.
4.Withthetopfacepointingupwards,guidethelargeisolatorbushdown
thetransducercableandoverthetransducerstem,ensuringitsitsflush
ontherubberwasher.
Largeisolatorbushtopface
5.Ifnecessary,applyadditionalmarine-gradesealanttothetransducer
stem,abovethelargeisolatorbush.
6.Ensuringthecableprotectorisfittedtothehullnut,guidethenutdown
thetransducercable,restingthenutontopofthetransducerstem.
Cableprotectorfittingandremoval
•A—Fitting
Installation29

 Loading...


