•B—R
emoval
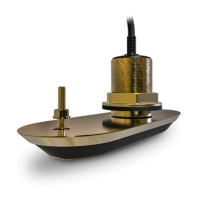
7.Removethecableprotectorbypullingthe2tabsawayfromtheback
ofthehullnut.
8.Applyathickbeadofmarinegradesealanttothebottomfaceofthe
hullnut.
9.Screwthehullnutontothetransducerstemsothatitishandtight.
10.Fromoutsidethevesselensurethatthetransducerispushedfullyinto
thehighspeednosecone.
Itisrecommendedthatasecondpersonholdsthehighspeednosecone
inplacewhilstthestemandanti-rotationnutsarefullytightened.
11.Fullytighten,usinga70mm(2
3
/
4
inch)wrench(spanner)orlarge
adjustablewrench.
Ensurethatthehullnutisadequatelytightened.Y oushouldseethe
sealantprotrudingfromtheedgesofallappliedsurfaces.
12.Placethesmallinternalisolatorsleevesovertheanti-rotationstuds,
ensuringtheysitflushontheinteriorofthehull.
13.Ifnecessary,applyadditionalmarine-gradesealanttotheanti-rotation
studs,abovethesmallinternalisolatorsleeves.
14.Placethesmallwashersovertheanti-rotationstuds.
15.Ifnecessary,applyadditionalmarine-gradesealanttotheanti-rotation
studsabovethesmallwasher.
16.Screwtheanti-rotationnutsontothestudsandfullytighten,usinga
13mm(
1
/
2
inch)wrench(spanner)oradjustablewrench.
Finalizingtheinstallation
Followthestepsbelowtofinalizetheinstallationofyoutransducer.
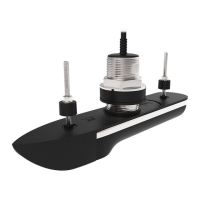
1.Applyathickbeadofmarine-gradesealantinthegapbetweenthe
transducerandnoseconeonthebottomandbothsides,asshownbelow.
2.Removeanyexcesssealantontheoutsideofthehullandtransducer,
ensuringasmoothtransitionbetweennoseconeandtransducer,and
transducerandhull.
3.Ensurethatthemarine-gradesealanthasfullycured
Refertothesealantmanufacturer’sinstructionsforcuringtimes.
4.Unlesslocalenvironmentalregulationsprohibit,applyawater-based
anti-foulingpainttothebottomfaceofthetransducer,ensuringallofthe
externallyexposedtransducersurfacesarecoatedandthepaintoverlaps
ontothehull.
5.Checkforleaksaroundthetransducerimmediatelyuponputtingthe
vesselbackinthewater.
Important:
DoNOTleaveyourvesselinthewateruncheckedafterinstallingyour
transducer.Verysmallleaksmaynotbeimmediatelyobvious,anda
considerablevolumeofbilgewatercouldaccumulateoverthecourseof
aday,orovernight.
6.Checkforleaksatregularintervalsafterinstallation,untilyouaresatisfied
thattherearenoleaks.
7.Addaregularcheckforleaksaroundthetransducertoyourroutine
vesselmaintenanceschedule.
30
 Loading...

