25
razberi™ Technologies
3.14.1.1 Editing Camera Information
To edit camera information:
1. Access the Administration window.
2. Select the Camera Management tab.
3. Right-click on a camera row in the
Camera List table.
4. Select Edit from the list of options.
The Edit Camera and Schedule dialog box
has three available tabs:
A. General Information
B. Recording Schedule
C. Camera Settings
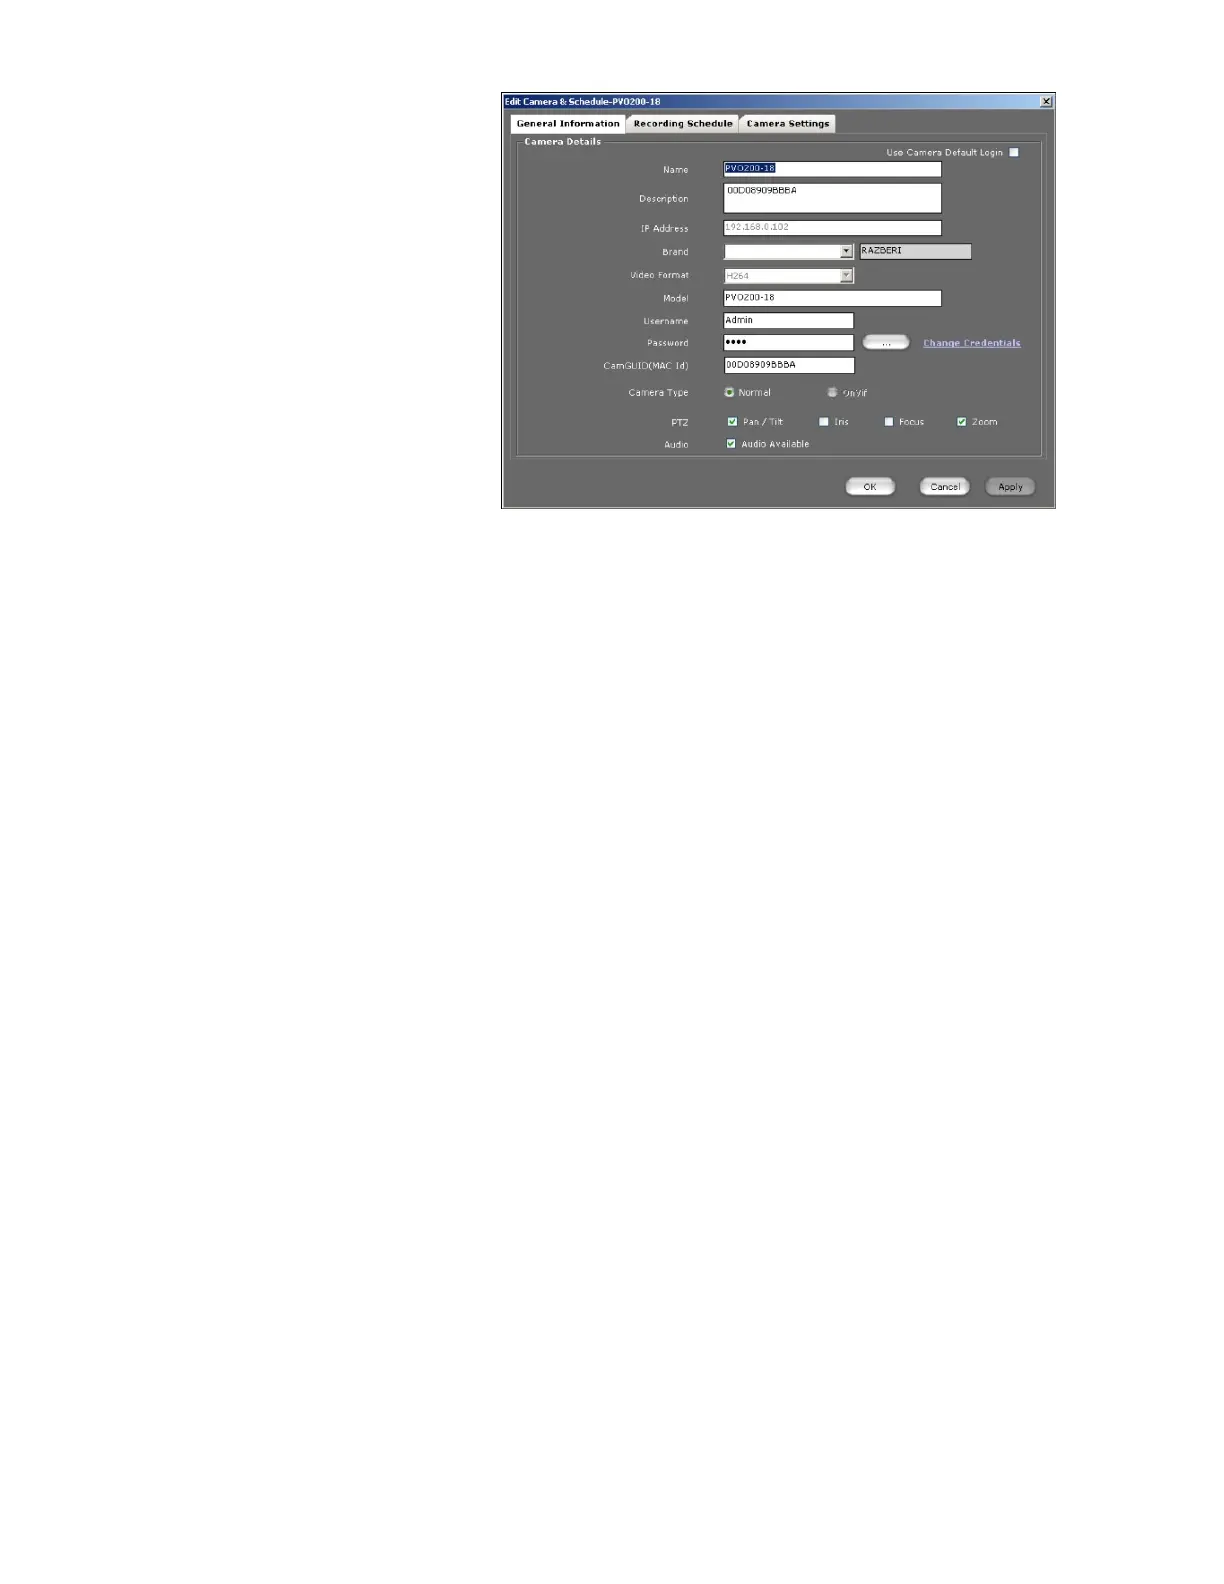
A. General Information tab (See figure 31)
This tab consists of a Camera Details section which contains the following options:
Name: This field is the name of the camera.
Description: The description of the camera is in this field.
IP Address: This field is for the IP address where the camera is configured.
Brand: This field is for the brand name of the camera.
Video Format: Select the video format from the dropdown.
Model: This field is for the camera model.
Username: Enter the user's name to view the camera's administration details.
Password: Enter the user's password. Only the administrator can reset the password.
*Change Credentials: Click this option to change password information.
CamGUID(mac ID): This field is for the unique camera ID.
PTZ: Select the controls for PTZ-enabled cameras only.
Audio: Select this option to enable audio.
Apply: Click this option to apply and save the changes.
Cancel: Click this option to disregard the changes and close the window.
Note: CamGUID (MAC Id) is mandatory when adding a camera.
B. Recording Schedule tab
Users can set the recording schedule of a camera two ways:
1. Event based: The recording starts when an event triggers. Select all three boxes for motion,
contact, and audio events to record.
2. Time Based: Users can set time-based recording two ways:
Always: Select this option for continuous recording.
Custom Schedule: Select this option to choose a custom schedule from the list or to
create a custom schedule. Click New to create a new schedule. For more information
on customizing a schedule, see the Custom Schedule topic.
Figure 31