31
razberi™ Technologies
3.14.4.3 Custom Scheduler
To access the tab, open the Administration window, select the System Preferences tab, and click the Custom Scheduler
tab. The features in this tab allow administrators to create customized recording schedules for each camera connected to
the application. If a custom schedule exists, administrators can apply that schedule to a specified camera using the
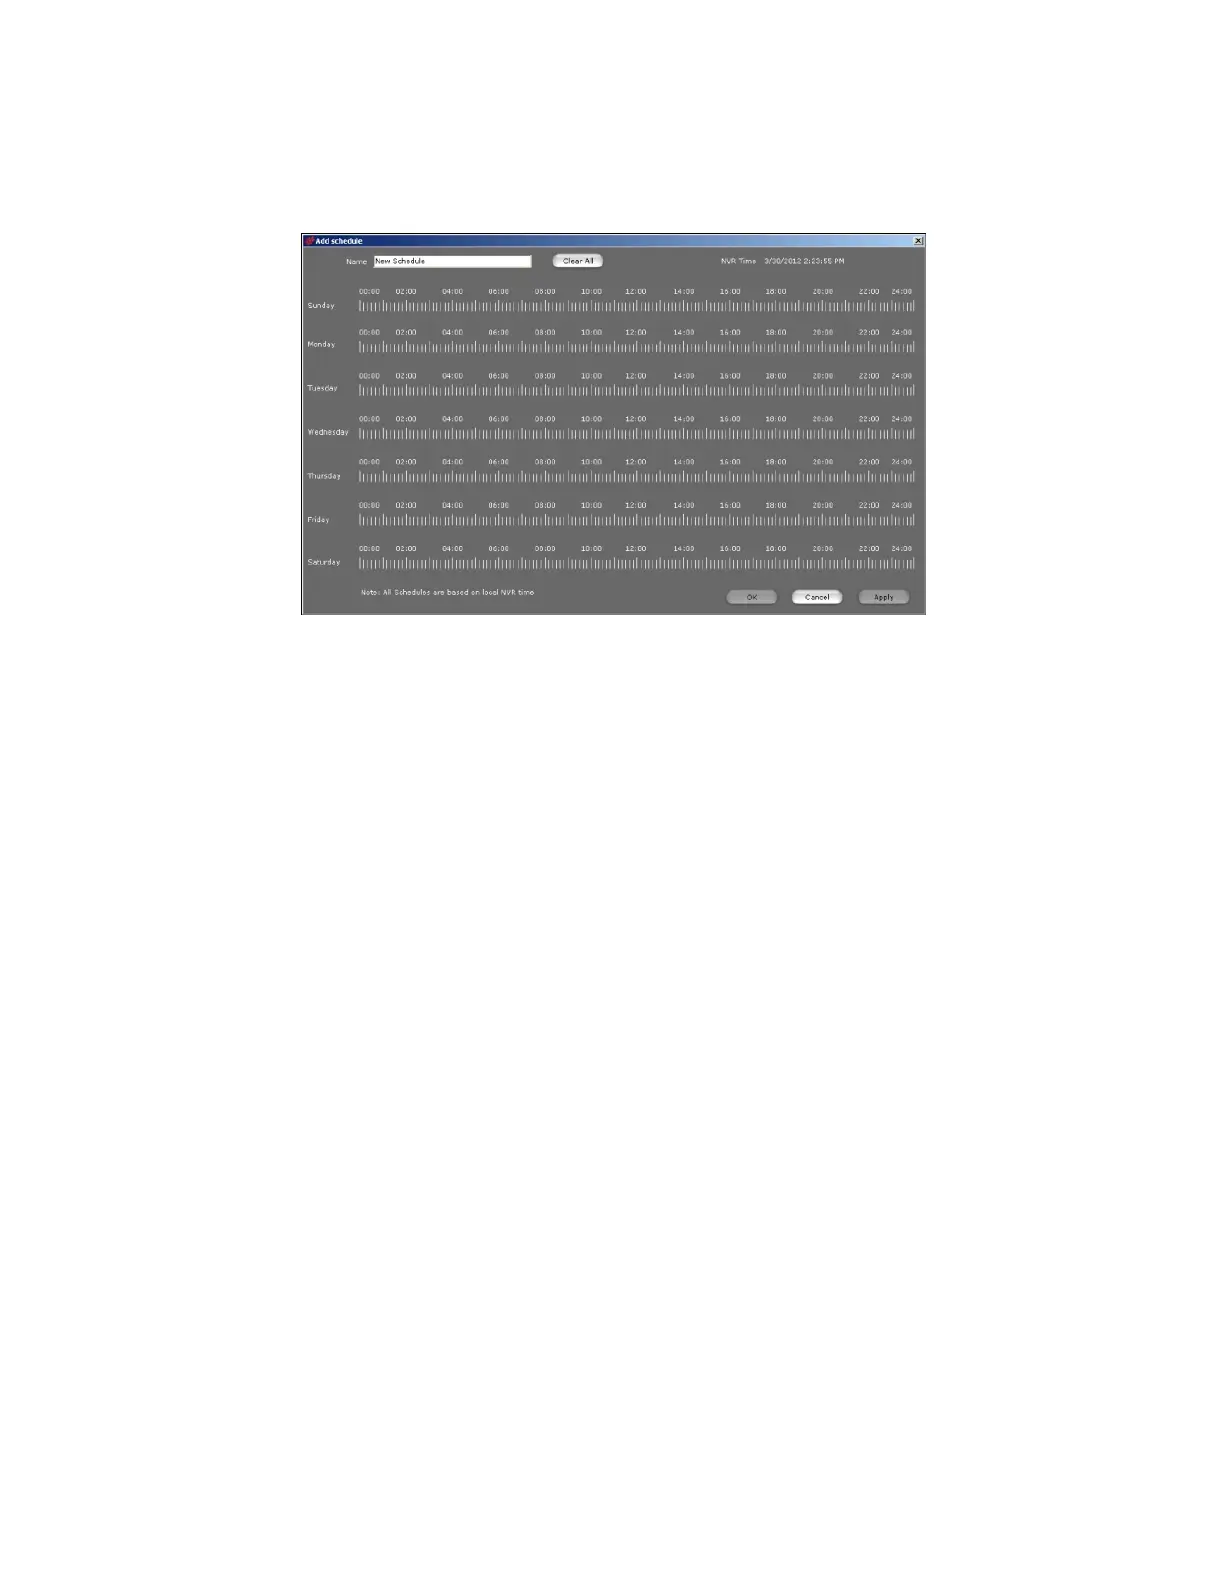
available dropdown. (See figure 36)
Figure 36
Creating New Schedules
1. To create a new schedule, click the New button on the Custom Scheduler tab.
The Add Schedule screen displays.
2. Provide a specific name for the schedule in the Name field (e.g., After Hours or Morning Shift).
3. Click and drag the appropriate date/time values to create a custom schedule.
4. Click Apply to apply the newly created schedule to a selected camera.
5. Click Ok to save the changes, apply them to the current camera, and close the window.
Note: In the Custom Scheduler tab, newly created schedules display an "X" next to the name signifying there
are no cameras currently using the schedule. The checkmark next to a custom schedule indicates the schedule
applies to a camera or cameras.
6. Click on the schedule name on the left column to see a list of cameras currently using the selected schedule in
the assigned cameras table.
7. Click Save Changes to NVR to save changes to this window.
Editing Schedules
Use this feature to edit recording times for existing schedules as well as assign cameras to custom schedules.
1. Select an existing schedule and click Edit to view and change recording times.
2. Make any necessary changes and click OK to view the camera list.
3. To assign the current custom schedule to a camera, click the box to the left of the camera or site.
Note: Cameras marked in blue are already assigned to another schedule. Select a camera marked in blue to
change it to the currently selected schedule.
4. Click Apply to make the changes.
5. Click Save Changes to NVR before exiting the Administration window.
Removing Schedules
1. To remove a customized schedule, select the specified schedule and click Remove on the Custom Scheduler
tab.
2. Click Yes in the prompt to confirm the schedule removal.
3. Click Save Changes to NVR before exiting the Administration window.
Note: Deleting a custom schedule also deletes the schedule from all associated cameras.
 Loading...