11
razberi™ Technologies
3. razberi™ Software Introduction
Welcome to razberi™. The topics within this guide provide basic information and instruction on razberi™ software. The
razberi™ application offers digital zoom, camera tours, PTZ control, and intelligent video searches to retrieve recorded
events through event searches. Automatic software updates offer new software features over the web.
razberi™ Technologies
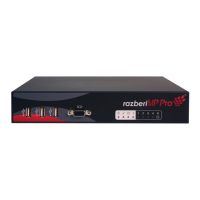
razberi™ Technologies provides network video solutions for professional video surveillance and security applications. The
company offers products designed for simplicity and ease-of-use such as the razberi™ MP Series. The razberi™ is an
integrated network video recorder combined with a high-powered Ethernets witch and video management software with
"auto setup" features. The razberi™ automatically provides power (high PoE), IP addresses, and configures cameras for
motion detection to begin recording. Installers can use multiple razberi™ units within a network to build large systems over
long distances with fiber optics using the built-in SFP Combo Uplink ports. For more information on the razberi™ MP
Series, access the razberi™ Technologies website at www.razberi.net
.
Client System Requirements
Operating System:
Windows 7 (32 bitand64 bit)
Minimum Hardware Required:
3.x GHz Intel® i3 Processor (Intel® i5/i7 preferred for multiple MP camera displays)
Memory:4GB RAM
Graphics card with full DirectX9.0c hardware acceleration
o 1 GB Internal Onboard Memory (minimum recommended)
100 MB Disk Space for Software Installation
Minimum Monitor Resolution: 1280 x 1024
CD/DVD drive required for installation
Ethernet 10/100/1000 NIC
3.1 Client Login
1. Connect the cameras to the LAN ports on the razberi™ (see section 2.2 for information on connecting a PC and
cameras to the razberi™). NOTE: Provide the razberi™ 3-5 minutes of start-up time prior to connecting a PC or
cameras.
2. Login by selecting Profile or Discover Server. Select the connection as either LAN or Remote. If the
razberi™ server resides on a local area network, then login with the LAN connection option selected. If the
server is outside the local area network, then login with the Remote option selected.
3. Use the Discover Server option, to auto discover the server. Use the drop down in the Select Server field to
see a list of available servers with the corresponding IP address. NOTE: The list displays servers discovered
within a LAN
4. The default user name and password are admin/admin
Figure 7