4-2
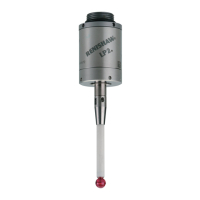
LP2 probe system: Maintenance
Cleaning the probe front seal
LP2 – LP2H
Dirt may accumulate in the cavity underneath the metal eyelid seal.
LP2DD – LP2HDD
Dirt may accumulate in the cavity underneath the outer diaphragm. (Outer diaphragm replacement kits are
available.)
LP2 – LP2H – LP2DD – LP2HDD
Once a month, remove the stylus front cap (the C spanner is provided for easy cap removal) then remove
all the residue with a low-pressure jet of coolant. Do not use a sharp tool or a degreasing agent. The
cleaning interval may be extended or reduced, depending on the rate at which dirt accumulates. If the
inner diaphragm is damaged, return the probe to your supplier for repair.
CAUTION: Do not use the probe with the cap removed. Check that the probe is rmly secured in its
mounting.
Stylus
Swarf deector
Cap (nger tight)
Outer diaphragm
Wash clean
Stylus
Weak link
screw
C spanner
Cap 4 Nm
(3.0 lbf.ft)
approximately
Metal eyelid
Spring
Front O-ring
Inner diaphragm
 Loading...